Search The Knowledge Base
Queries in Mentor EDC – Reviewer Initiated, Custom, and Data Management Queries
- Monitors and Data Managers issue Reviewer Initiated, Custom, and Data Management queries.
- Review Query Handling in Mentor EDC AND Query Listings in Mentor EDC videos for additional information.
- Refer to Query Listings in EDC for additional information.
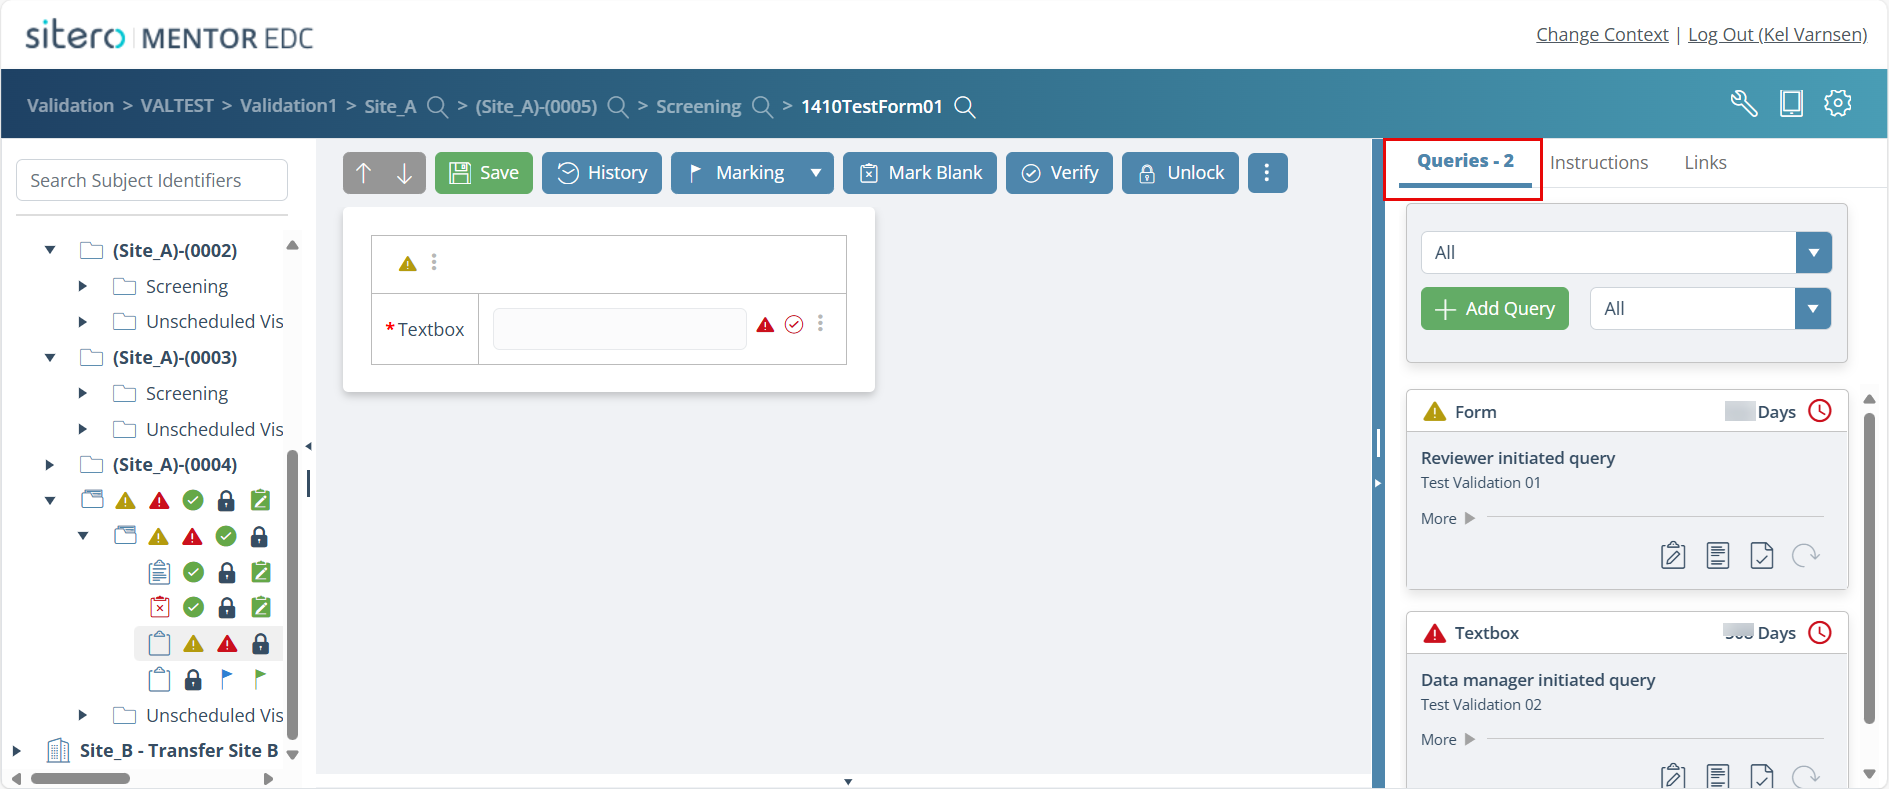
- Use the Switch Layout option to change the display for the Details from Vertical to Horizontal.
- Custom Queries may be configured in your environment and are permissioned separately but function the same as Reviewer Initiated and Data Management Queries with one exception.
- When this setting is “On,” AND the field data changes, the query is automatically updated to “answered” and the reason is set to “data changed.”
- When this setting is “Off,” then field data changes DO NOT affect the query.


Query Status Management
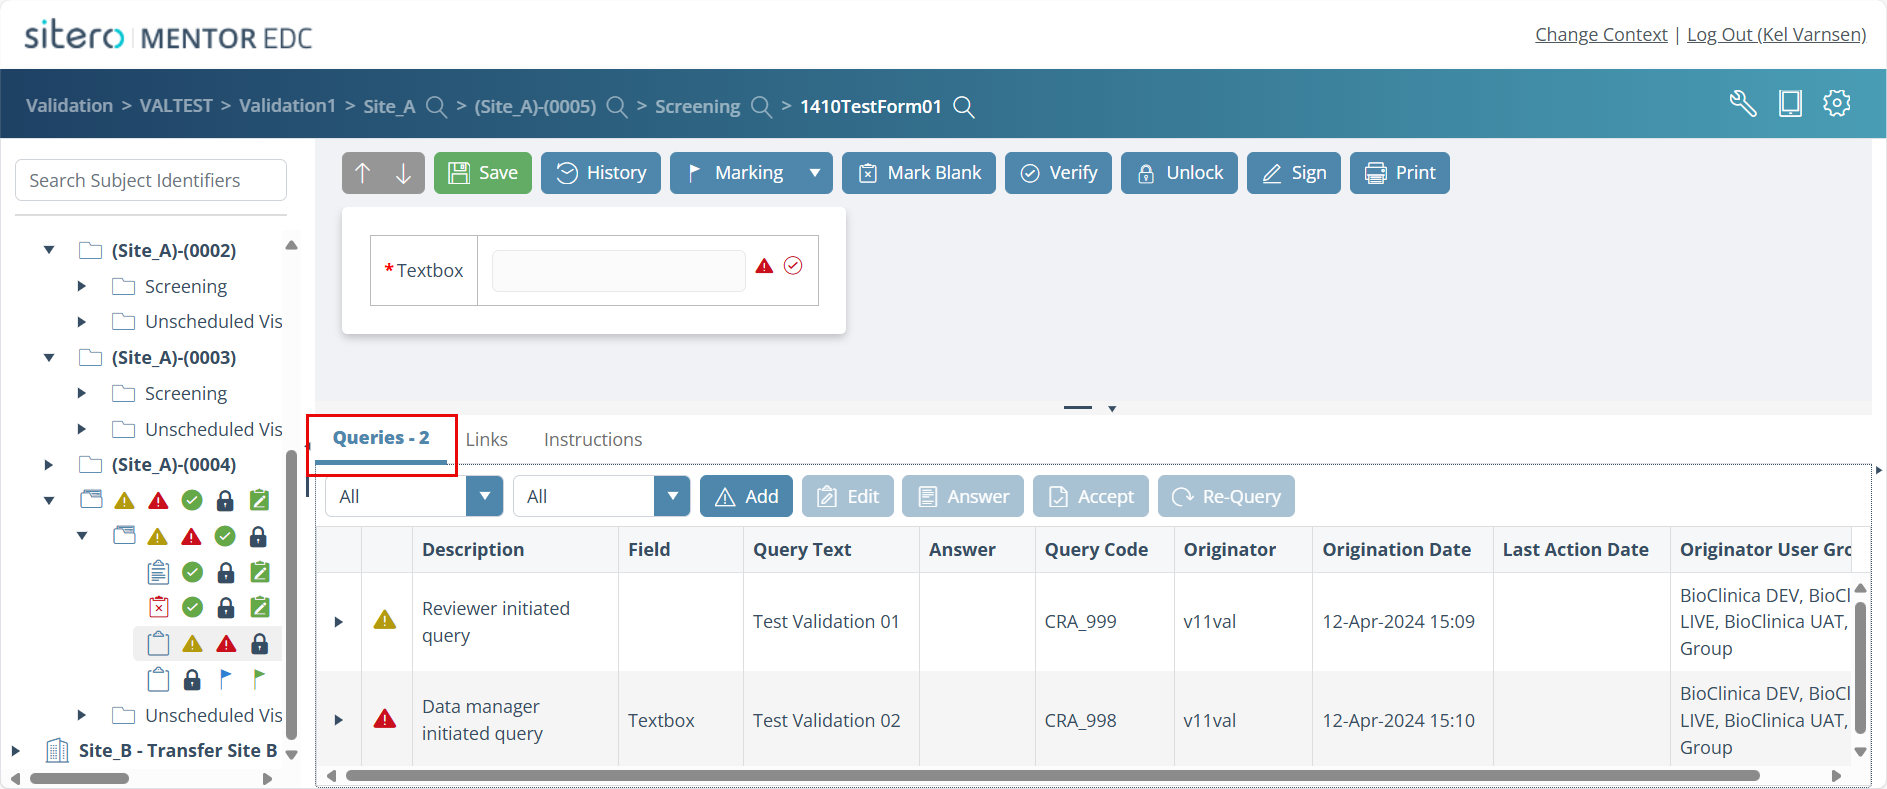
- Use the menus and buttons to make selections and to Add, Edit, Answer, Accept, and Re-Query records.
- The Queries tab contains two (2) drop-down menus for filtering and five (5) buttons for selecting status states for a query.
- Refer to the table below for a description of the drop-down menus and “Status/State” buttons.
| Button | Description |
 |
Use this drop-down menu to select a specific field on the selected form; leave at the default selection [Form] to add/change status for entire form.
This drop-down menu populates selections based on the form selected. |
 |
Use this drop-down menu to select a Status/State to filter on. |
 |
Use this button to initiate a query.
A symbol may display in the form field and the queries grid, to indicate the type of query. |
 |
Use this button to update a query. |
 |
The Monitor/Data Manager may use this button to answer a query. |
 |
The Monitor/Data Manager may use this button to accept the answer to a query. |
 |
The Monitor/Data Manager may use this button to indicate they have not accepted the response to the Query and have issued another query. |
Inline Query Management
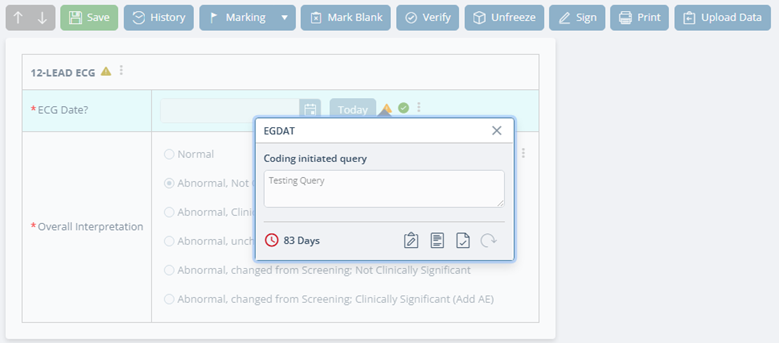
- To manage a query directly on the form, click the query icon to open a pop-up.
- Populate information and click the applicable button (if needed) to save the update.
- When you click Accept, no save action is required.