Data Listings in Mentor EDC
- Data Listings allow you to view all of the data entered on a specific form or all forms across subjects within a grid/table.
- A warning message displays when updating the Status setting at the Data Listing level, allowing you to review and confirm the changes being made in order to prevent making unintended changes.
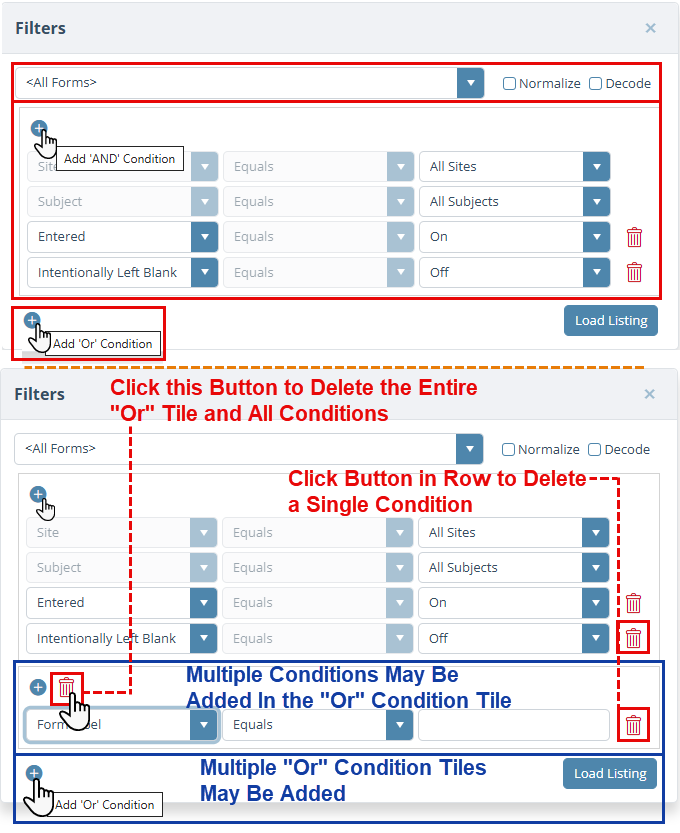
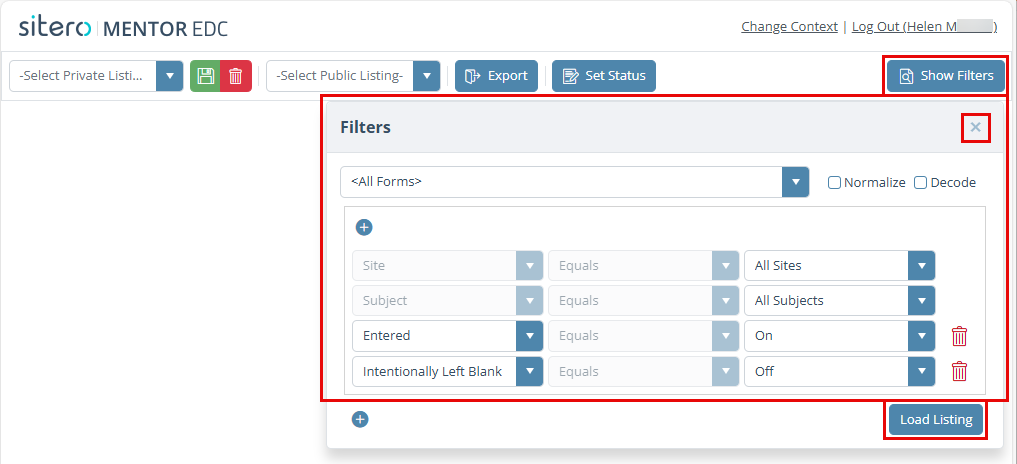
- Use the buttons, menus, check boxes, and filters to display some or all records and customize criteria selections.
- To review a video that shows this feature, click this link Data Listings in Mentor EDC.
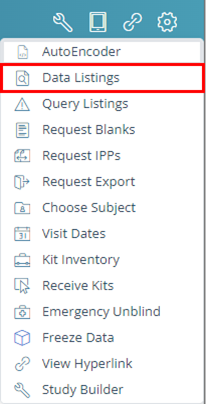
Click the Tools button to display the menu and click Data Listings to open a new browser window.
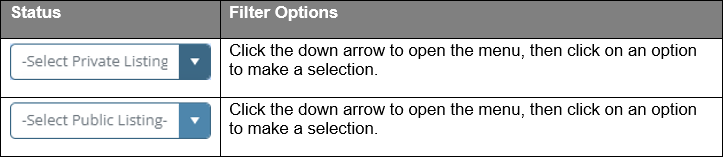
Drop-down Menus for Data Listings
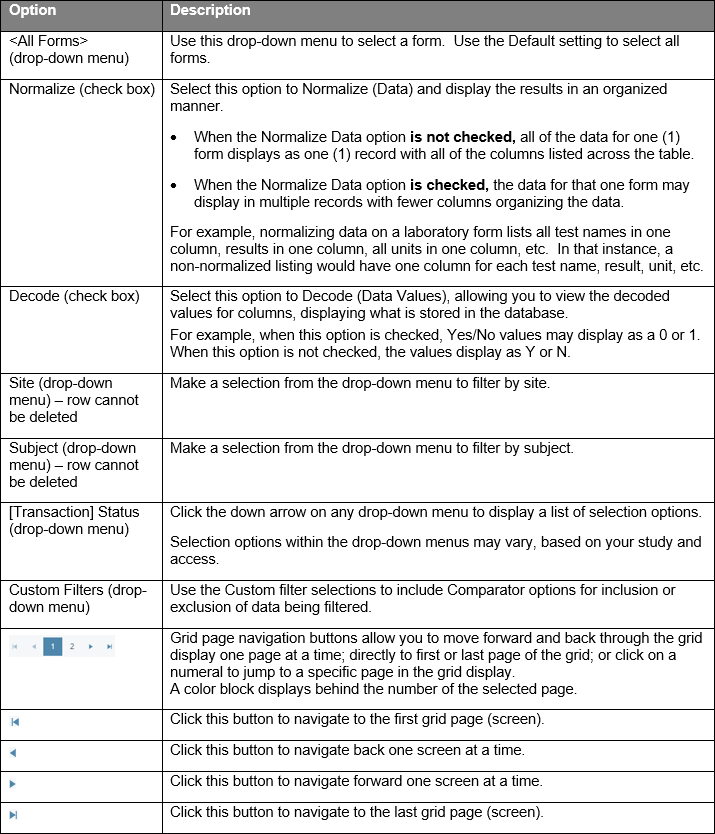
The table below lists the drop-down menus available on the Data Listings main screen.
Buttons for Data Listings
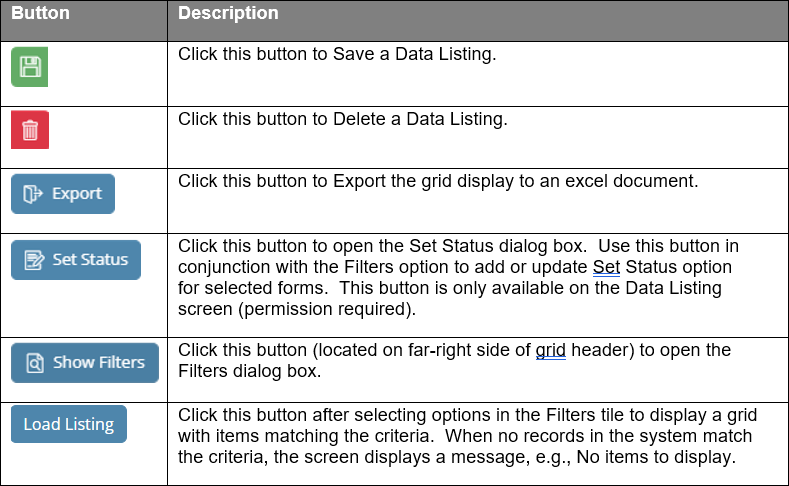
The table below lists the buttons available on the Data and Query Listings main screen.
Remember: The Save and Delete Buttons for Public Listing only display for a permissioned user.
Export Data Listings
Use the Export button to export your Data Listings to an Excel (*.xlsx) file. Export Filename contains date and time detail to make it unique allowing you tell the difference between exported files (Data Listings and Query Listings).
- Click on the Export button above the grid.
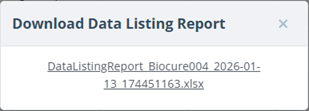
- A dialog box displays a link.
- Click the link to initiate the document download process.
- The file is in the location where your browser stores downloads.
- Open the file using Microsoft Excel.
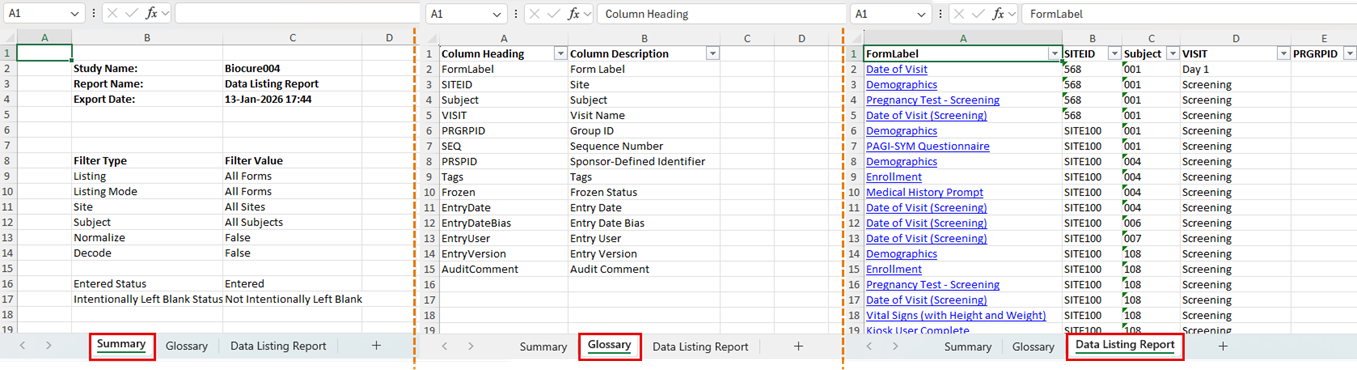
- The Summary tab in the report file lists the Study Name, Report Name, Export Date/Time, and all the criteria used to generate the report.
- The Glossary tab contains 2 columns that show the Column Heading ID that displays in the system (short name/abbreviation) and a Column Description that clarifies the context of the data points.
- The Data Listing Report tab in the report file contains all the information that displays in the on-screen grid.
- Remember: The Attachment column of the exported file displays the File Name when a file has been added for the record. The column is blank when no file is uploaded for the record.

View Attachment Record in Data Listings Grid
When an Attachment has been added to a form, the file name displays in the ATTACHMENT column of the grid. When no file name is present, no file has been added to the form.

Transaction Status Options for Data Listings
The table below provides information about the transaction status options.
Remember: Marking label names may be customized in the environment.
| Status Selection Option | Results Using the Filter (On/Off) |
| Entered | – Entered – Not Entered |
| Verified | – Verified – Not Verified |
| Queried | – Queried – Not Queried |
| Data Manager Queried | – Queried – Not Queried |
| Signed | – Signed – Not Signed |
| Locked | – Locked – Not Locked |
| Marked Blue (or custom name) | – Marked Blue – Not Marked Blue |
| Marked Green (or custom name) | – Marked Green – Not Marked Green |
| Marked Red (or custom name) | – Marked Red – Not Marked Red |
| Marked Yellow (or custom name) | – Marked Yellow – Not Marked Yellow |
| Intentionally Left Blank | – Intentionally Left Blank – Not Intentionally Left Blank |
| Must Verify | – Must Verify – Not Marked Must Verify |
| Expected | – Expected – Not Expected |
| Answered Query | – Answered Query (yes) – Answered Query (no) |
| Data Manager Answered Query | – Answered Query (yes) – Answered Query (no) |
| [Custom] Queried | – [Custom] Queried – Not [Custom] Queried |
| [Custom] Answered Query | – [Custom] Answered Query – Not [Custom] Answered Query |
| Frozen | – Frozen – Not Frozen |
Data Listings Filters