

Search The Knowledge Base
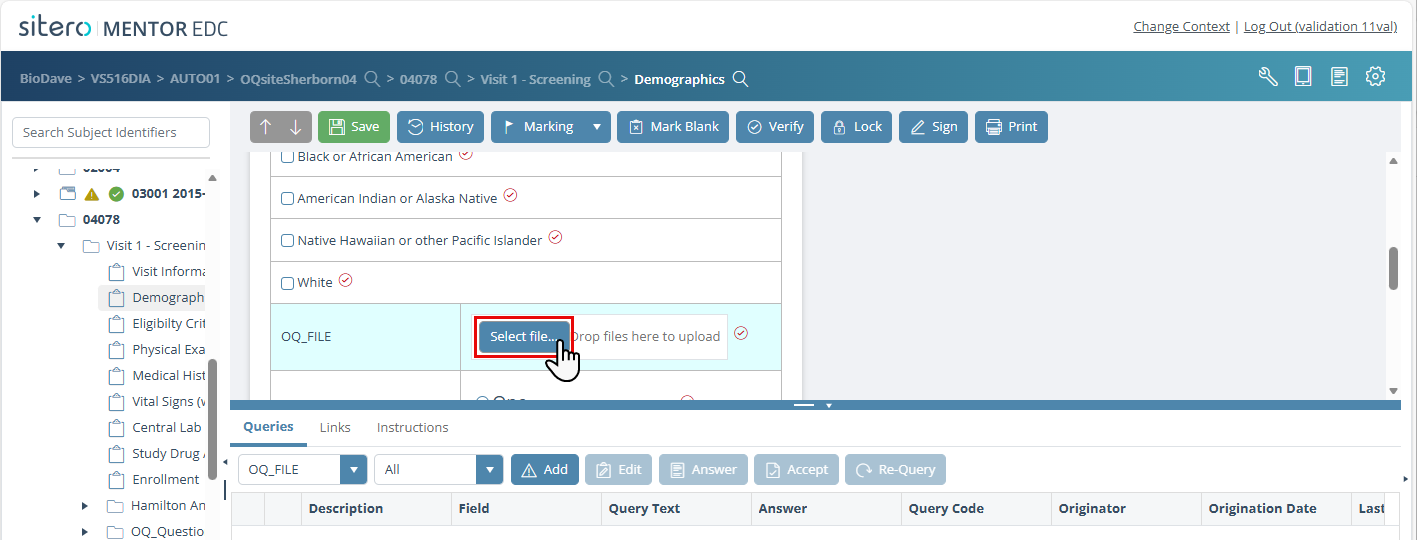
Attach and Manage a File in Mentor EDC
- The Upload (attach/add a file) and Download a file feature in this system is permission based.
- When your permissions include Edit Data, you may upload a file.
- When your permissions include Read Data, you may download a file.
- Based on your study configuration, the File Attachment Control may be included on one (1) or multiple forms or may be a separate option (e.g., a Form that is set up specifically for attachments) in your study tree.
- You may add only one (1) file per Attachment Control.
- To add multiple Attachments, your system may be configured with multiple File Attachment Controls.
- After you attach a file, the Select file… button is replaced with the File Name for the Attachment.
- The system options for Viewing, Deleting, and Verifying the file display to the right of the file name; permission is required for these features.
- Each file Attached is assigned a unique name for the export, allowing you to associate a file with a Site, Subject Visit Form, Form Iteration, and File Name.
- The file name for each uploaded file is uniquely identified by the Form’s Keylabels and Filename.
- File size is limited to 100 MB.
- Supported file types include: CSV, Excel Document, GIF, JPEG, JPG, PDF, PNG, Word Document.
- Use the permission-based EDC options to Add, View, Open, and Delete an Attachment.

Add an Attachment
Follow the steps below to Add an Attachment.
- Drag and drop file OR click the Select file… button in the Attachment control.
- Navigate to the location of the file and click to select it.
- Follow the on-screen prompts to complete the process.
- When uploaded, the file name displays and the Select file… button is removed.
- You may only add one (1) file per Attachment control. To include multiple files, your system must be configured (in Study Builder) to include multiple Attachment controls.
- When multiple Attachment controls are available, repeat steps 1-3 as required.
- The screen may display buttons to view, delete, or verify file options, based on your assigned permissions and other configuration settings for the environment.
- Click the Save button to complete the process.
- Click the History button and the History dialog box displays; the History tab may be selected by default and displays details about the actions performed including the name of the attachment.

Open an Attachment
- Click the View button (magnifying glass) to open and view the Attachment.
- The browser in use determines the options (e.g., file download is initiated, file opens on screen) that are presented or actions that occur. Remember: To open a file, you must have a program installed that supports opening the file type. E.g., Acrobat must be installed to open a PDF.
- Use this option to review Form data and Attachment details side by side, if desired.
View an Attachment from the Control or In the History Tab
- Click the View button (magnifying glass) to view the Attachment – OR – click the View button (magnifying glass) in the History grid. The Attachment files remain in the same format that was uploaded.
- The browser in use determines the options (e.g., file download is initiated, file opens on screen) that are presented or actions that occur. To open a file, you must have a program installed that supports opening the file type. E.g., Acrobat must be installed to open a PDF.
- Use this option to review Form data and Attachment details side by side, if desired.
Delete an Attachment
- To delete an attachment, click the delete button (trashcan), located to the right of the file name.
- The Reasons for change dialog box displays.
- Select a reason from the drop-down menu. The text of that selection displays in the field located below the menu.
- Optionally, update or include additional details in the field.
- The information you enter becomes part of the history for the record and may be viewed by clicking the View Reasons link in the Reasons for change column of the History grid for the record.
- After you remove a file, the Select file… button is available in the Attachment Control.
