Search The Knowledge Base
How to Upload Data in Mentor EDC
Upload Data Details
- The Upload Data button displays (form permission-based) when configured for a User Group in the Study.
- This feature allows a permissioned user to Upload Form Data from a CSV file.
- In Study Builder, this permission is added (by an Administrator) to the Forms where the permission is applicable. Additionally, this permission MUST BE ASSIGNED to the applicable User Groups who will perform this action.
- Since this feature is permission based at the Form level, this process can be isolated to a single form, a set of forms, or the entire tree.
- Remember: You may use this option in conjunction with the download (sample file) option to perform testing (e.g., confirm output in UAT environment, etc.).
- Uploaded data is saved ONLY to the corresponding fields on the selected form.
- When a file is uploaded, fields with existing data are overwritten with data from the file.
- When data exists on a form and the file contains an empty field, the data is deleted from the form.
Follow the steps below to Upload Data in Sitero Mentor EDC
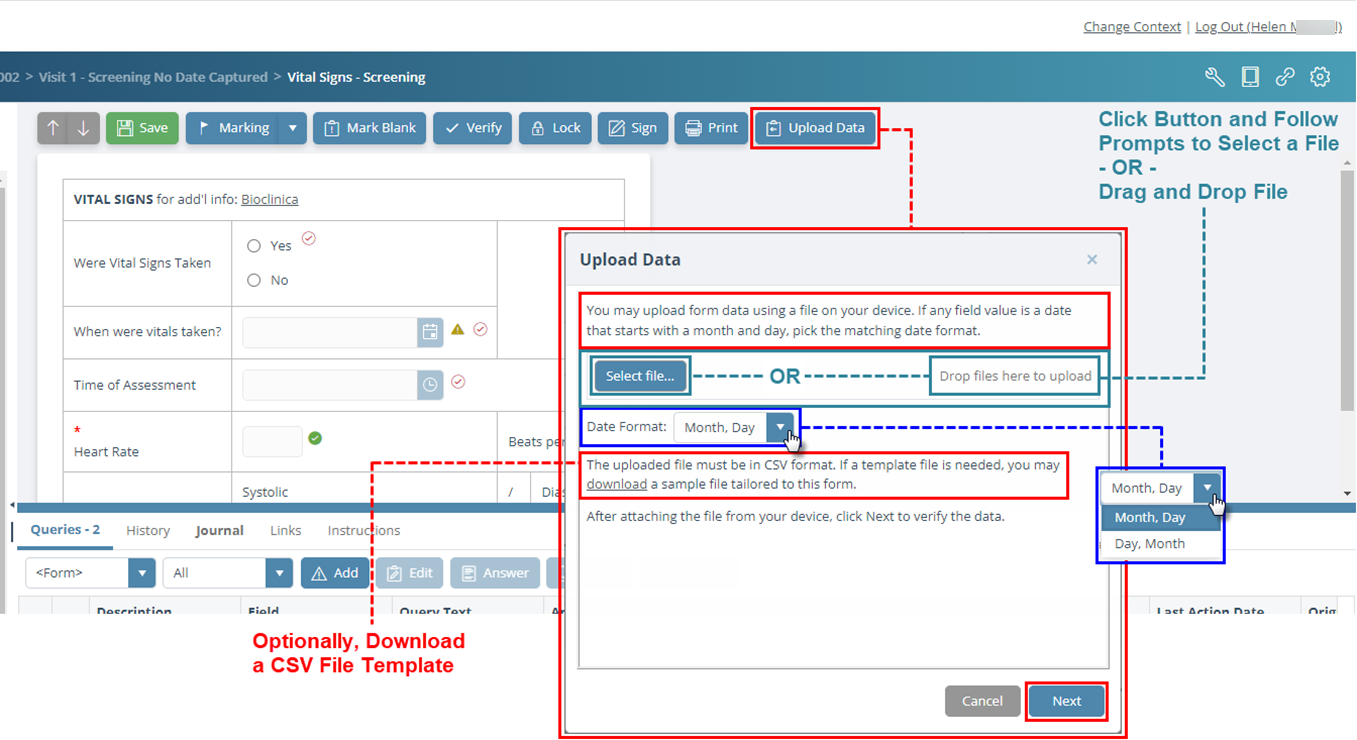
- Select (click on) a form then click the Upload Data button. The Upload Data dialog box displays.
- Click the Select file… button and follow the prompts to locate and select a file. Optionally, drag and drop the file into the tile.
- As needed, click the “download” link (tile below Date Format) to access a formatted sample file.
- As needed, use the menu to change the Date Format.
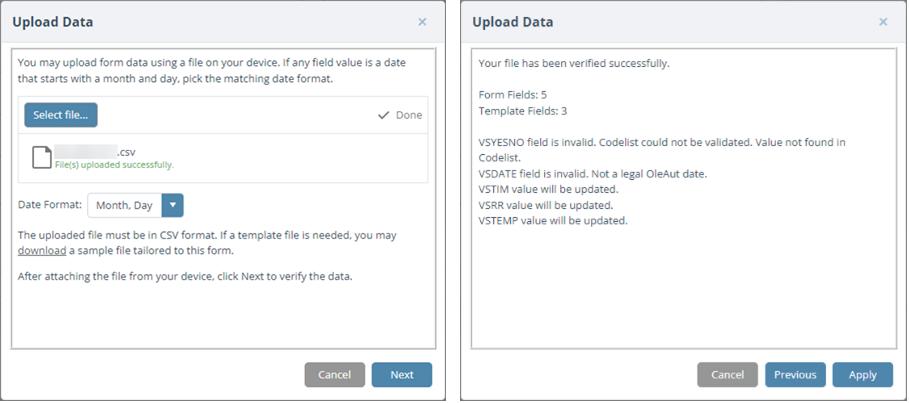
- Click the Next button to continue.
- Review the verification information in the Upload Data dialog box.
- Click the Apply button to complete the process.
- Click the Previous button to return to the original screen and add a new file.
- Click the Cancel button to abort this action without saving changes.