

Request IPPs (Individual Patient Profiles) in Mentor EDC
The Request IPPs utility allows a permissioned EDC user to generate an Individual Patient Profile (IPP) for one or many subject(s). Remember: buttons that display on the IPP screen are based on your permissions in this system.
- Click the link below to review a video with details about this feature.
Request IPPs Overview
- Click the link below to access the IPP Setup Reference Guide. The file may open in a new browser window. You may use the options presented to Save or Print the file.
Reference Guide For IPPs
Scroll down for additional information or contact your project manager for details.
The Request IPP wizard allows selection of options to be included in each IPP plus selection of all sites (default), single site, or multiple sites.
- An IPP is a PDF rendered version of the entire study design that includes data entered in the EDC system.
- The system stores IPPs for 90 days.
- The system calculates the Expiration date that displays in the Request IPP grid.
- Dialog box options allow you to select the details to include in each generated IPP.
- Some options may be selected by default (check mark in the check box).
- Click in a check box to select an option (check mark now shows in check box).
- Click on a check mark to remove an option.
- Click the Next button to proceed. Use the Back button to return to previous screen and the Cancel button to abort the process.
- Select one, many, or All Sites.
- Open the Select Site menu and click to select a Site. A list of Subjects displays.
- Click to select check boxes for one or more subject records OR click the Check All check box to select all subject records (click on check marks to deselect individual Subjects).
- Click the Next button to proceed to Form and Folder selection.
- By default, Select All (forms and folders) is active.
- Retain this option to generate IPPs for All Forms in All folders for the selected Site(s).
- To limit the scope of the request, click on the Select All check mark and a list of folders and forms displays.
- Open a folder to select forms individually or click the check box to select all forms in the folder.
- Continue to add check mark for all forms and folder to be included.
- Click the OK button to proceed and create IPPs.
Remember: It can take some time for all IPPs to be generated, especially when the request includes many subject records and multiple Sites.
The table below provides descriptions for the EDC Individual Patient Profiles (IPP) options.
| Option | Description |
| Include Audit Trail Pages | This option includes the history for each form within the IPP. Details include data entered in each version of the form, who entered the information, and date of information entry. |
| Include Query Pages | This option includes all queries associated with each form selected and included in the IPP. |
| Include Auto-Closed Queries | Select this option to include Auto-Closed Query pages. |
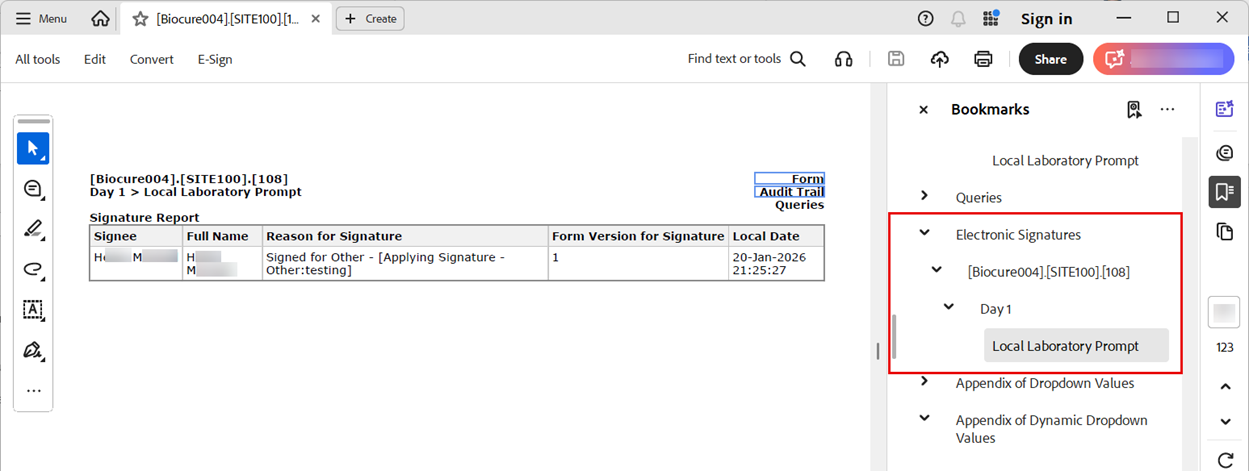
| Include Signature Pages | This option includes electronic signature information for each form. |
| Include Site Level Data | This option includes Site level data that can be viewed in the printed copies of the IPPs. |
| Include File Attachments | This option includes file attachments for each form. |
| Generate Locked IPPs | Click in the check box to select this option and generate a read-only version of the IPP. **If this option is not checked, the system-generated PDF file is available for manipulation (information may be changed) by an outside program. |
| Generate Shared IPPs | Select this option to generate IPPs that will be shared with users that have access to the selected Sites. Remember: When Generate Shared IPPs (IPP Options) is not checked, a single file is generated and includes IPPs for all subjects in all Sites selected. When Generate Shared IPPs is checked, a file is generated for each selected site and includes IPPs for all subjects in that Site. |
Request IPPs
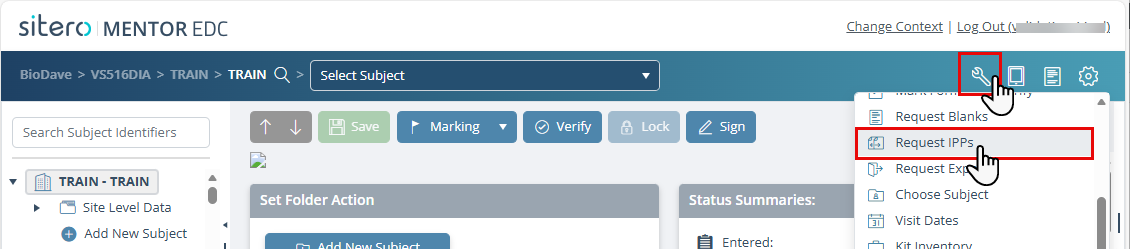
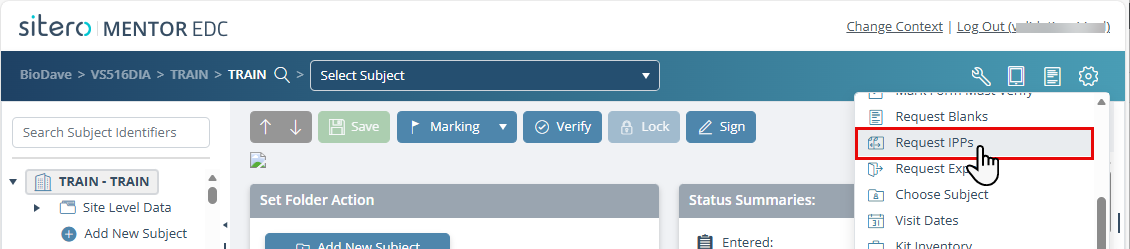
- Click the tools button (wrench icon) to open the menu then click the Request IPPs menu option.
- The Request IPP screen displays in a new browser tab and allows you to select and set specific options to be used to generate IPPs
- Click the Request IPP button (above the grid, left side).
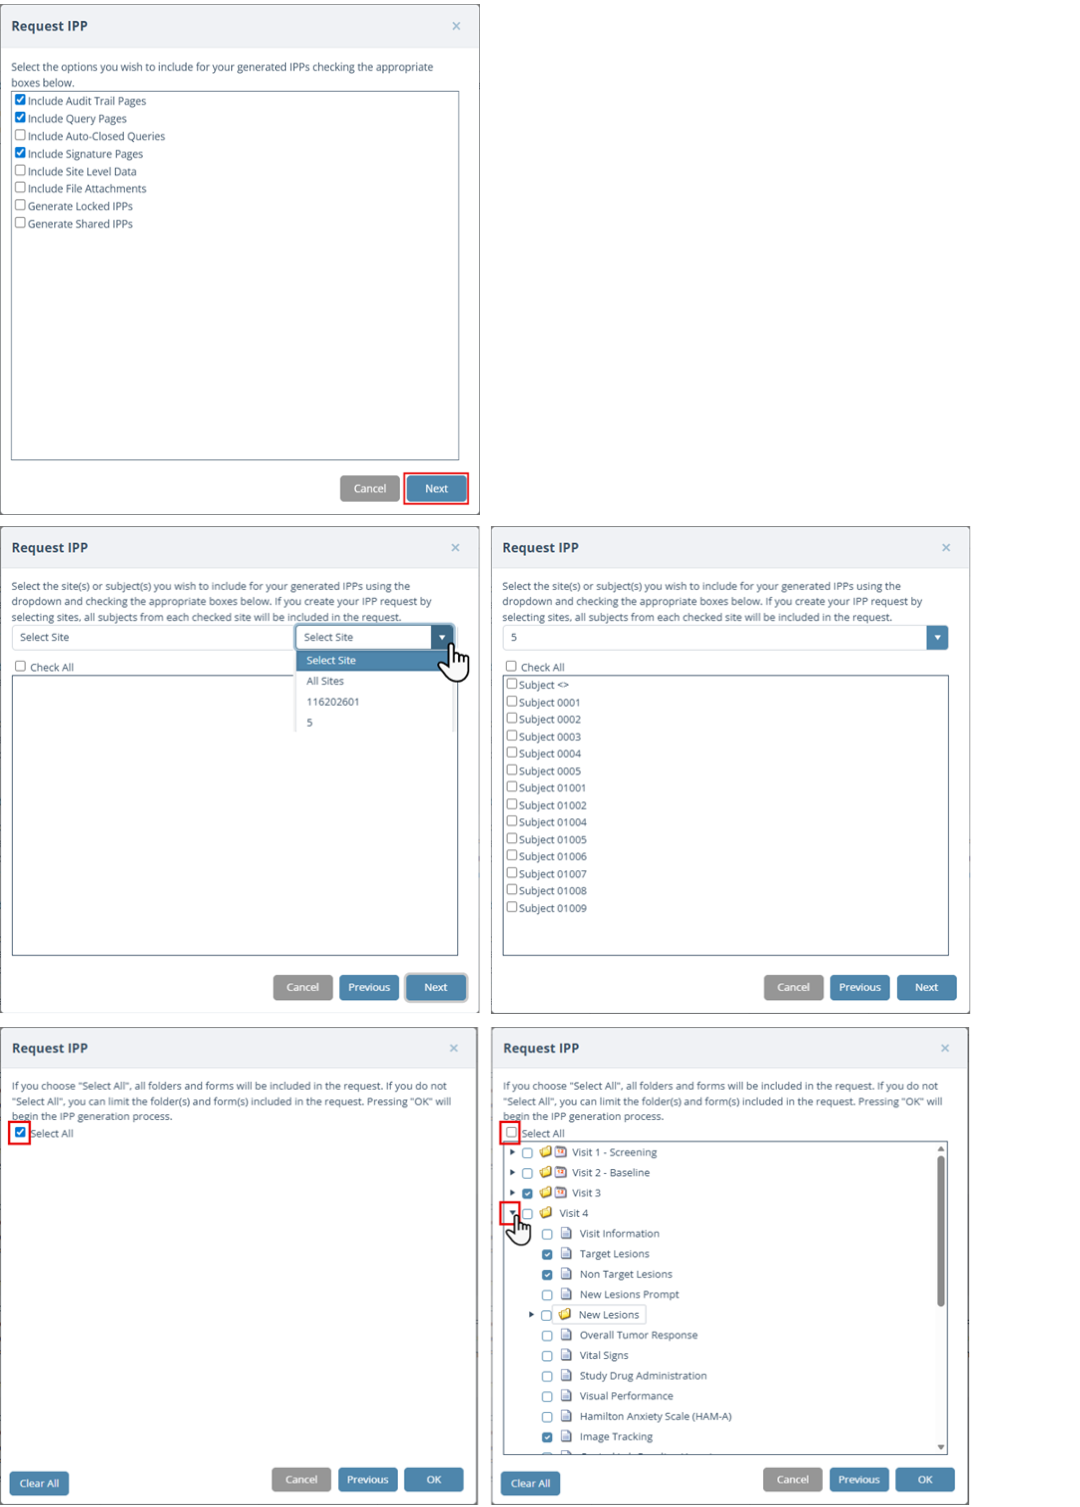
- The request IPP dialog box displays, some options may be selected by default.
- Click in one or more check boxes to select the options to be included in the generated IPPs. Click on a check mark to deselect an option.
- Click the Next button to continue to Site selection.
- Use the Select Site drop-down menu to select All Sites OR a single site.
- After selecting a single site, a list of Subject records displays.
- Click in check boxes to select Subject records OR click in the Check All box. Optionally, click on a check mark to deselect subject records.
- After selecting All Sites, a list of Site records displays.
- Click in one or more check boxes to select Site records OR click in the Check All box.
- Optionally, click on a check mark to deselect records.
- Click the Next button to proceed.
- Select forms and folders. By default, Select All is active.
- Click on the Select All check mark to remove the check mark and display a list of folders and forms.
- Click the arrow (far left) to open a folder and display the contents for selection.
- Click in check boxes to select options; click on check marks to deselect.
- Click the OK button to initiate the generate IPP action.


Access the IPP Files
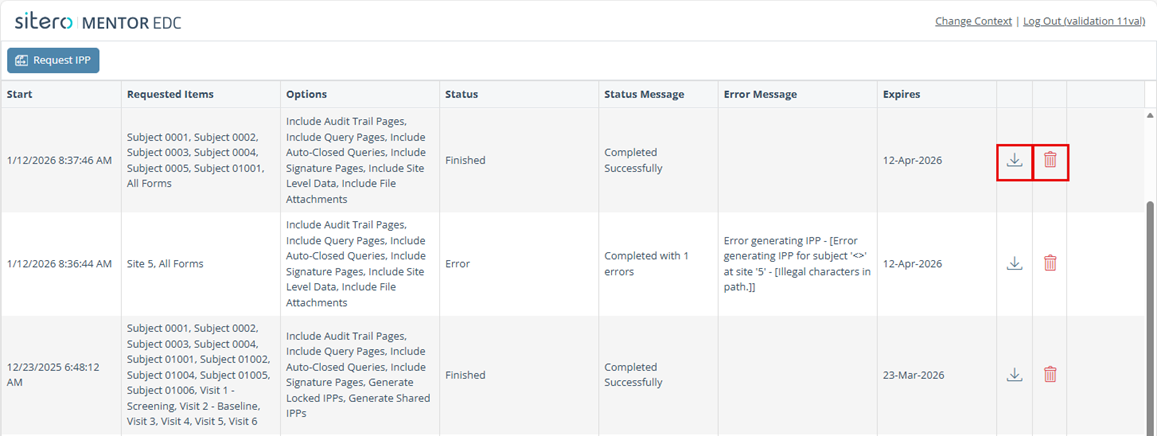
The Request IPP main screen displays a list of your IPP requests.
Remember: Access to the features on this screen are based on your Permissions assigned in this system. The figures shown below display the view of a user with both Request IPP and Request IPP (Download) permission assigned.
Buttons in the far-right columns allow you to Download Files and Delete the record (buttons display based on your permissions in this system).
Remember to Download your file before using the Delete option.
IPP File Content
The IPP file displays the IPPs on applicable Forms and includes the attachments in a folder (for each applicable subject).
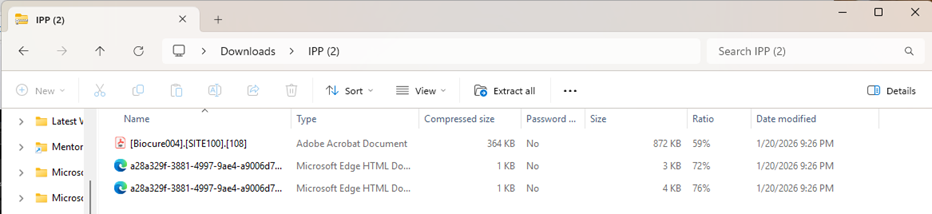
Signature in IPP File
When IPP’s are generated, click to open a file to view the signature report.
When the latest version is not signed, a message displays to indicate the Version of the Form that is not signed.
Return to the EDC Screen
Close the Request IPP tab when you have completed this process to return to the EDC system main screen.
