Kiosk – Participant – Create and Access Your Mentor EDC Kiosk Account
During the course of your participation in a Study, you may receive questionnaires that are accessed online in Sitero Mentor Kiosk.
A link to Kiosk is sent to the email address that you provide.
The first time you log in to Kiosk use the password that is sent to you, then you must create a Password that will be used with your email address to access your questionnaires and a Password Reset Question that is used if you forget your password.
After you register your Sitero Kiosk account, use the email address and password to log in to the system, access the questionnaires assigned, and to complete the process (save answers, acknowledge you reviewed the information).
Scroll down to access details for:
- Logging in to Sitero Kiosk
- Create Password and Reset Forgotten Password
- Access and Manage your Account, including:
- Changing your email address in this system
- Change or reset your password
- Set and update your “password challenge” question and answer
- Return to the questionnaires screen
- Access and populate your questionnaires
- Confirm choice to leave a response blank
- Add a file
- Return to a questionnaire
Log In to Sitero Kiosk
→ Follow Steps 1-3 below to log in to the Kiosk and access your questionnaires.
After you’ve logged in, refer to the “Access and Populate Your Questionnaires in Kiosk” section below for additional information.
→ Follow Steps 4 and 5 the first time you access Kiosk to Create Your Password and Password Challenge Question and Answer.
After completing these Initial User Setup steps, you are registered in this system and use the password you created with your email address to access Kiosk questionnaires. Refer to the “Access Your Questionnaires in Kiosk” section below for additional information.
→ Follow Step 6 then refer to the “Change Your Password” details below if you forgot your Password.
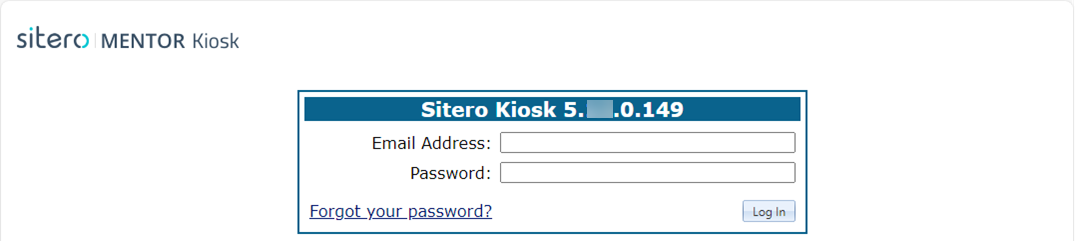
- Click the link that was sent to you or open an internet browser and type in the Kiosk Internet address provided by the Site.
- Enter your Email address and your Password in the applicable fields, and then click the Log In button.
- First time logging in to this system? Proceed to Steps 4 and 5 to create your password and challenge question and answer.
- A list of your questionnaires displays onscreen.
- Follow the steps below the first time you access this system.
- The first time you access Sitero Kiosk, enter your email address (matches the address on the email you received with the Kiosk link) AND enter the temporary password that was sent in that email.
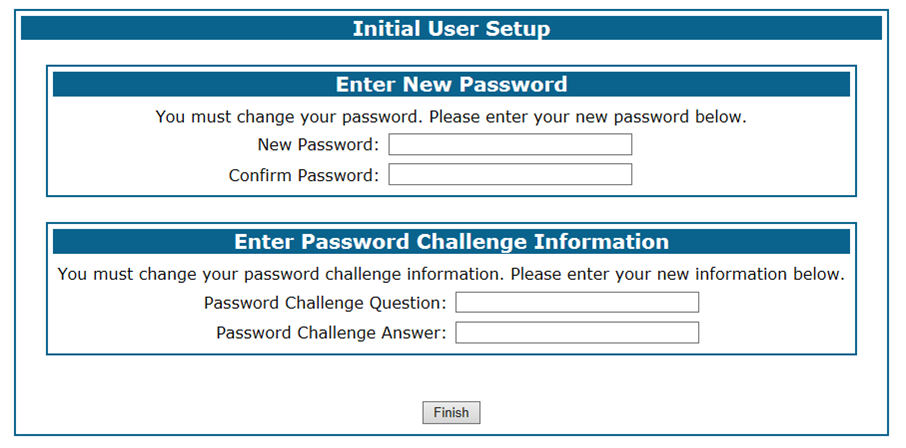
- The system prompts you to change your password and set a Password Challenge Question.
- Make a note of the Password you create since it will be used each time you log in to Kiosk, upper and lower case letters must be entered exactly as you set them.
- Password Challenge Question and Password Challenge Answer: Make sure to enter an answer you will remember.
- Password Challenge Answer IS Case Sensitive (upper and lower case letters must be entered exactly as you set them).
- After you enter the information on this screen, click the Finish button.
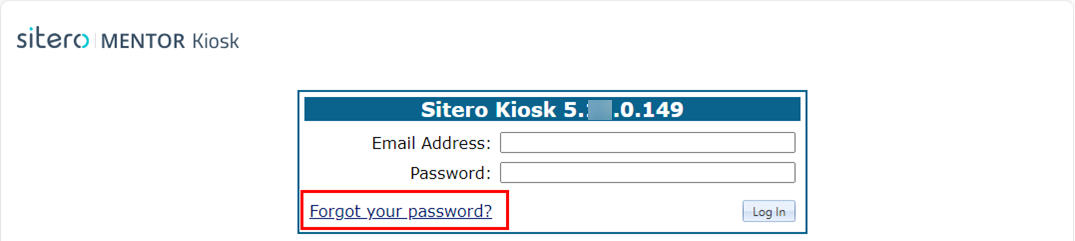
- If you forget your password, click the “Forgot your password?” link on the Kiosk main screen and when prompted, type in the Password Challenge Answer. Refer to the “Forgot Password?” section below for step-by-step instructions to reset your password.

Forgot Password?
Follow the steps below to reset your Kiosk Password.
- To begin, click the link that was sent to you or open an internet browser and type in the Kiosk Internet address provided by the Site.
- Click the Forgot your password? link.


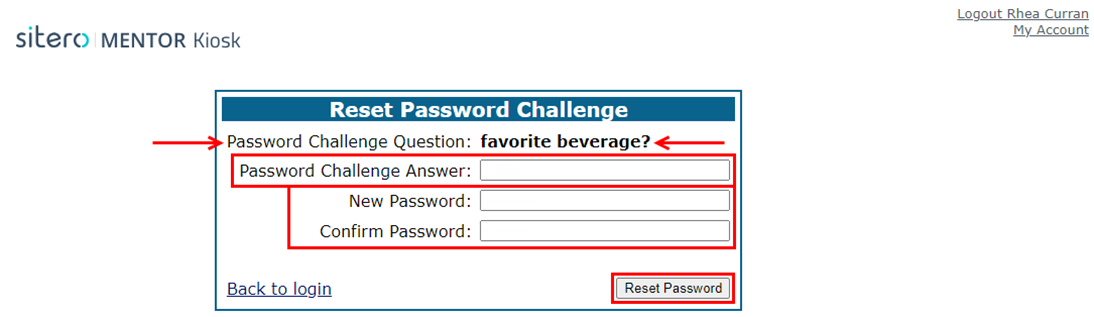
- The Reset Password Challenge dialog box displays.
Enter your email address and click the Next button.

- Your Password Challenge Question displays.
- Enter your Password Challenge Answer (case sensitive) in the field.
- Enter identical characters in the New Password and Confirm Password fields (must match).
- Click the Reset Password button.
- Your password is changed when your challenge answer matches your stored information.

- A message displays onscreen.



Access Your Kiosk Account
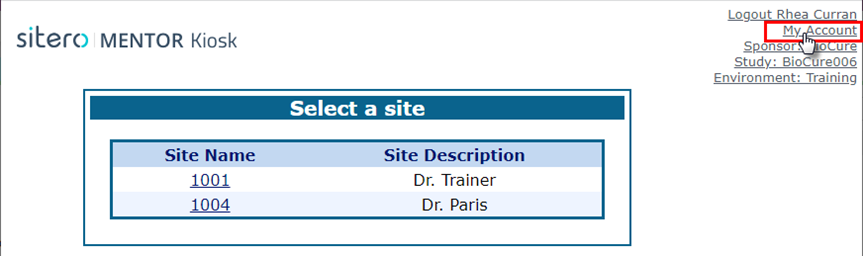
→ Log in to Kiosk and click the My Account link to perform the following actions:
- Change your Email address.
- After completing this action, Kiosk sends messages to the new email address, and you use the new email to log in to the system.
- Change your Password.
- Change your Password Challenge Question and Password Challenge Answer.
- Return to the Questionnaires screen.
To Begin:
- Open Kiosk from a saved webpage or click the Kiosk link that you received.
- Use your email address and password to log in to Kiosk.
- Click on the My Account link at the top right side of your screen.
- Then scroll down and follow the steps for the update you wish to make to your account.
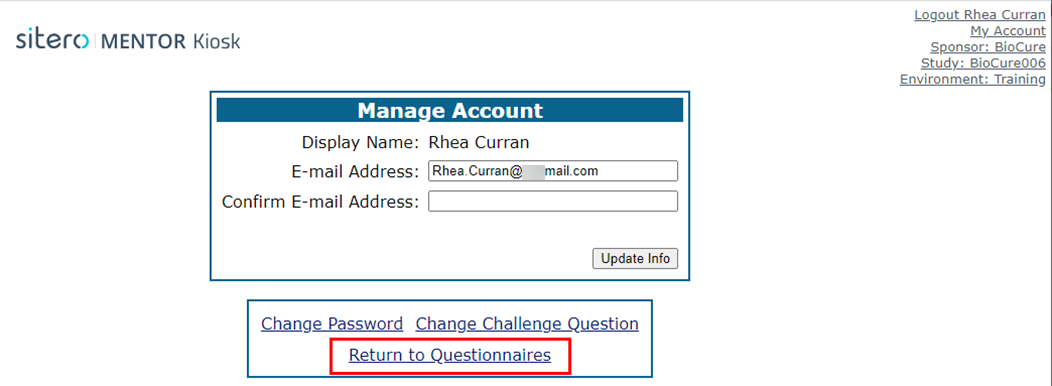
- After making changes to your account settings, click the Return to Questionnaires link to return to your Kiosk screen.
Update Your Email Address in Kiosk
- Log in to the system and click the My Account link.
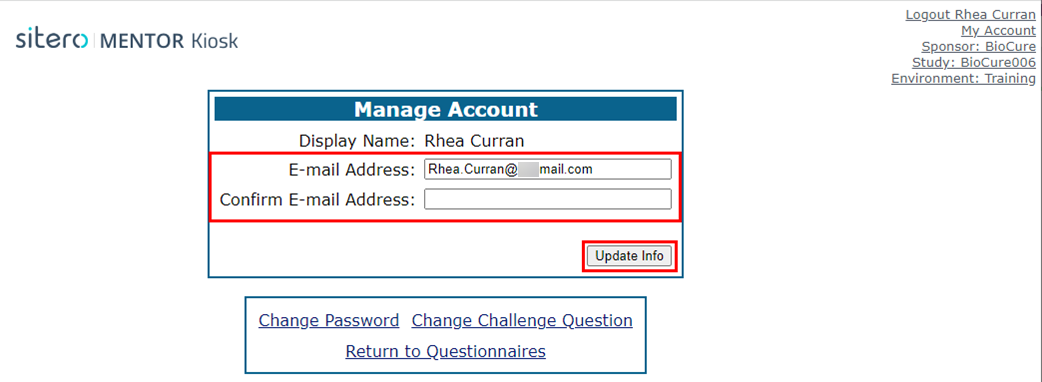
- The Manage Account screen displays.
- Enter characters in the E-mail Address and Confirm E-mail Address fields (characters in each field must match).
- Click the Update Info button.
- All email messages from Kiosk will now go to the new email address that you entered, and you use this email to log in to the Kiosk and on any other screens that require it to be entered.
Change Your Password
- Log in to the system and click the My Account link.
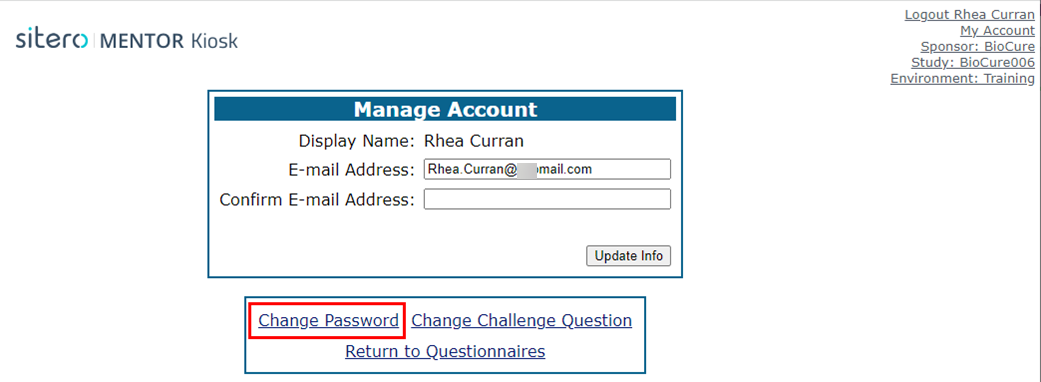
- The Manage Account screen displays.
- Click the Change Password link.
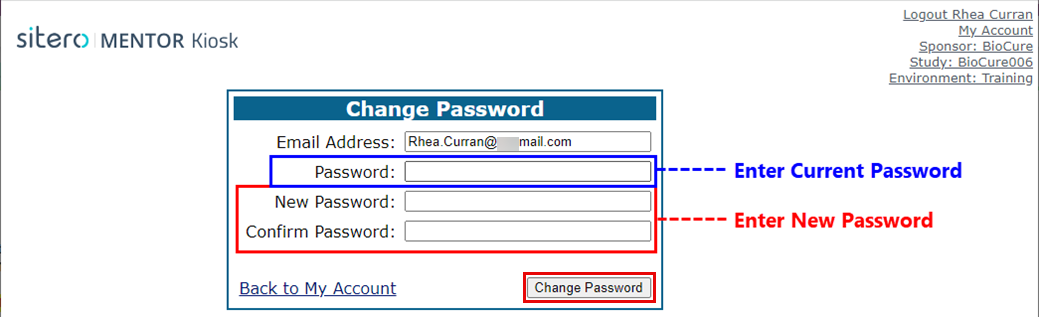
- The Change Password dialog box displays.
- Enter your current password in the Password field.
- Enter a new password in the New Password and Confirm Password fields (characters in each field must match).
- Click the Change Password button.
- Use the new password to log in to the system.

Change Your Password Challenge Question
- Log in to the system and click the My Account link.
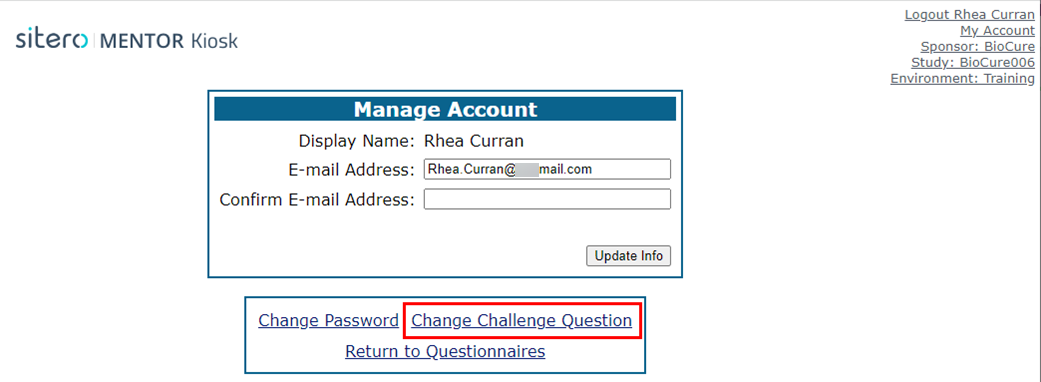
- The Manage Account screen displays.
- Click on the Change Challenge Question link.
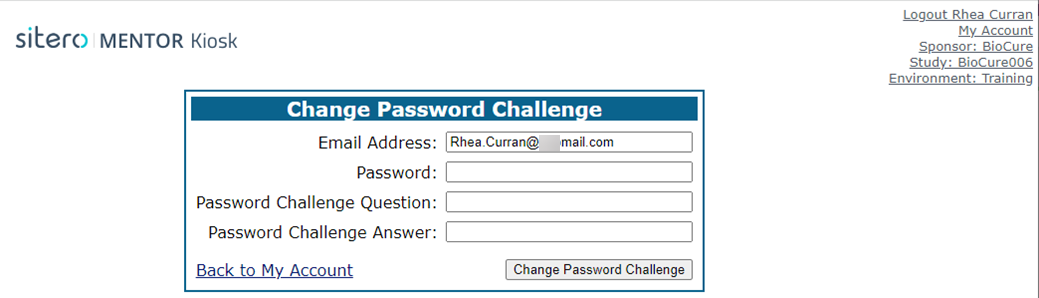
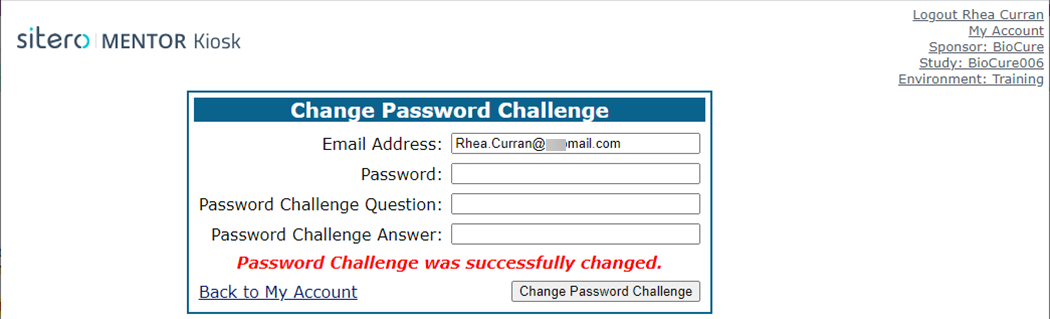
- The Change Password Challenge dialog box displays.
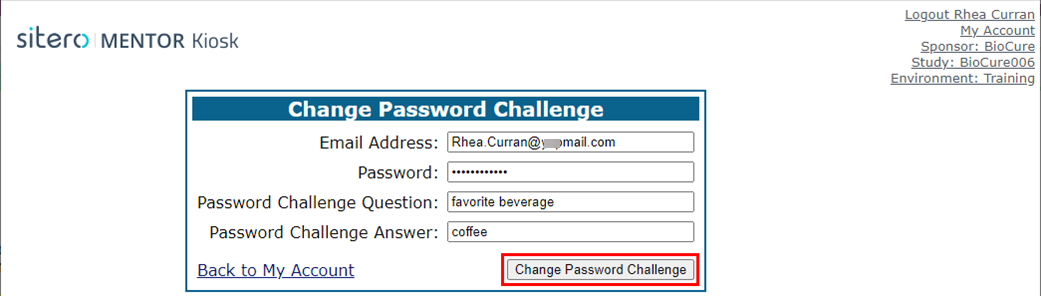
- Enter your current password in the Password field.
- Enter a Password Challenge Question.
- Enter a Password Challenge Answer. Make a note so you remember your answer, since upper- and lower-case characters MUST BE entered exactly as you set them.
- Click the Change Password Challenge button.
- A message displays onscreen.
Return to Questionnaires
- After making changes to your account settings, click the Return to Questionnaires link to return to your Kiosk screen.
- The system navigates to the “Select a Questionnaire” screen.
Access and Populate Your Questionnaires in Kiosk
- After logging in to the Kiosk, any questionnaires that are available to you display as a hyperlink.
- You may have multiple questionnaires available to you.
- A questionnaire is one (1) or more forms in sequence. As each form displays, populate replies and use the button to proceed forward, the Kiosk leads you from one form to the next.
- At any time while populating answers, you may click the home (graphic) button to exit the questionnaire. The system automatically saves your questionnaire answers, and you may return to the questionnaire later to continue and complete the process.
- To begin, click the link that was sent to you or open an internet browser and type in the Kiosk Internet address provided by the Site.
- Enter your Email Address and Password in the fields, and click the Log In button.
- Click on a link with the Questionnaire name.
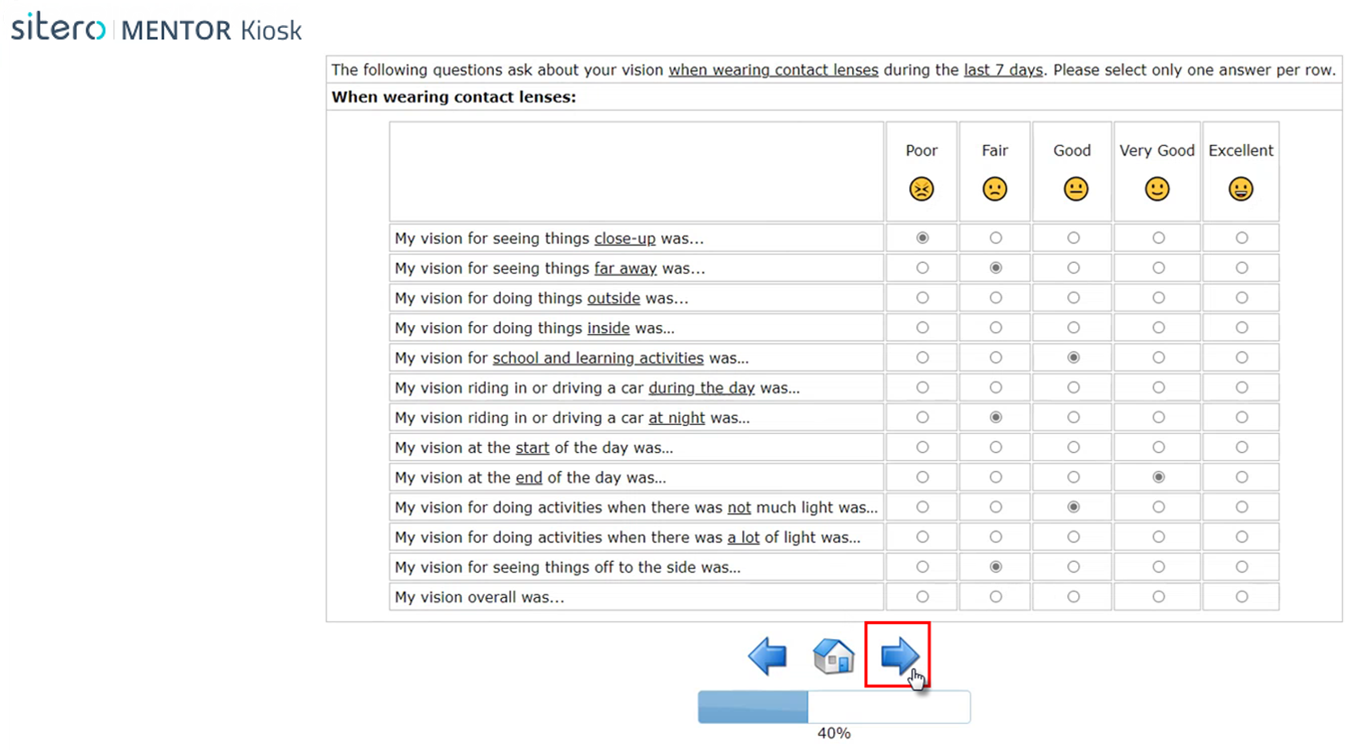
- The Kiosk screen displays questions and/or statements and provides options (e.g., field, drop-down menu) for populating a response.
- Enter a response or select an answer for each line that displays.
- Click the arrow on the right side of the home button (arrow points right) to continue (proceed forward).
- Optionally, to return to a previous screen click the arrow on the left side of the home button (arrow points left).
- Repeat steps 6 and 7 until you reach the end of the questionnaire.
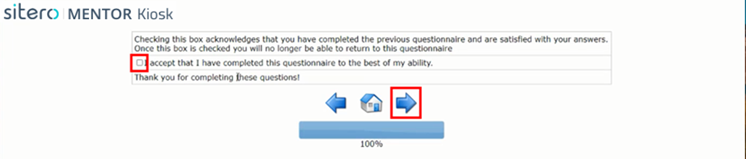
- On the final screen, the system may display a message and a check box for acknowledging that you have completed the questionnaire and are satisfied with your answers.
- Click in the check box, then click the forward arrow to complete the process.
- After completing this process, you can no longer return to the questionnaire.

Confirm Your Choice to Leave a Response Blank
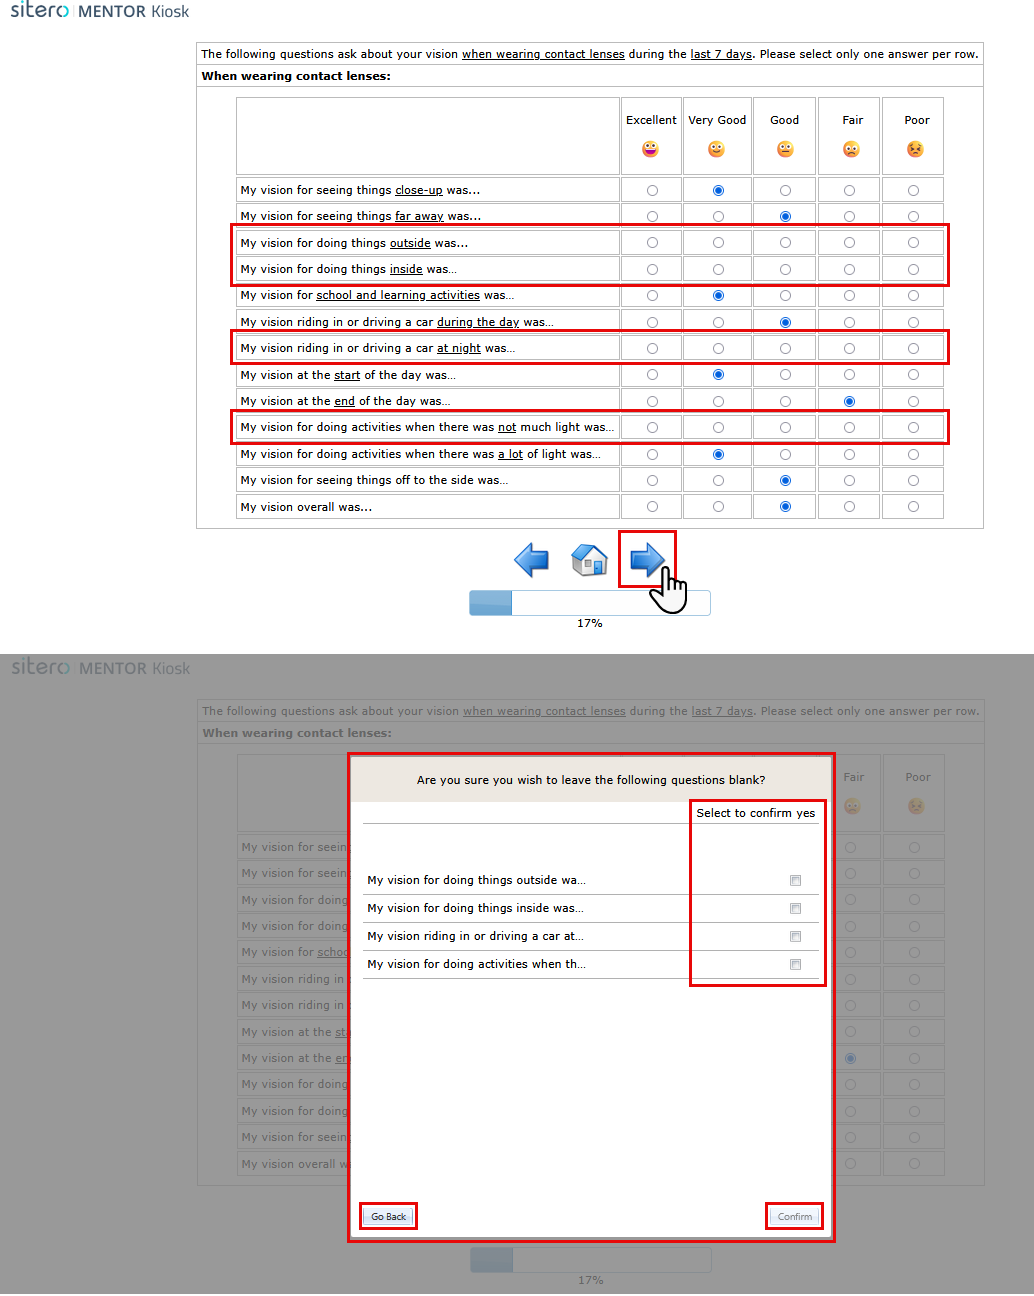
- Some questionnaires allow you to confirm that you chose to leave one or more responses blank.
- As you proceed to the next screen after leaving at least one response blank, the system displays a message to allow you to confirm the action.
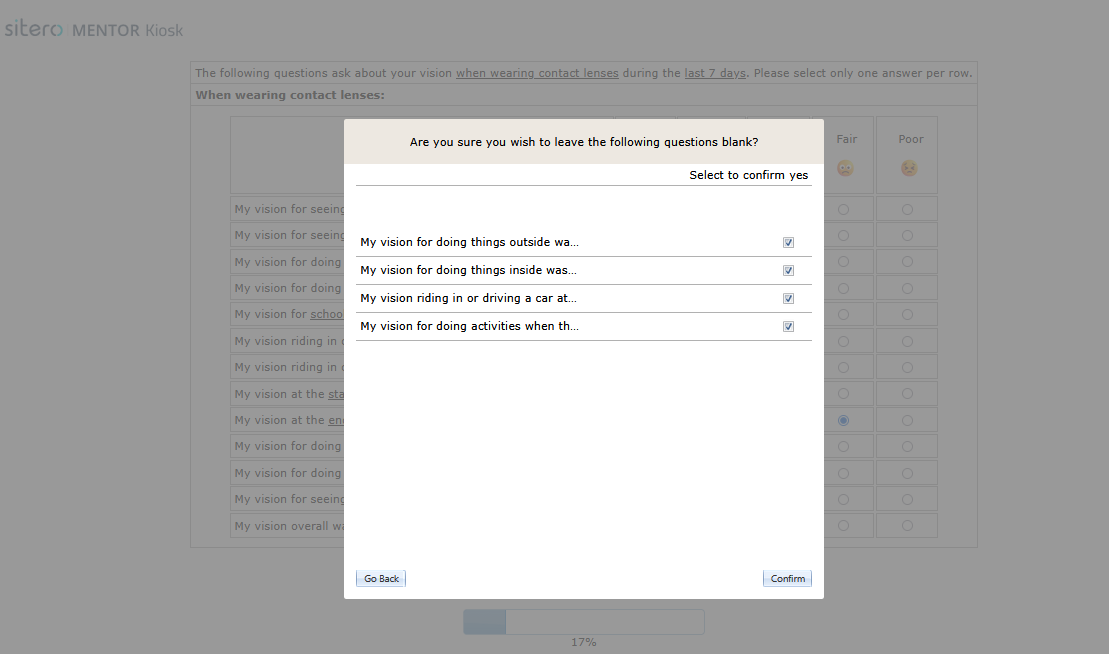
- A dialog box displays over your questionnaire showing the blank response and a check box on the right side.
- To proceed, use one of the actions below.
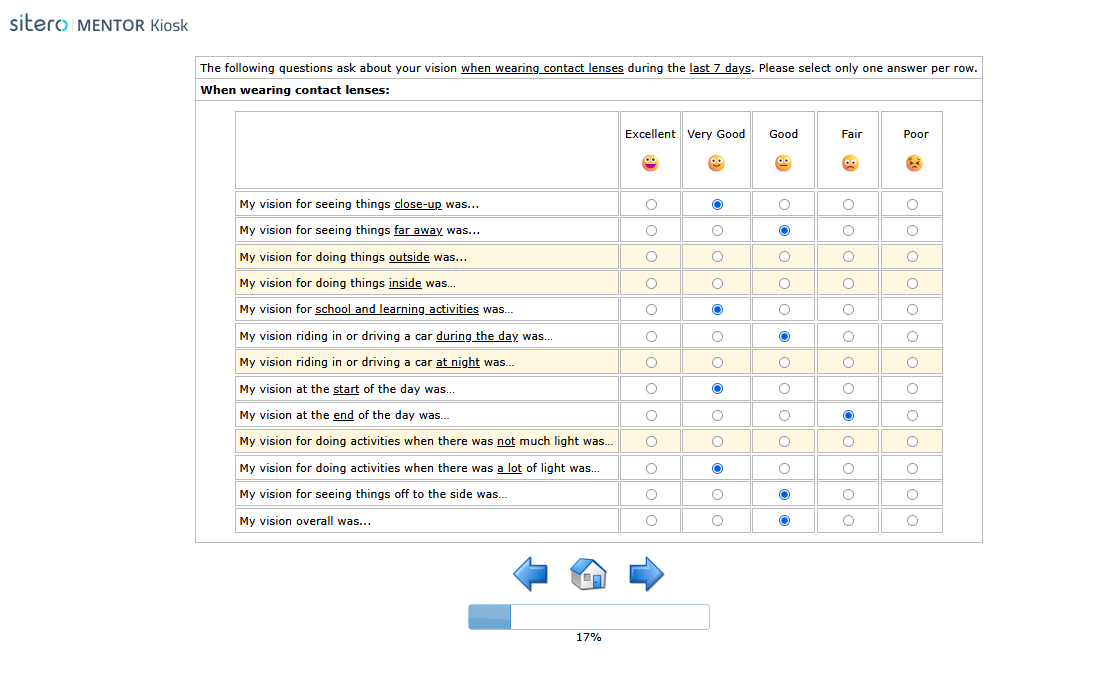
- Click the Go Back button to return to the screen and populate answers. On the form, the blank options display with highlighting behind them for easy identification.
- Click in the check box to confirm your intention to leave a reply blank, when multiple responses are left blank, one row displays with a check box for each.
- Click the Confirm button to proceed forward.
- The Confirm button is inactive until you return to the prior screen and populate an answer OR until you click in each checkbox to confirm your intention to “leave blank”.
Add a File During Questionnaire Process
Some questionnaires may allow you to add a file. Follow the steps below to upload a file.
- Click the Select file… button in the Attachment control.
- Navigate to the location of the file and click to select it.
- Follow the on-screen prompts to complete the process.

After Completing a Questionnaire
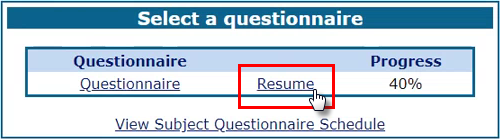
- When you reach the end of the questionnaire, you return to the Select a Questionnaire screen. The Progress column displays 100% in the row, indicating that a Kiosk user has clicked through all screens. There may still be unanswered questions when the Progress indicates 100%.
- If you exit out of the questionnaire prior to reaching 100% completion, you may access that questionnaire again on the home page by clicking the Resume link. This action returns you to the questionnaire section where you left off, the Progress column displays the percentage that was completed.
- To open or reopen a questionnaire at the first page, click a link under the Questionnaire header.