

Verify Data (Source Document Verification) in Mentor EDC
Use the Verify Data options for Source Document Verification (SDV).
To review videos that show this feature, click here Verify Button in Mentor EDC AND here SDV-Form and Field Level.
For related information, refer to Targeted and Risk Based Verification in EDC.
The Data Monitor usually applies verification.
The Verification is removed from the Form if any changes are made and the Save button is applied.
Sponsors may decide to use this feature in a different manner.
When setting up the study, the sponsor may decide on using a reduced SDV methodology.
The system allows the sponsor to decide, at a Study/Site/Form level, the number of forms that require verification.
These defaults are setup at study start; with the appropriate permissions, you may modify the level of SDV per site, subject, or form. These values are set at any time during the study.
Verify Button
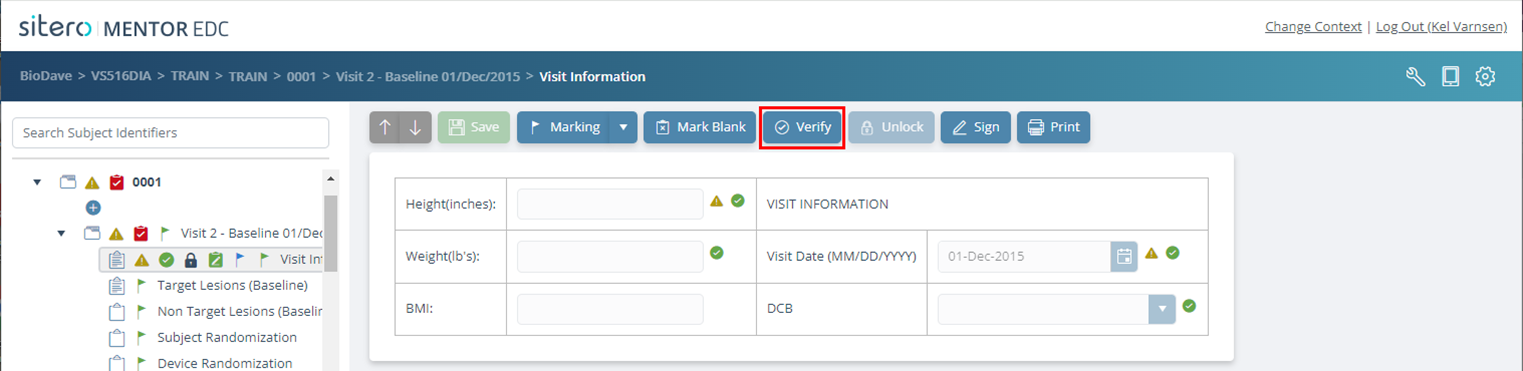
Use the Verify button to apply this setting to a single form, multiple forms in a folder, or all forms within multiple folders in the environment.
- A form must contain data in order to be verified.
- If this setting is applied to a folder that contains six forms and only one has data, the setting will be applied only to the form or forms that contain data.
- The Verify button may be used independent of or in conjunction with Source Document Verification (SDV) options.
- Click on a single form or click on a folder at any level in the study tree.
- Click the Verify button. A dialog box displays a message and may present additional options. Click in a radio button to select an option.
- Click the OK button to continue and apply the verification to any form that contains data OR click the Cancel button to end the process without making a change.
- To remove the verification, click on a form (or folder) that shows the Verify mark and click the Verify button. A dialog box allows you to confirm the action. The verification is removed from the form or from all applicable forms in the folder.

SDV Configuration
There are multiple options for configuring Source Document Verification (SDV) and Reduced Source Document Verification (RSDV) settings in the environment, including:
- Mark Subject Must Verify (Reduced SDV)
- Mark Form Must Verify (Reduced SDV)
- Always Verify AND Never Verify Settings
Scroll down for additional information.
Mark Subject Must Verify (Reduced SDV)
To mark subjects as Must Verify, follow the steps below.
- Select a Site then select a Subject record.
- Click the tools button (wrench) then click the Mark Subject Must Verify button.

- A dialog box displays listing all of the subject identifiers at this site.
- Check the box next to All of the subjects that require verification.
- This action immediately marks the selected subjects as requiring verification; onscreen confirm message(s) may display during this process.
- Optionally, click on a check mark to remove the setting; onscreen confirm message(s) may display during this process.
- Click the Close button to exit the dialog box.

All of the subjects selected display a Must Verify icon in the Navigation Tree and a record in the Journal tab.
Mark Form Must Verify (Reduced SDV)
- Select a Site then select a Form.
- Click the tools button (wrench) then click the Mark Form Must Verify button.
Remember: The form must contain data saved on it to enable the button.

- The form selected now displays the Must Verify icon next to it in the Navigation Tree and a record in the Journal tab.

Always Verify and Never Verify Setting
When configured in your environment, Always Verify and Never Verify work independently of the %SDV configuration to allow precise management of forms. E.g., Forms marked “Always Verify” require verification even if the %SDV = 0.
This setting may be applied at the Form level (apply setting to applicable Forms) or Folder level (system applies setting to all forms in the folder).
