Search The Knowledge Base
Subjects Screen and Actions in Mentor RTSM
- Based on your study configuration and protocol, when you process a Subject Visit in the system you may also Collect Subject Stratification and other information about the Subject from the Question Sets.
- Select the appropriate button for the Subject visit (i.e., enroll, process visit) and populate information for required and optional fields in the dialog box that displays.
- When your study uses branching logic, question sets act as an advanced responsive data collection form and additional fields may display, based on information you enter or select.
- Click this link [Subject Management Details] for additional information.
Follow the steps below to access the Subjects screen.
- Click in the grid to select a site.
- Click to select the Subjects button in the main menu, then click to select a subject.
- The buttons that display are based on your permissions and the subject’s progress in the study.
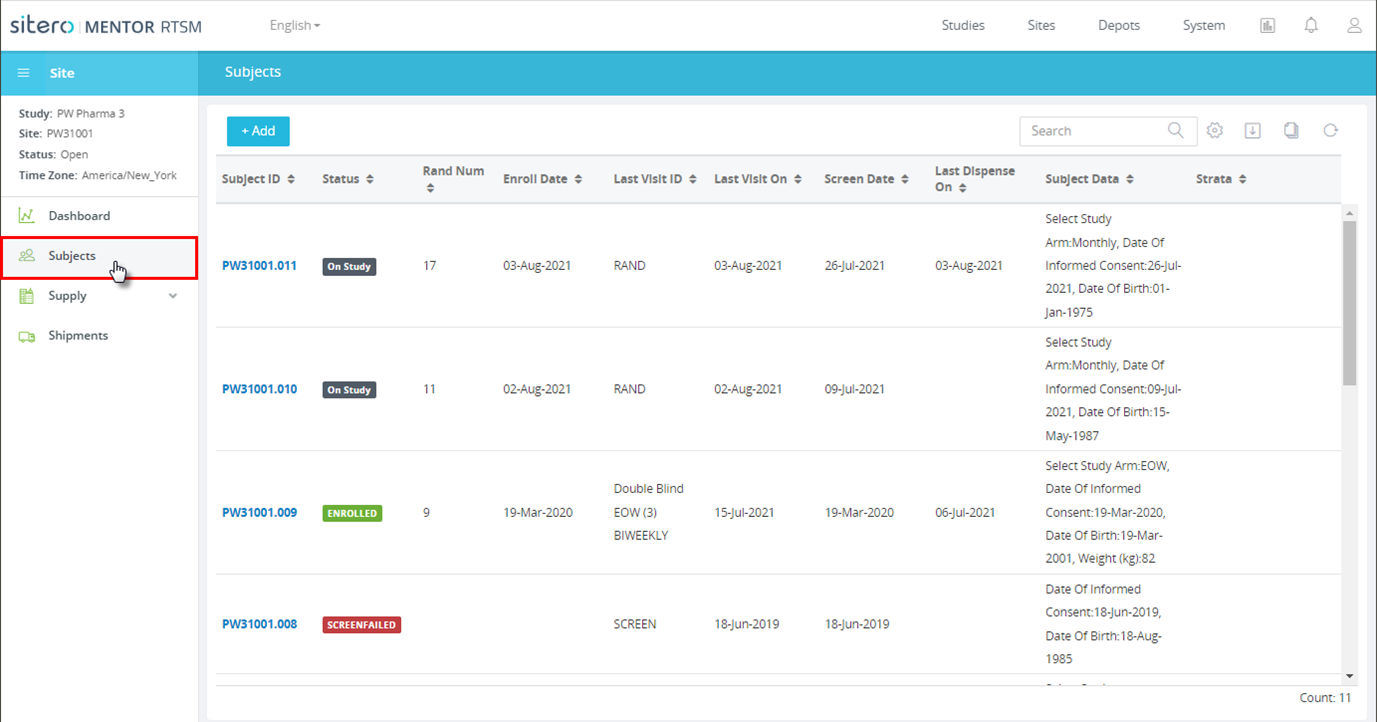

The table below describes the columns in the RTSM Subjects grid.
| Field | Description |
| Screen ID; Subject ID | Click the link in the Screen ID or Subject ID column to open the subject detail screen. |
| Status | Displays the subject’s current status information for the study. |
| Rand # | This column displays the Randomization Number (#) of the subject represented in the row. |
| Enroll Date; Rand Date | This column displays the Enrollment or Randomization Date of the subject represented in the row. |
| Last Visit | This column displays the Visit Identifier for the subject’s most recent visit. |
| Last Visit Date | Displays the date of the subject’s last visit. |
| Screen Date | Displays the date that the subject is screened the study. |
| Last Dispensed | Displays the last dispense date for the subject. |
| Subject Data | Displays custom data that has been added for the Subject. The information that displays may vary, based on the Custom Data Visibility configuration. |
| Strata | Displays subject strata information. |
Add and Manage a Subject
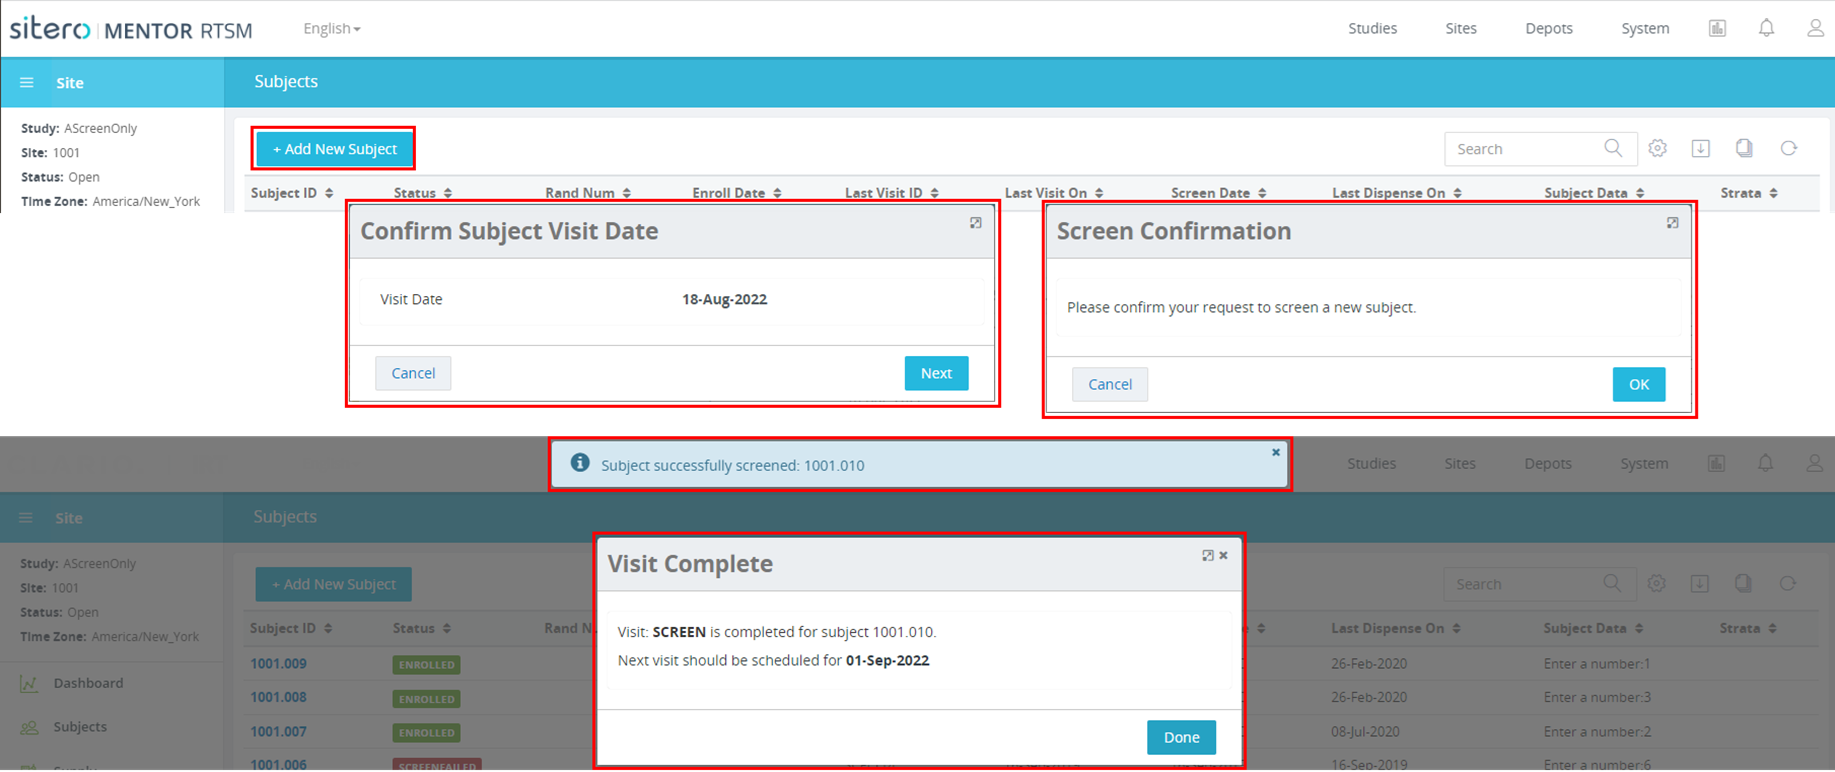
Based on your study configuration, you may see the + Add New Subject button or the option specific to your study (e.g., Pre-Screen, Screen, Enroll). After adding the Subject record, a permissioned user can access that screen to review and manage Subject progress.
- Navigate to the Subjects screen.
- Click the + Add New Subject button (or applicable button for your study).
- Populate required and optional fields in the dialog box and use the button(s) to proceed when additional information is required. The content that displays in the dialog box is based on the configuration for your study.
- Review the information that displays in the Confirmation dialog box (as applicable).
- Click the Next or OK button to proceed and to complete the process.
- Optionally, click the Back button to return to the previous screen and make change or click the Cancel button to abort the process.
- Click the Done button to complete the process.
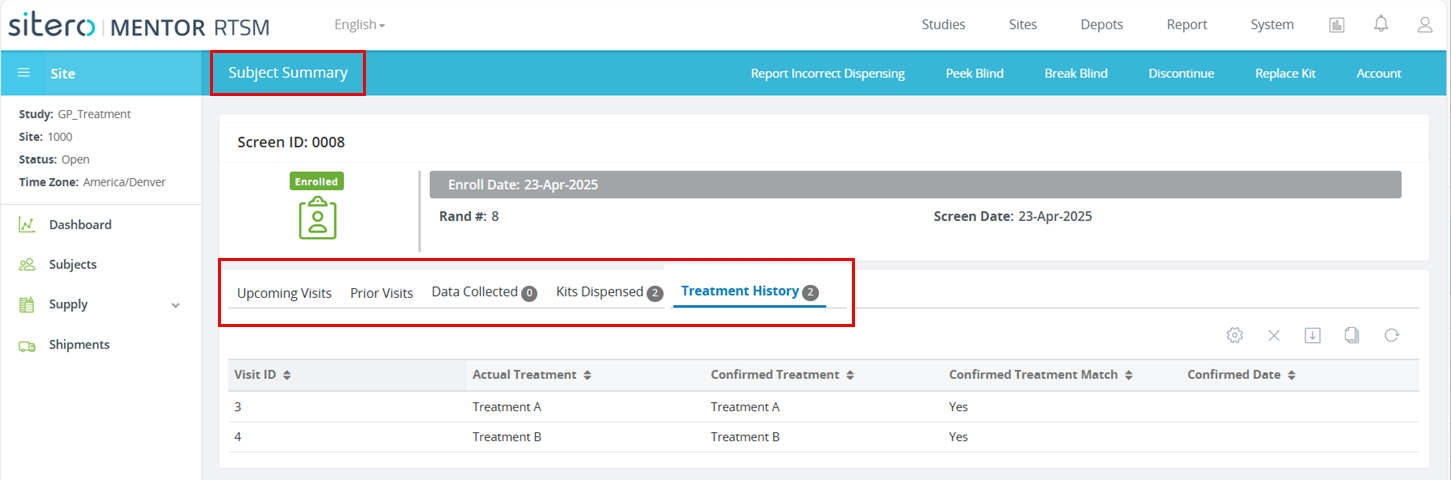
- Permissioned users may access additional details and processing options with the tabs that display on the Subject Summary screen.