Search The Knowledge Base
Site Custom Data in Mentor RTSM
Follow the steps below to begin the process to add, edit, and delete Site Custom Data.
- Click the Studies button at the top of the screen.
- Click a link in the grid to select a Study.
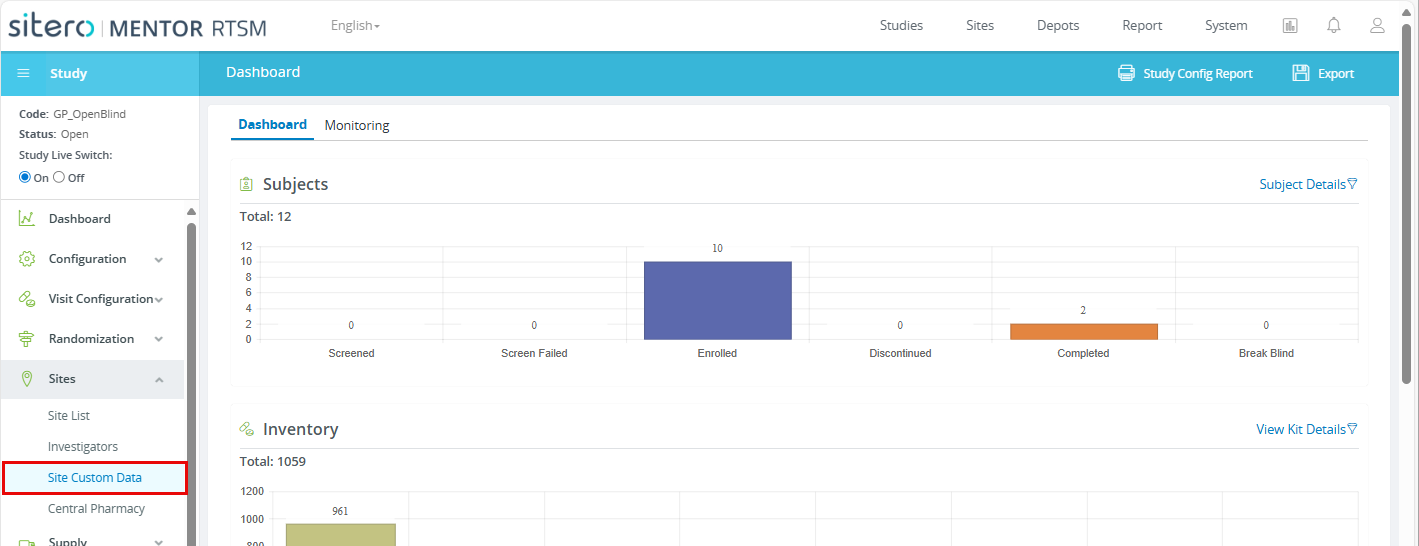
- Click to open the Sites menu (left side menu).
- Click to select Site Custom Data.


- Use this feature to add Custom Data associated with a Site to track specific Site-level data or data across several Sites.
- The Site Data that displays is for informational purposes and provides options for adding site specific customization, as needed.
- The Custom Data does not display in reports and is managed on the Sites screens with individual read, write, and edit permissions.
Add Site Custom Data
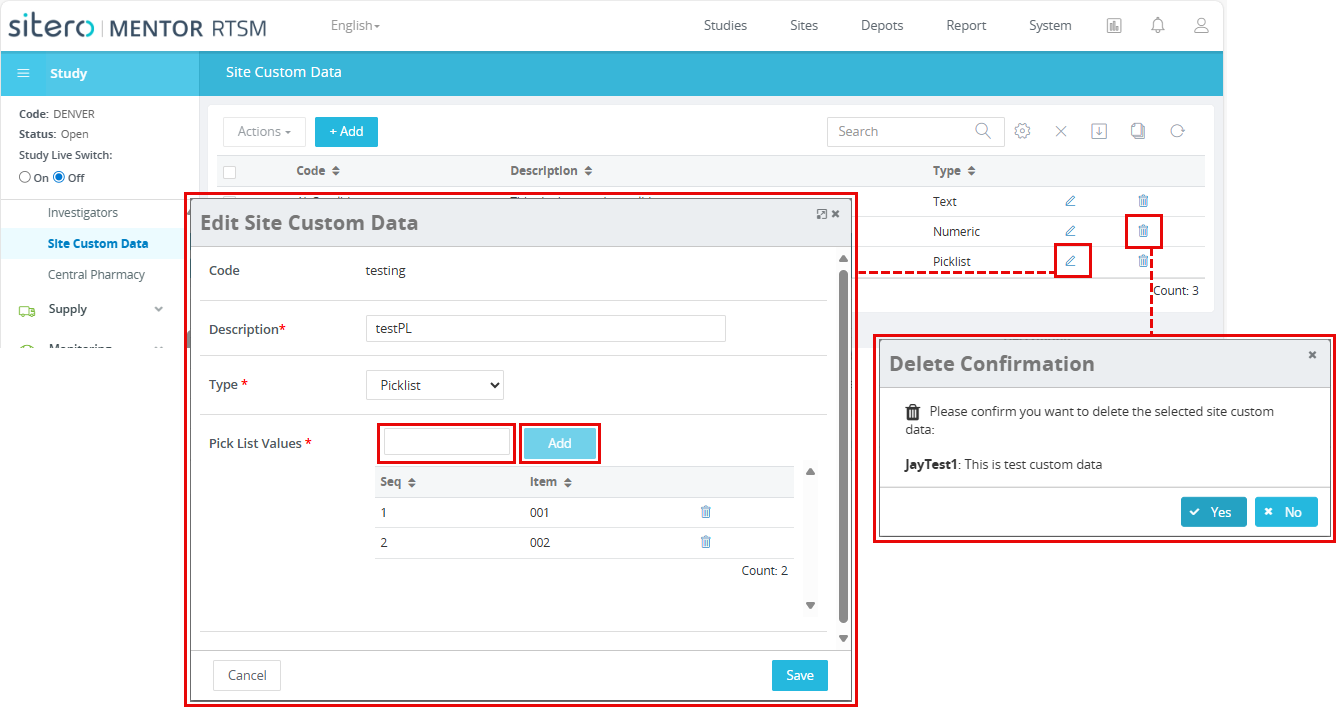
- Click the + Add button (above the grid) to display a dialog box.
- Populate information in the fields (all fields are required*).
- Select the Type of Custom Data from the drop-down menu.
- If selecting Numeric, Text, or Date, proceed to Step 5.
- If selecting Pick List, proceed to Step 4.
- Populate the Pick List Value field then click the Add button to commit it to the grid; you must add at least 2 Pick List Values to activate the Save button.
- Click the Save button to complete the process.



Edit and Delete Site Custom Data Records
Remember: You can modify Site Custom Data ONLY for a Study that is “Off.”
Click the edit button (pencil) in a row to display the dialog box and make changes as needed. Click the Save button to complete the process.
Click the delete button (trashcan) in a row to display a confirmation dialog box and click the Yes button to complete the process OR click the No button to exit the process.