

Site Dashboard Tiles in Mentor RTSM
Remember!
The content that displays on the Dashboard is dependent on the permissions associated with each User’s Role.
- Click to select the Sites module from the header to display a list of Sites to which you have access.
- Click on a link to select a Site.
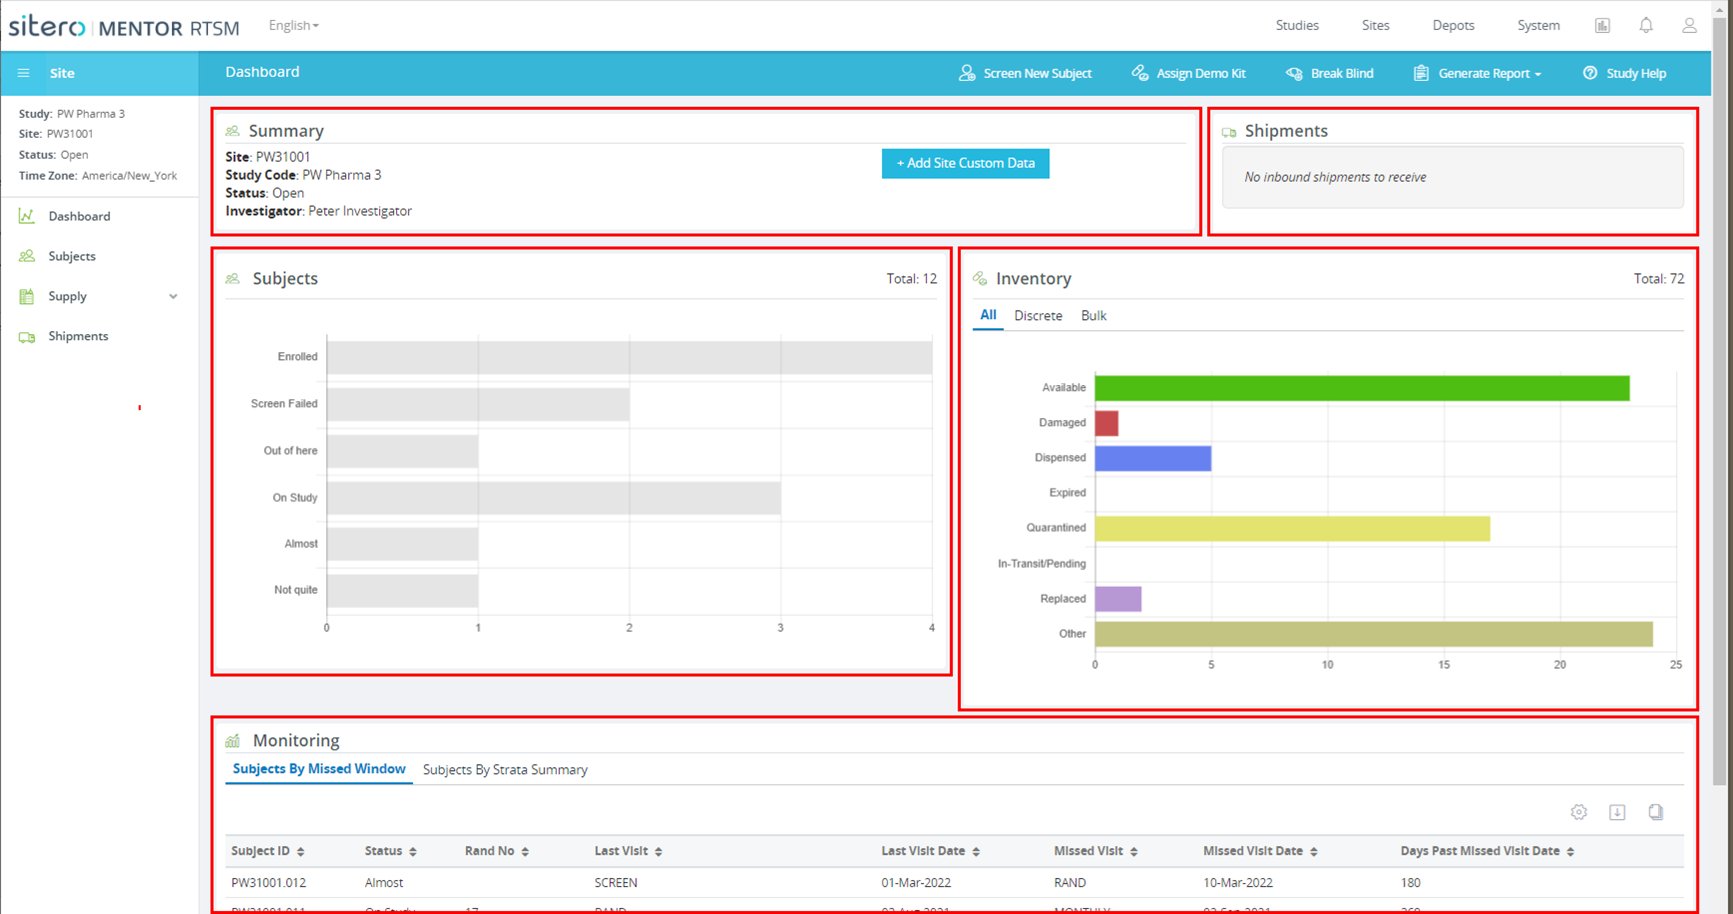
- The Site Dashboard screen displays a menu of options on the left side, action buttons in the top bar, and information in tiles.
- Some tiles display information within multiple tabs, click on a tab to display associated data.
Refer to the sections below for details about the features and functions in the Sites Tab tiles.

Summary (tile)
The Summary tile displays data and information about the site, including Site Identifier, Study Code, Status, and Investigator Name.
Add Site Custom Data
Follow the steps below to Add Site Custom Data.
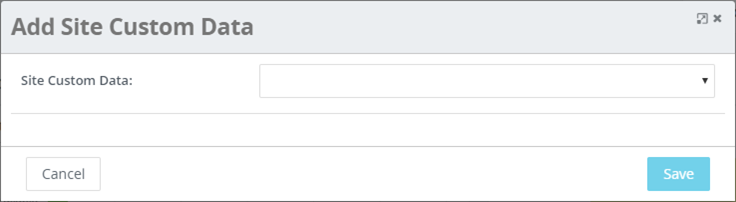
- Click the + Add Site Custom Data button in the Summary tile.
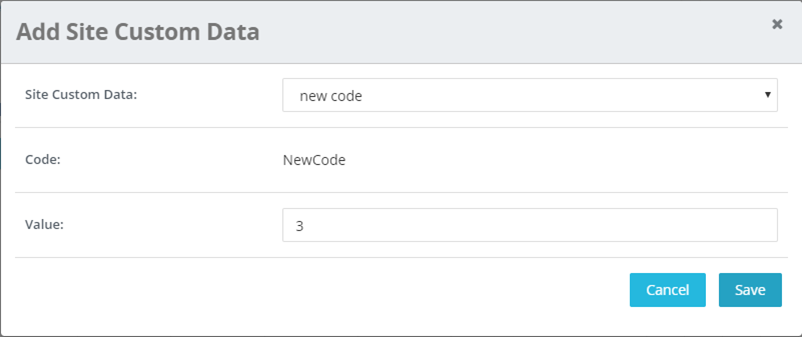
- Click to open the drop-down menu and click an item to select.
- Populate information, as required.
- Click the Save button to complete the process.
- Refer to Site Custom Data in RTSM for additional information.

Shipments (tile) Overview
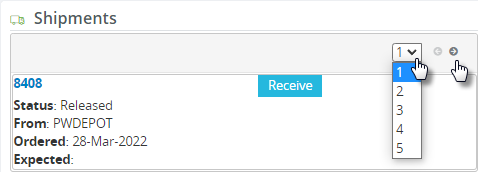
The Shipments tile provides a permissioned user the ability to receive a shipment from the dashboard screen.
Use the right and left facing arrows and the menu to navigate to and select a Shipment.
- Click the arrow facing right to move forward one (1) shipment at a time and display information for the next shipment.
- Click the arrow facing left to move backward one (1) shipment at a time.
- Optionally, open the drop-down menu and click to select a Shipment record.
- The drop-down menu displays when more than three (3) Shipments are available.
Receive Shipment Button (in Shipments tile)
Click the Receive button, located on the Shipments tile to initiate the Receive Shipment process from the Site dashboard.

Subjects (tile) Overview
The Subjects tile displays an overview of subject information for the site in chart format.
Hover over a bar in the chart to display on-screen information for an item.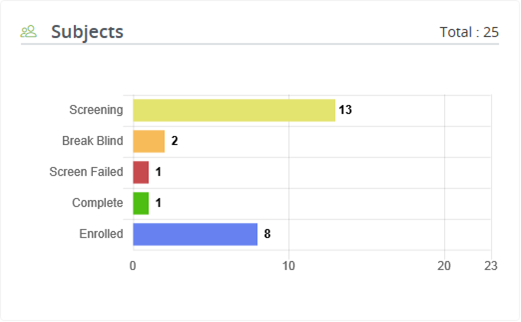
Inventory (tile) Overview
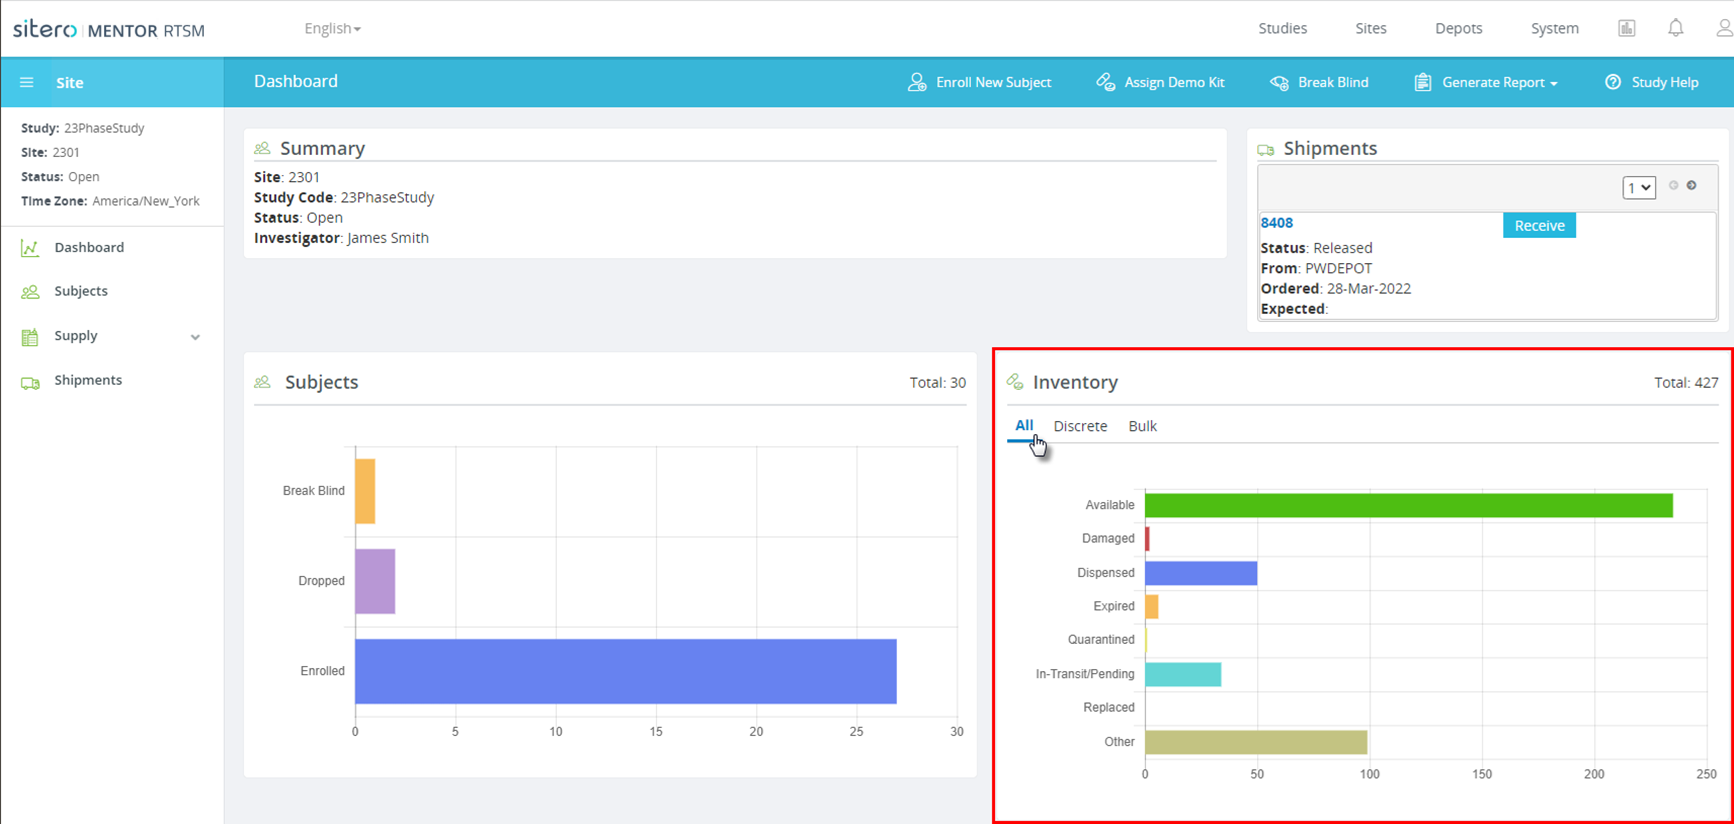
- The Inventory tile on the dashboard displays a chart showing current inventory for the site by status.
- Use the tabs to view details filtered by “type” (e.g., Type = bulk, discrete; type options display based on your study/permissions): All, Discrete, Bulk.
- Hover over a bar in the chart to display on-screen information for an item.
- The Site Inventory Summary box contains current information about the inventory at the site, displayed in a chart by availability status.
- A tab displays for Discrete inventory and Bulk inventory if applicable for the site.
- The Inventory Summary tab contains a count by status of the total kits within each status type.
Remember: Site Inventory tabs (All, Discrete, Bulk) only display when Site inventory with applicable status value exists for your selection.
All (tab) in Inventory Tile
- The All tab is selected by default, displaying results for all inventory associated with the selected site.
- This tab only displays when Site inventory with status value of Discrete and Bulk exists for your selection.
Discrete (tab) in Inventory Tile
- Select the Discrete tab to display results for current discrete inventory associated with the selected site.
- This tab only displays when Site inventory with status value of Discrete exists for your selection.
Bulk (tab) in Inventory Tile
- Select the Bulk tab to display results for current bulk inventory associated with the selected site.
- This tab only displays when Site inventory with status value of Bulk exists for your selection.
Monitoring (tile) Overview
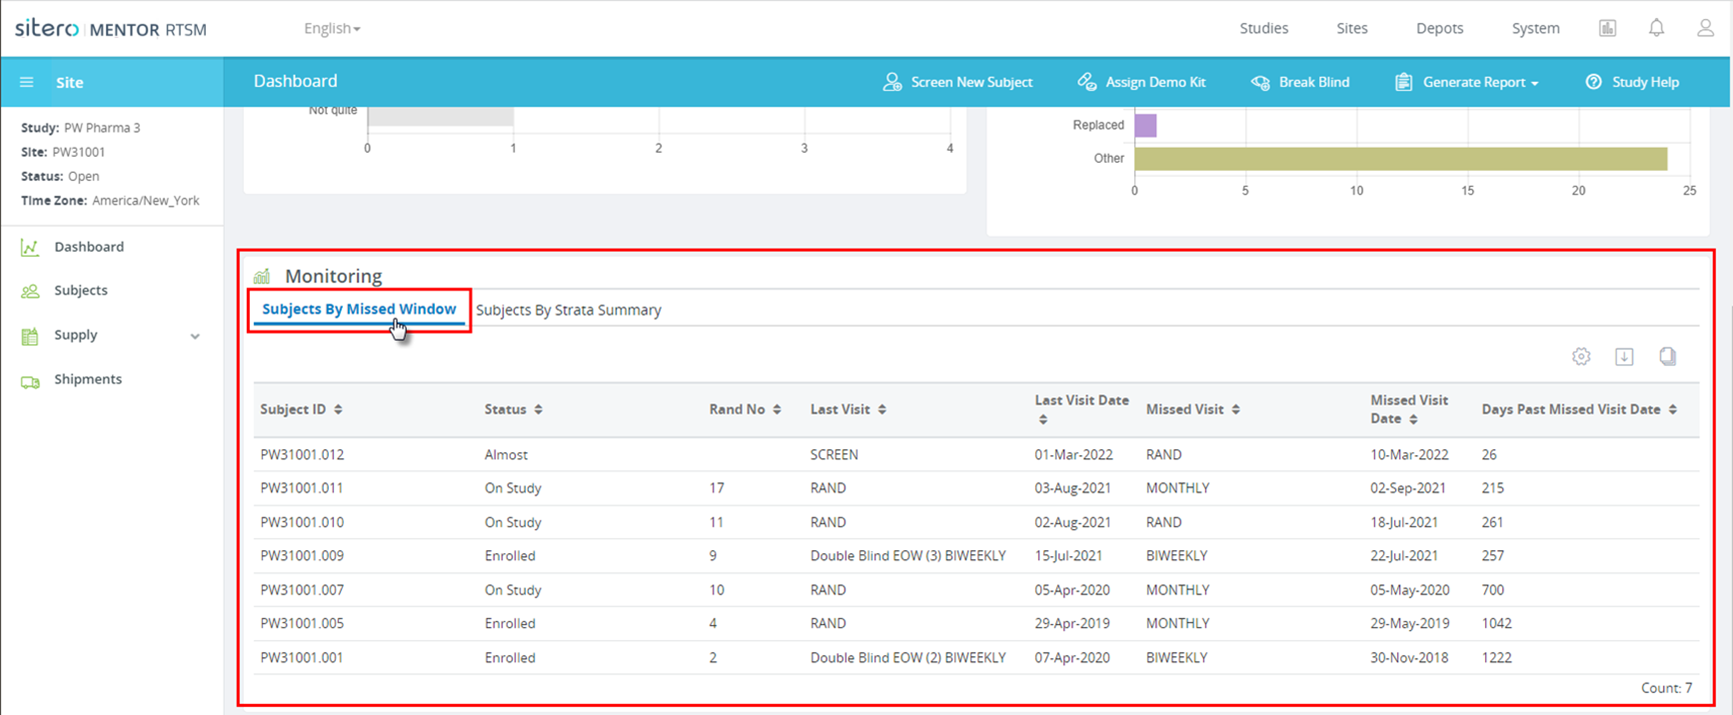
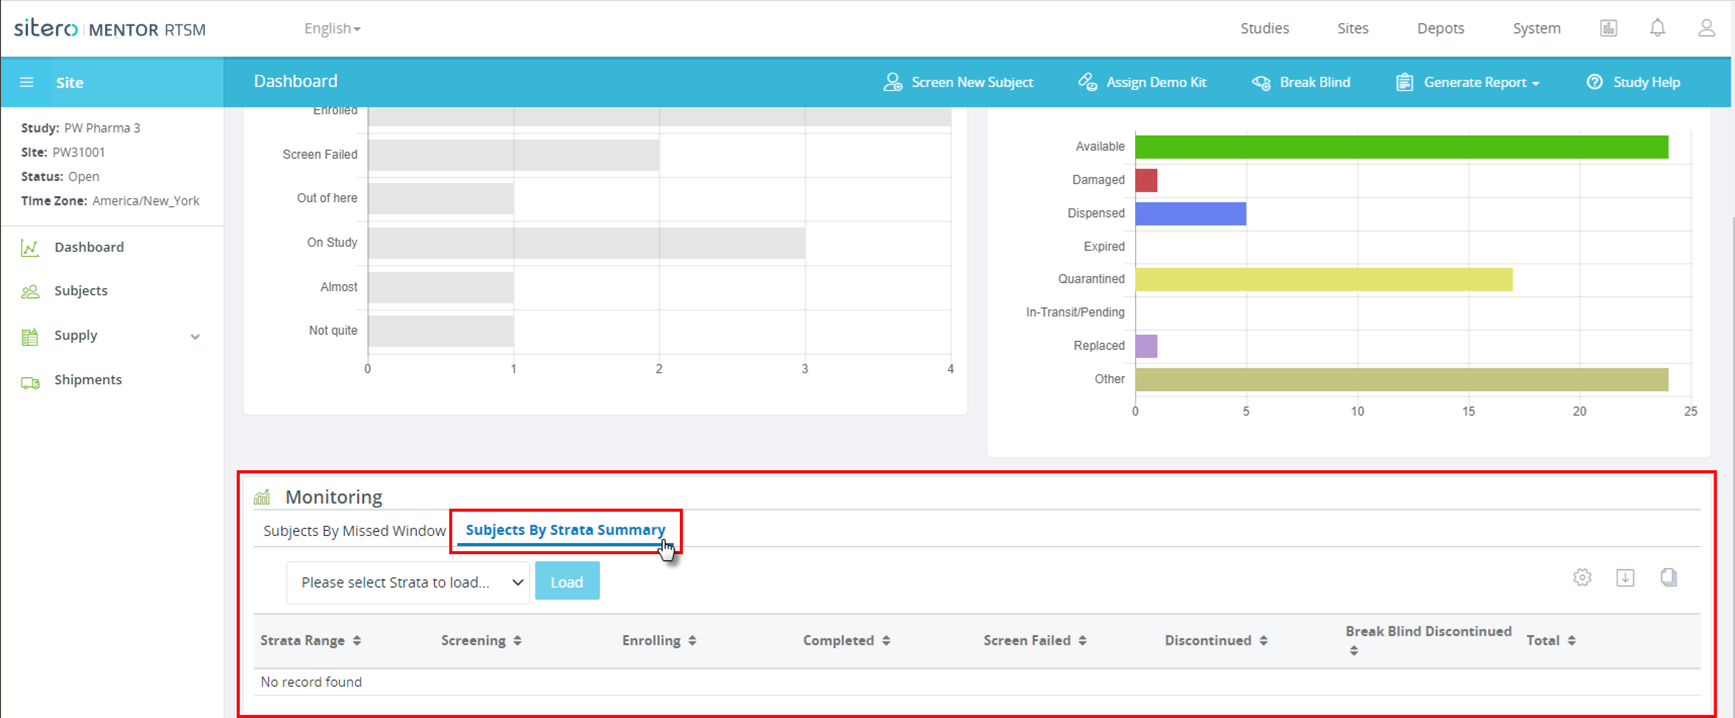
- The Monitoring tile presents subject information in grid format on two (2) distinct tabs:
- Subjects By Missed Window – a grid displays the subjects that have missed their visit window, as defined in the study visit schedule.
- Subjects By Strata Summary – a grid displays the total number of subjects per Strata, as defined by the study protocol.
Download Monitoring Report
- Click to select either tab (Subjects By Missed Window OR Subjects By Strata Summary).
- Subjects By Missed Window: This Report lists the subjects that have missed their visit window, as defined in the study’s visit schedule.
- Subjects By Strata Summary: This Report lists the total number of subjects per Strata, as defined by the study design.
- Click the download button (arrow in box).
- The system automatically generates a *.csv file for the option selected.
- File options display based on the browser in use. Navigate to the location where your browser saves downloads, to locate your file. Use the options to open or extract the file.
