Search The Knowledge Base
Add a Shipment to a Study in Mentor RTSM
This article outlines the steps required to Add a Shipment to a Study in Mentor RTSM.
- Select and open the Study record in RTSM.
- Open the Supply menu (left side) and click to select Shipments.
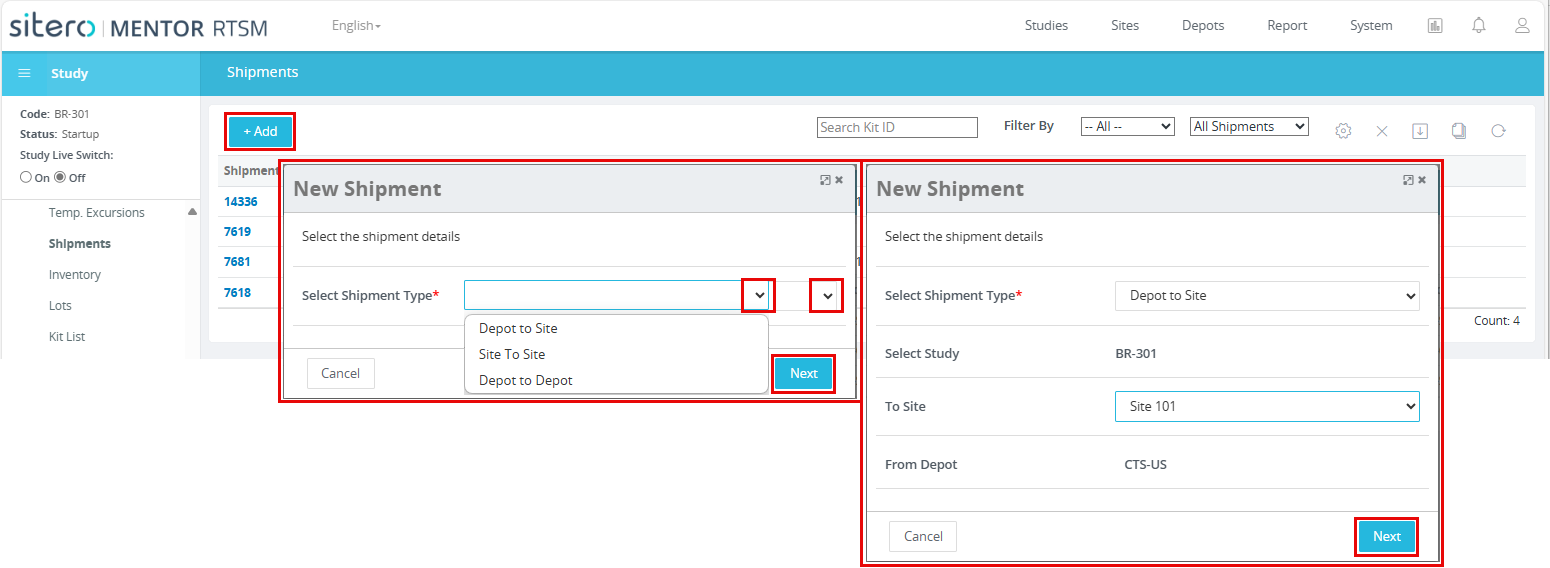
- Click the + Add button, located above the grid.
- The New Shipment dialog box displays; use the menus to make a selection for the options and click the Next button to proceed. This step may be repeated until all options are selected.
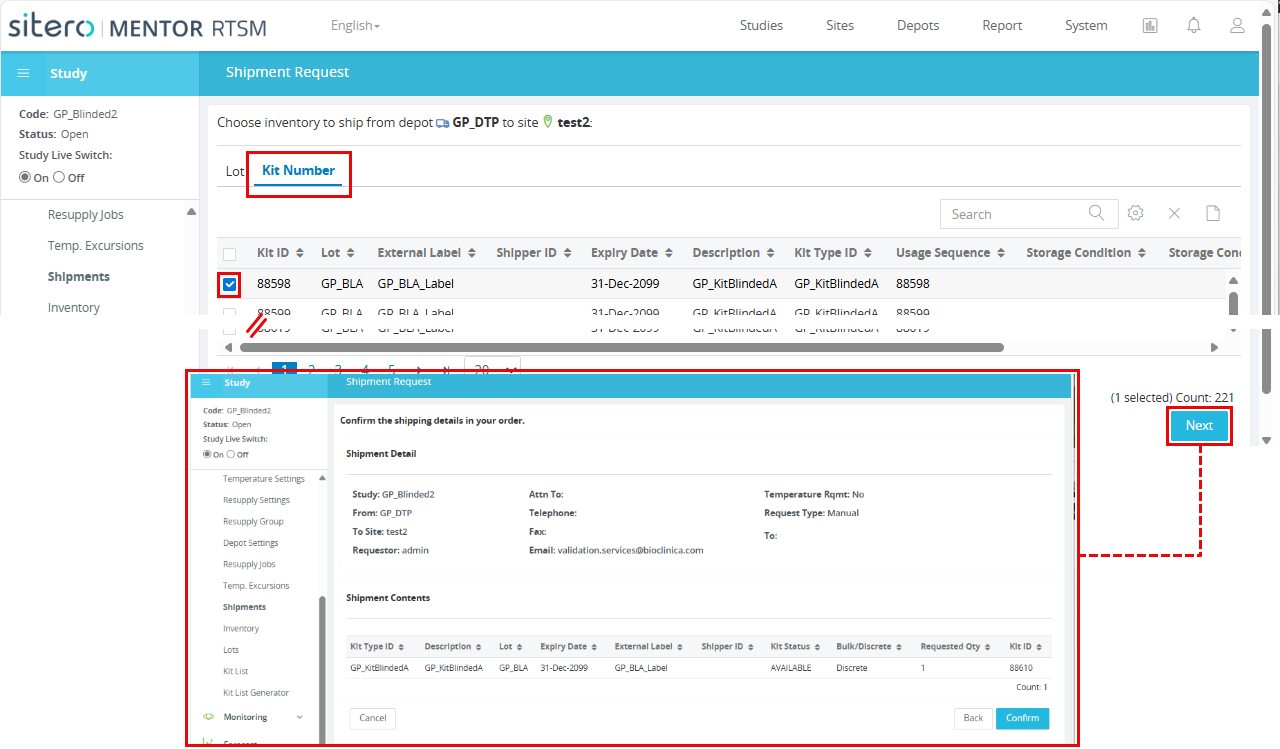
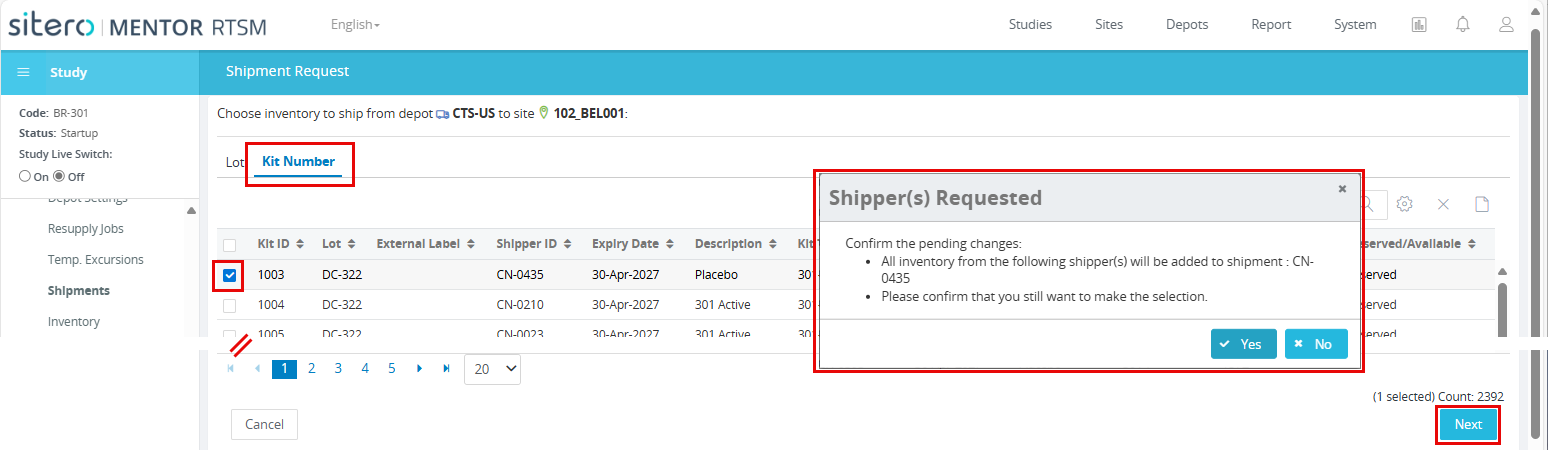
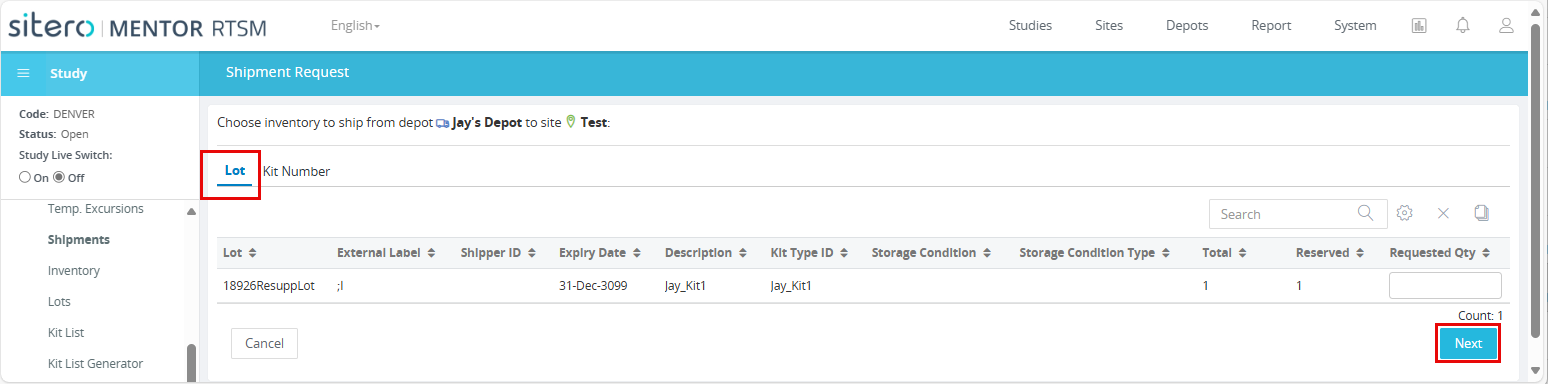
- The Shipment Request grid displays options, under tabs, based on your selections (e.g., Lot and Kit OR Discrete and Bulk). Populate information (enter Qty or click in check boxes) in the appropriate tab for the shipment.
- Click the Next button to continue.
- One or more dialog boxes may display, allowing you to make selections. Click the appropriate button(s) to proceed.
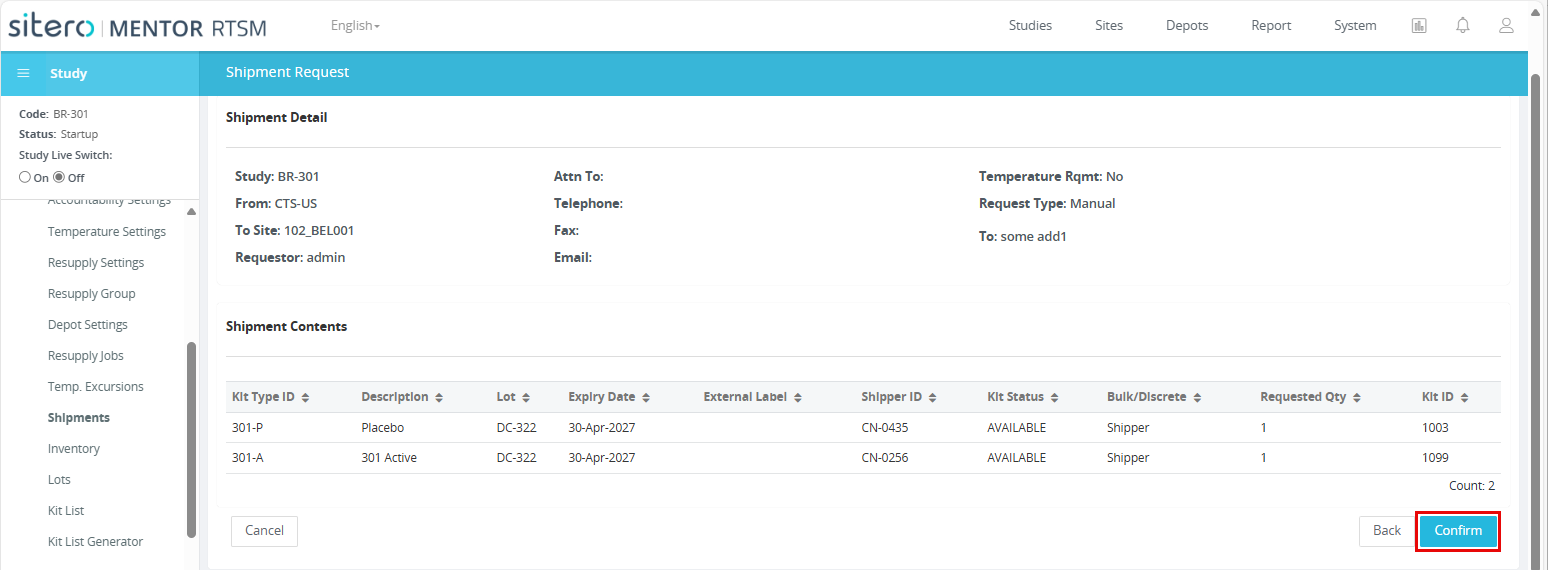
- Review the Shipment Detail and Shipment Contents.
- Click the Confirm button to complete the process. Optionally, click the Back button to return to a previous screen, if needed.
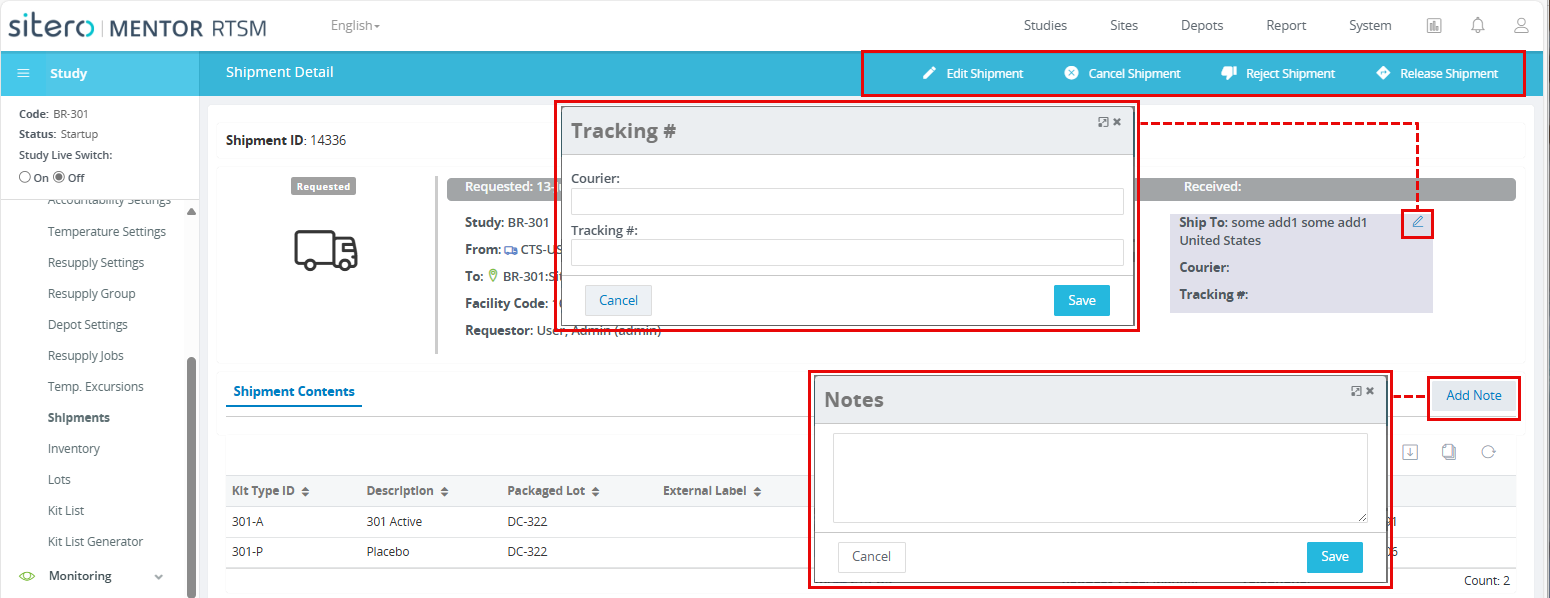
- The Shipment ID screen displays.
- Use the buttons (top of screen), as required, to continue processing the shipment.
- Optionally, click the edit button (pencil) to include additional information; click the Save button to retain the update.
- Optionally, click the Add Notes button and follow the onscreen prompts to populate additional information as needed; click the Save button to retain the update.