

Search The Knowledge Base
How to Process a Subject Visit in Mentor RTSM
This article outlines the steps used to process a Subject Visit in RTSM.
Remember: button names in your system may be customized; the buttons shown in the figures may display custom data in your environment.
- Click the Sites button at the top of the screen to display a grid with your Site records, this screen may display by default.
- Click a link in the Site column to display the Site Dashboard.
- Click the Subjects button (left side menu) to display a grid showing all subject records for the selected Site.
- Click the Add New Subject button to create a new record.
- Additional information may be prompted, based on the study configuration; follow the onscreen prompts to complete this process.
- After a subject is added, a link to the subject record is added to the Subjects grid.
- Click a link in the Subject ID column to display the Subject Summary screen.
- Subject details display on the Main screen and Visit details display under tabs by category (Upcoming Visits, Prior Visits, Data Collected, and Kits Dispensed tabs).
- Buttons may display at the top of the screen or in a grid (e.g., Prior Visits tab) based on your permissions and the study configuration.
- On the Upcoming Visits tab, the “next available” visit button displays. When clicked, the Visit is applied to the Subject record with additional data that may be prompted based on study configuration.
- When the visit is completed, a record is added to and displays on the Prior Visits tab AND the additional data that was entered for the visit (if applicable) displays on the Data Collected tab. If there was drug dispensed at the visit, the Kits Dispensed tab displays the dispensing information.

Sites Grid Example
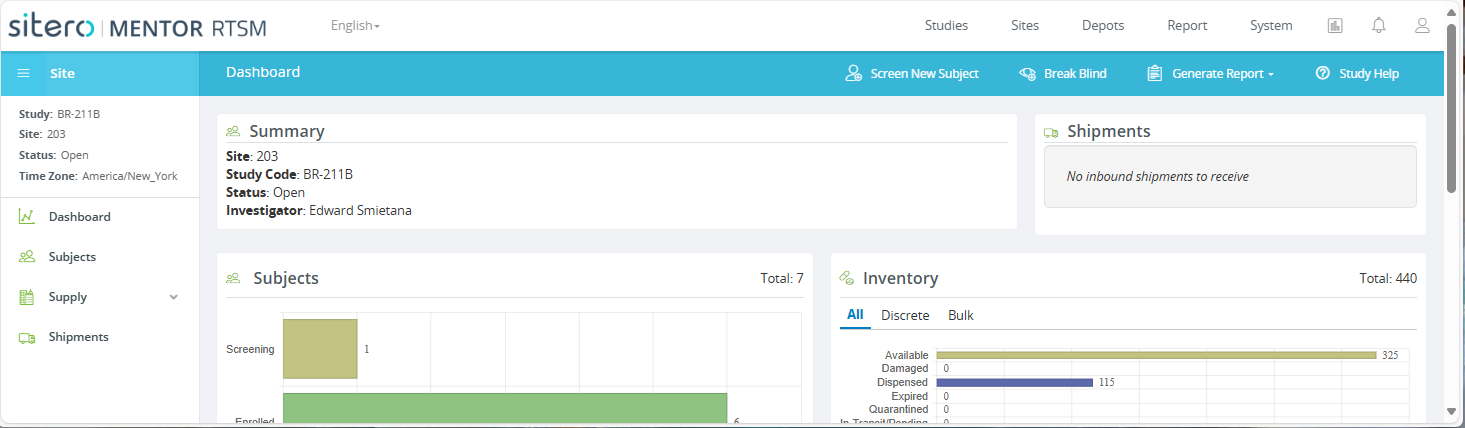
Site Dashboard Example
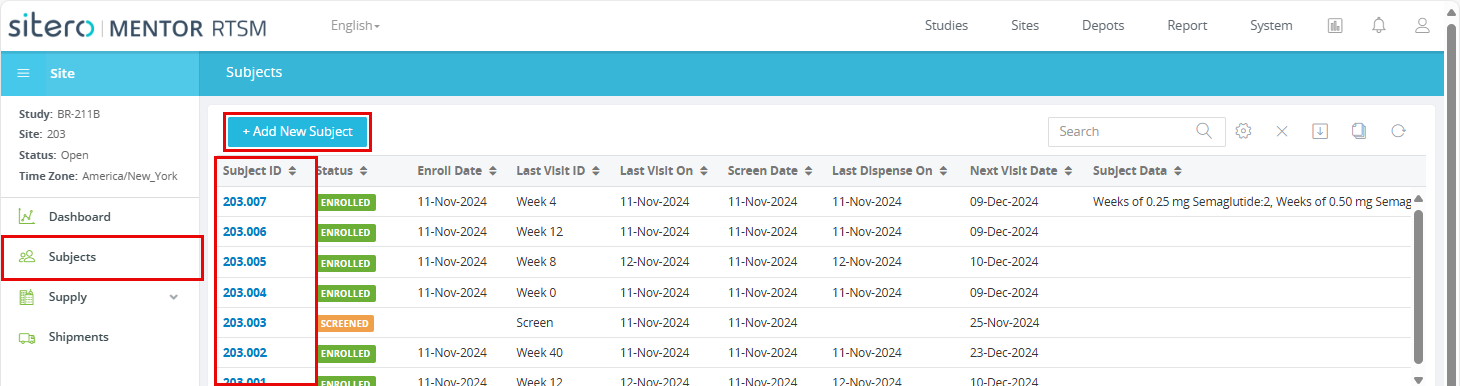
Subjects Grid Example
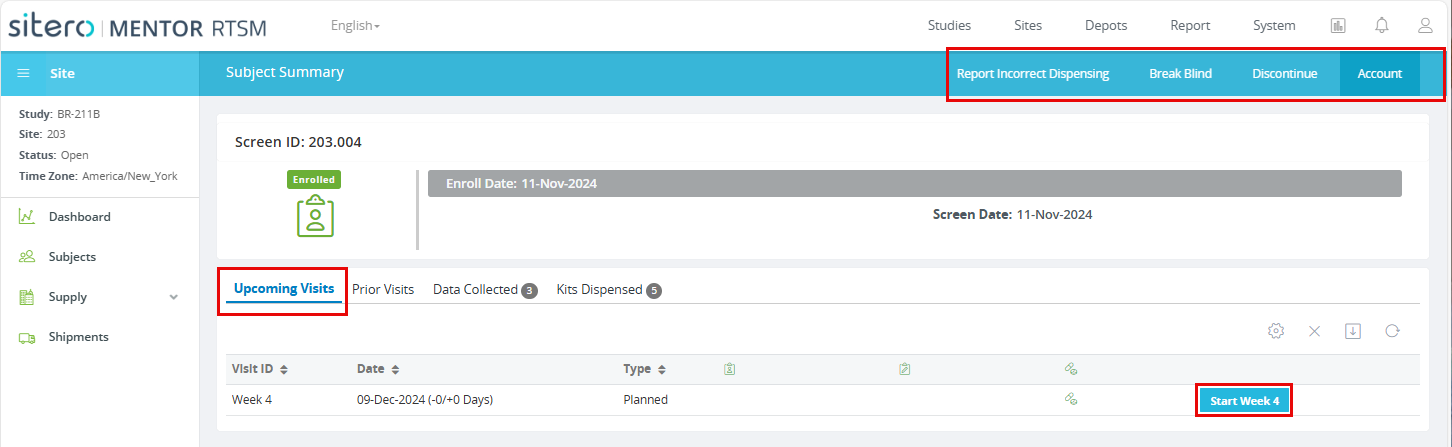
Upcoming Visits Tab in RTSM
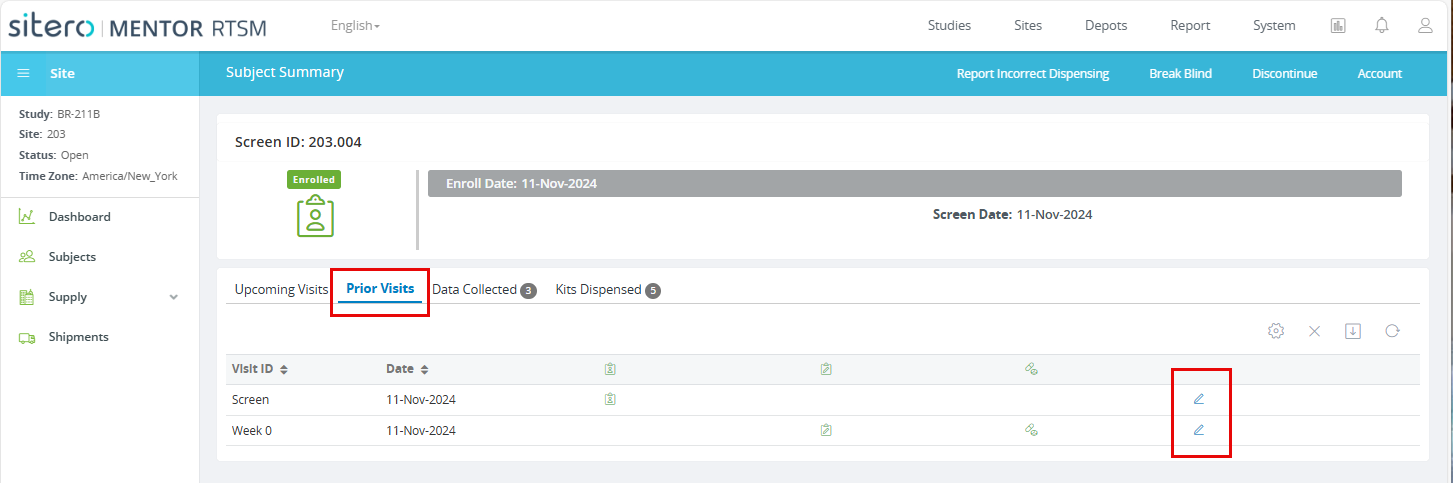
Prior Visits Tab in RTSM
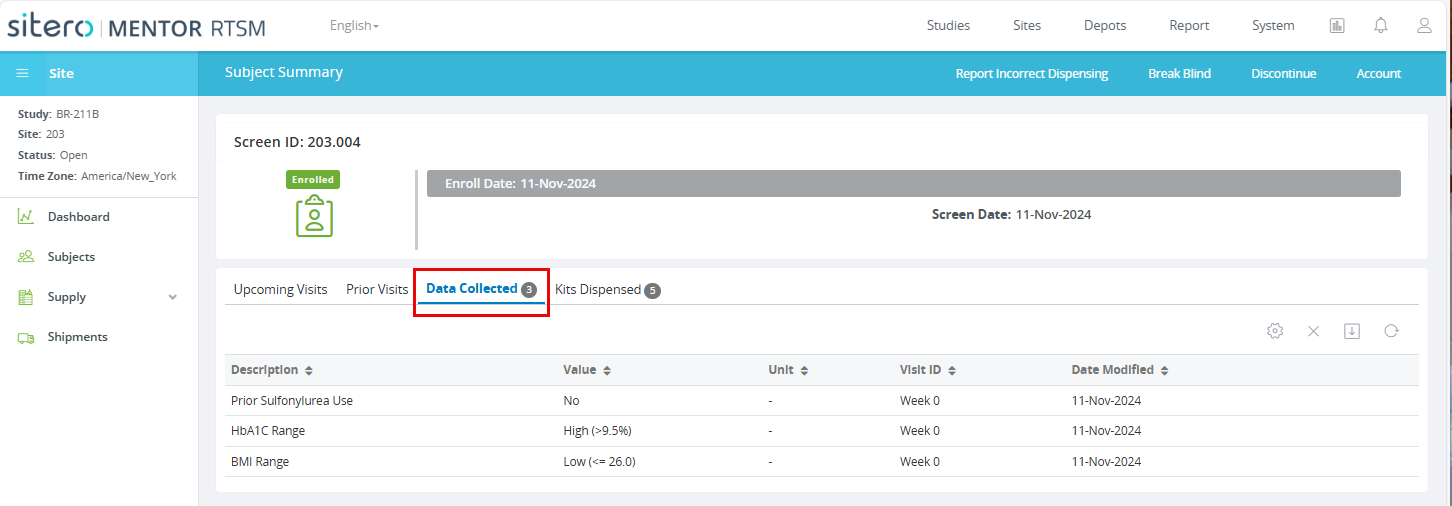
Data Collected Tab in RTSM
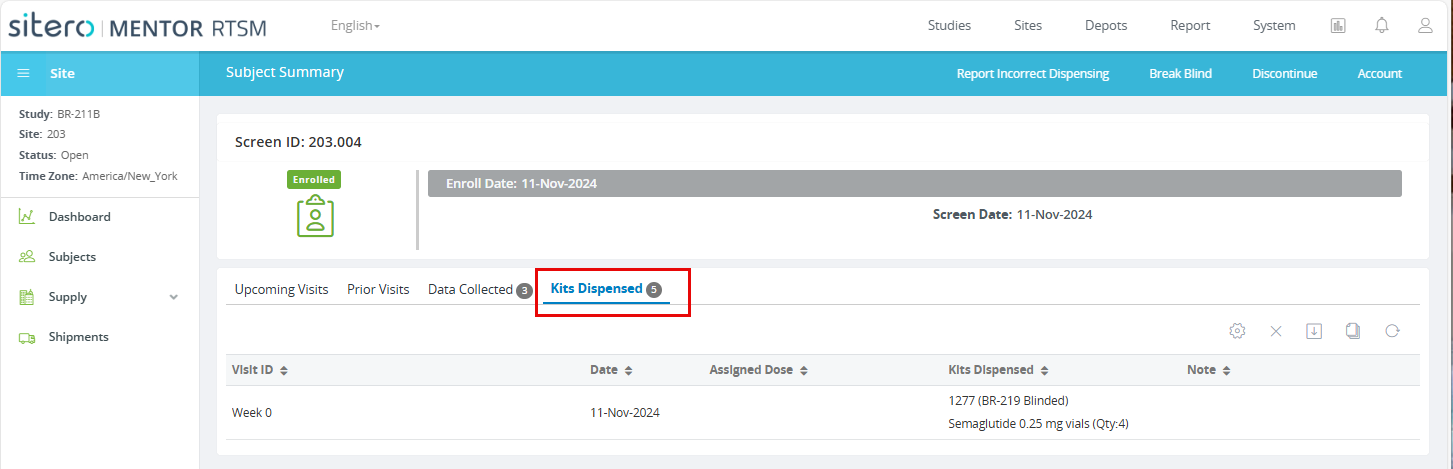
Kits Dispensed Tab in RTSM
