

Subject Management in Mentor RTSM
Use the features in this system to Add and Edit a Subject record, Add Visits, and Review details about the progress of the Subject.
The Subject Visit and History details contain information about Prior and Upcoming Visits, Data Collected, and Kits Dispensed.
Add New Subject – Registration, Pre-Screen, Screening
Follow the steps below to Add a Subject record.
After creating the record, you can begin to process a Visit.
Click this link [Process Subject Visit in RTSM] to view details for additional information.
Click this link [Details for the Subject Grid Options] to view a table with details about the options in the RTSM Subjects grid.
- Click the Sites option at the top of the screen.
- Click a link in the grid to select a Site.
- Click the Subjects option from the menu (left side of screen).
- The system navigates to the Subjects screen.
- Click the + Add New Subject button.
- When your environment configuration contains Pre-Screen [subject] option AND Allow Skipping option a + Add New Subject (Skip Pre-Screen) button also displays and may be used as appropriate.
- The Confirm Subject Visit Date dialog box displays the current date.
- Based on the configuration of your environment, you may see a select date option; use the calendar to select a date; by default, the current date is selected and displays.
- Click the Next button to confirm the date and continue.
- Populate required and optional fields in the dialog box when configured for your environment. The content that displays in the dialog box is based on the configuration for your study and may present information in multiple dialog boxes.
- Click the Next or OK button to continue.
- Optionally, click the Back button to return to the previous screen and make changes –OR– click the Cancel button to abort the process.
- Click the Done button to complete the process.

Select a Site
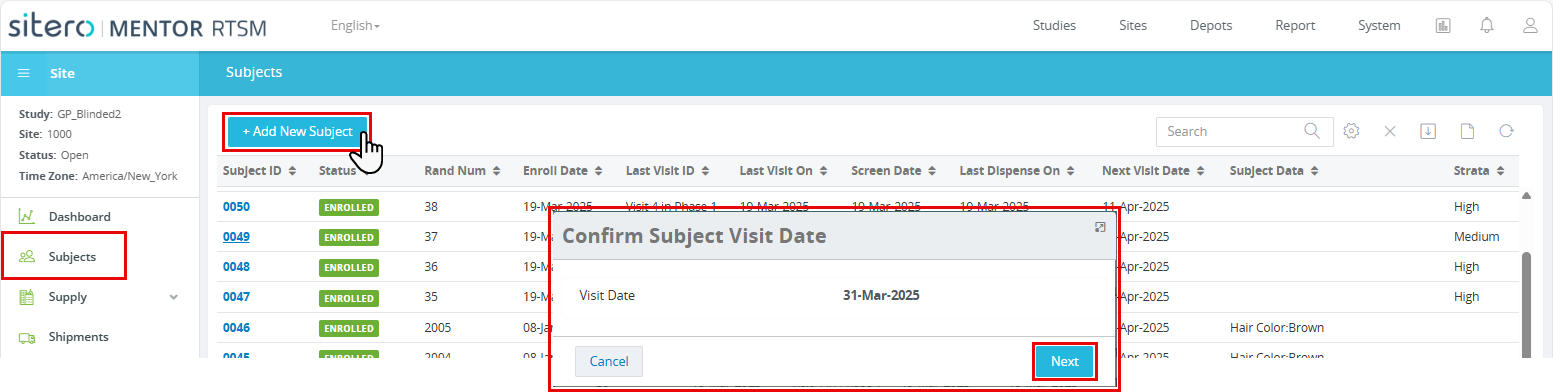
Screening Example
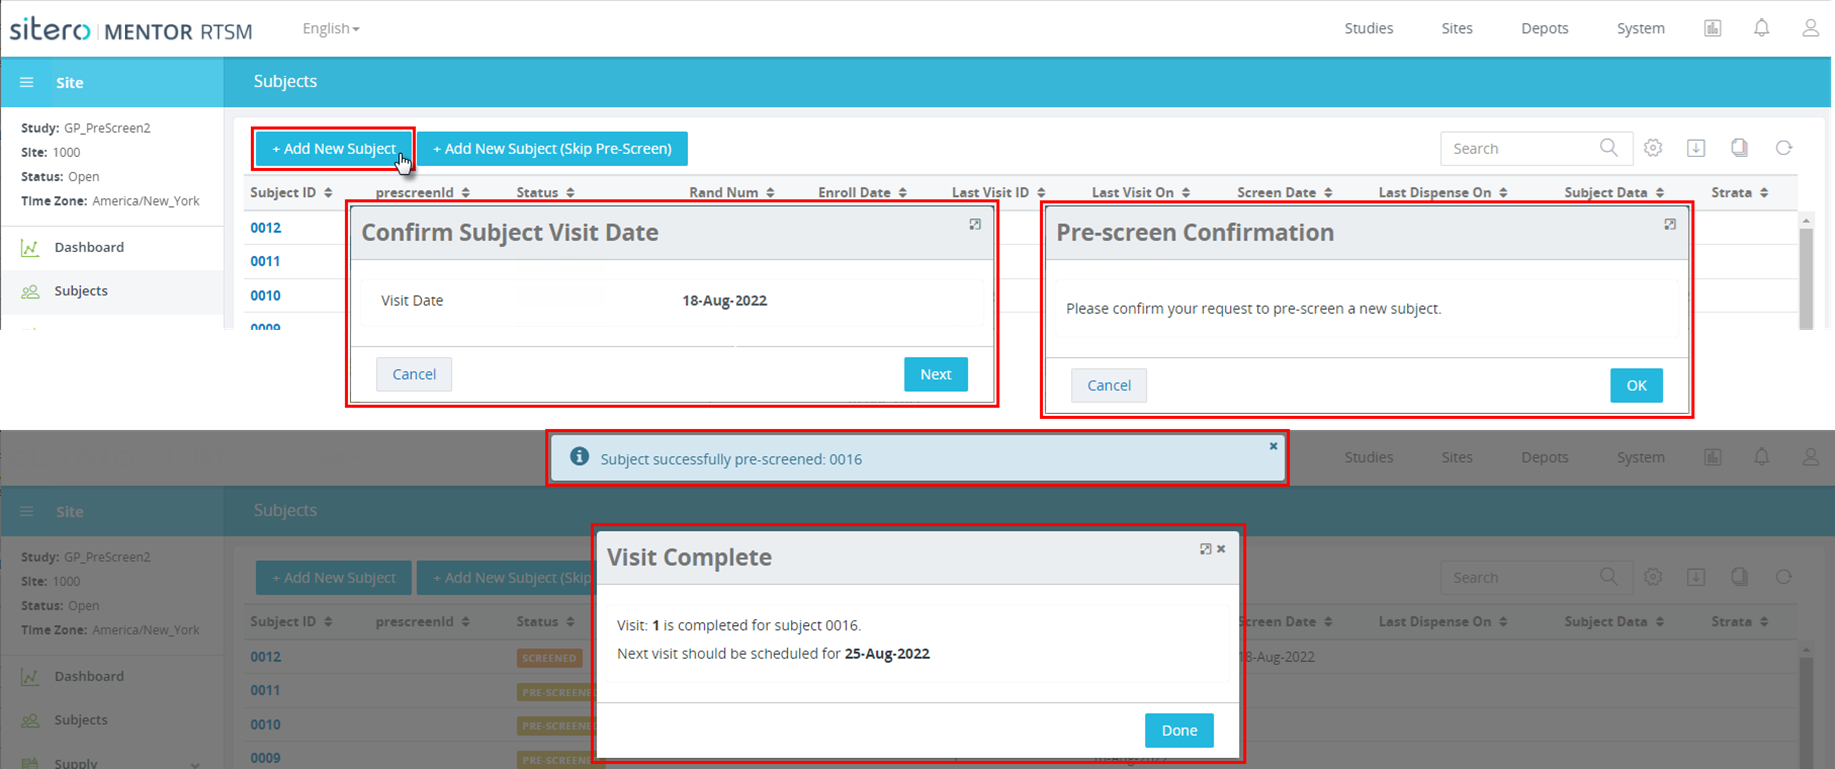
Pre-Screening Example

Review Subject Detail
- Click the Sites option at the top of the screen.
- Click a link in the grid to select a study.
- Click the Subjects option from the menu (left side of screen).
- A grid displays information for all subjects associated with the site.
- Click a link in the Subject ID/Screen ID column to select a subject record.
- Use the buttons (at the top of the screen) to initiate subject actions, replace a kit or account for dispensed product.
- The buttons display based on your roles/permissions in the system and the Status of the Subject record you select/open.
- The Main screen displays details for the subject in three (3) distinct tiles:
- Subject/Screen ID <#>
- Subject Summary
- High-level information for the subject displays in this tile, e.g., current status, rand number, screen date.
- Visit Schedule (upcoming and prior visits), Data Collected, Kits Dispensed
- Includes a tab for each of the following categories:
- Upcoming Visits
- Prior Visits
- Data Collected
- Kits Dispensed
- Click on a Tab to display details about the subject’s actions in the study.
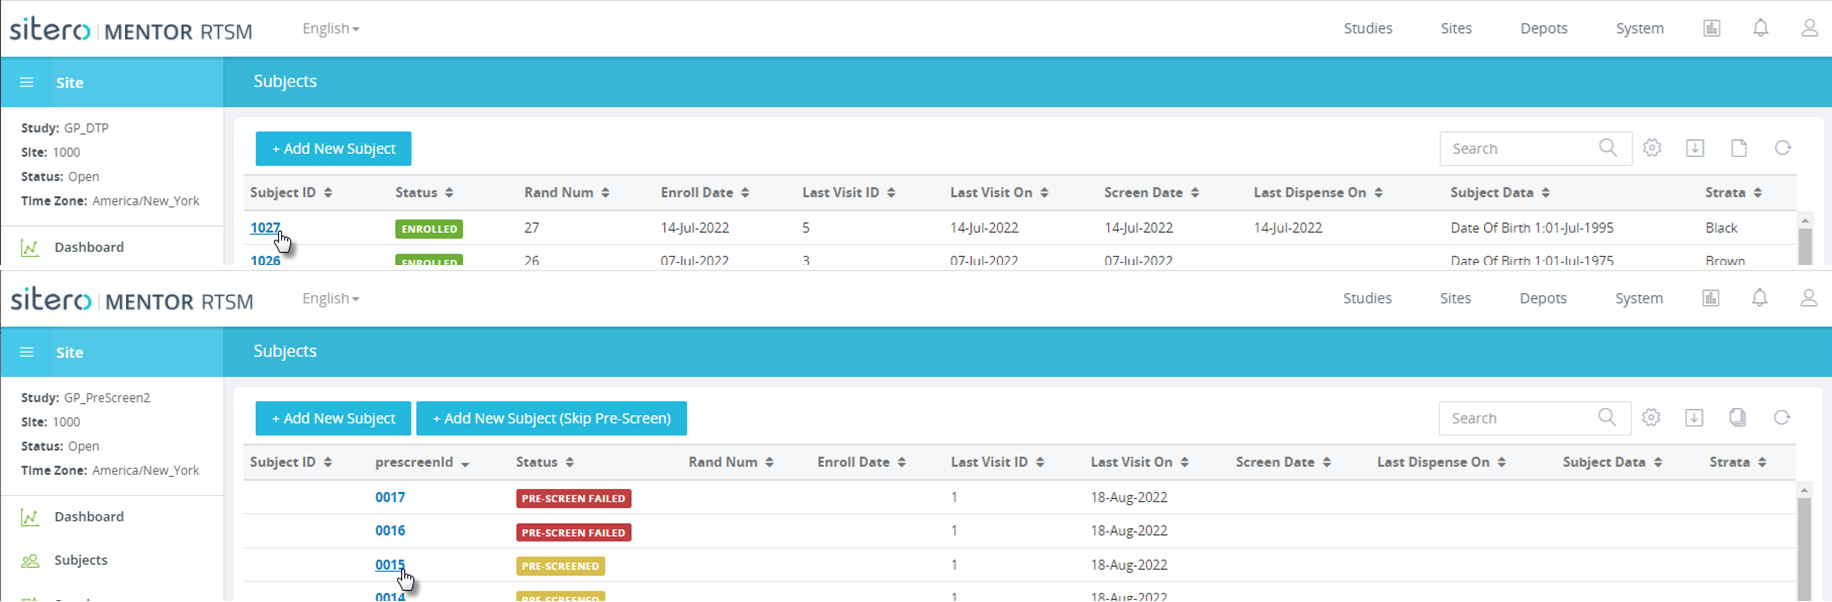
Select a Subject Record
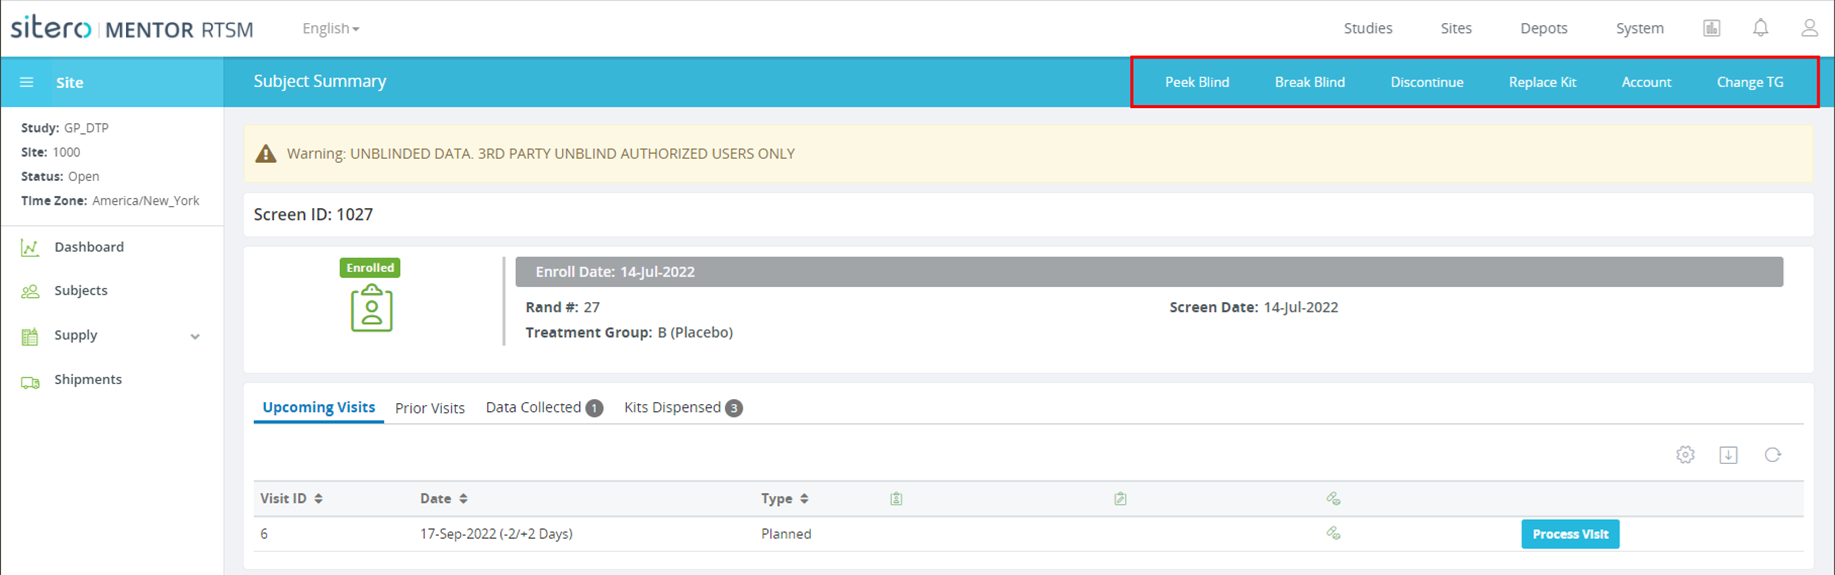
Subject Summary Example 1
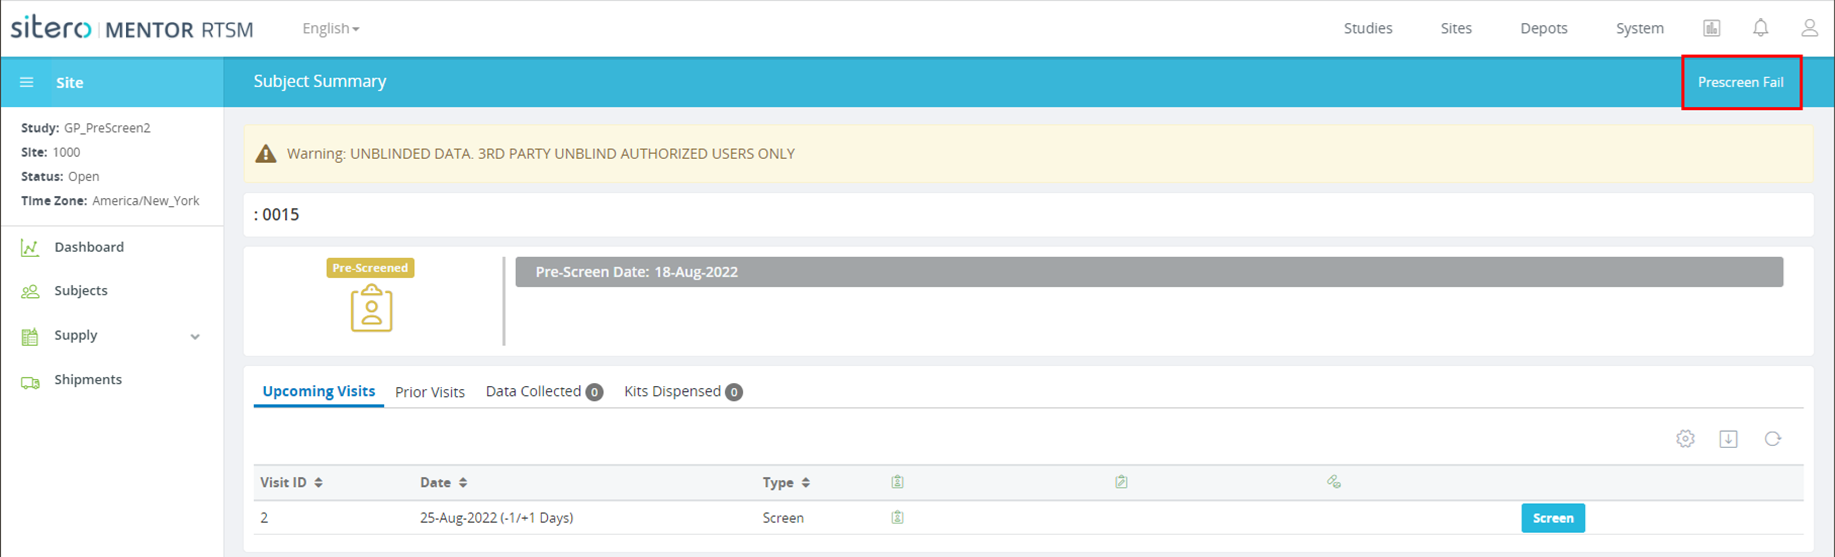
Subject Summary Example 2
Subject Visit and History Details
Click a link to select a subject record and display the Subject Summary screen.
This screen displays information by category in tabs for Upcoming Visits, Prior Visits, Data Collected, and Kits Dispensed.
Refer to sections below for details about each tabbed section.
Click a link in the Subject ID column of the grid to begin. Details display on the Subject Summary screen.
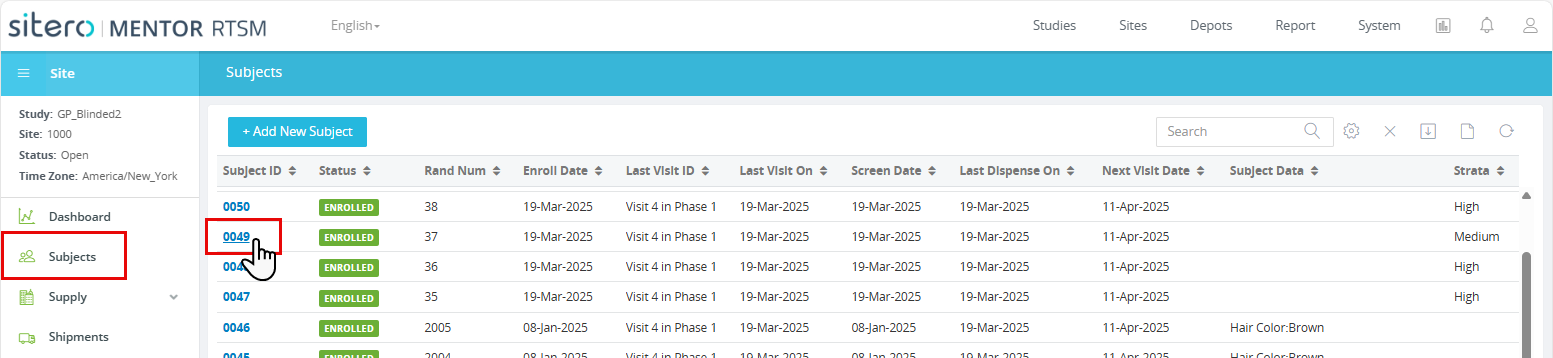
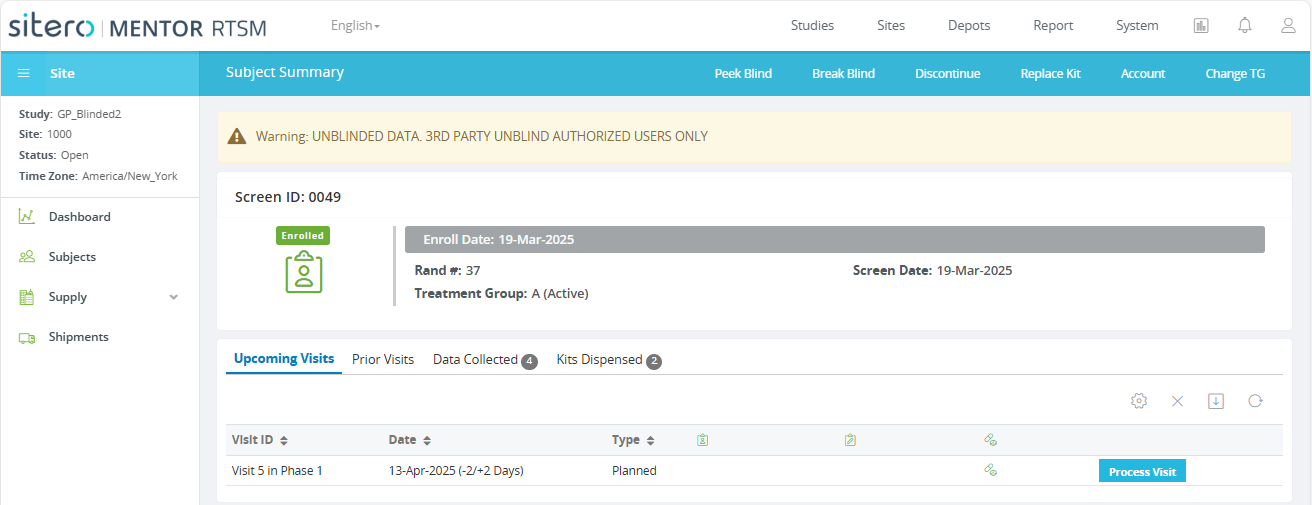
Select a Subject Record to Display the Subject Summary Screen
Upcoming Visits
The Upcoming Visit tab displays a grid showing the expected visit dates and allowed window (details may display next to or below the date), based on the study protocol, for all future visits. This tile may also contain information about the actions (e.g., enroll, drug dispense, data collect, final visit) that are scheduled to occur for visits.
Click a link in the Subject ID column of the grid to begin.
Click the Upcoming Visits tab to display a grid listing visit(s) scheduled for the subject.

Upcoming Visits Screen Example
Prior Visits
The Prior Visits tab displays information for each visit step that occurred, along with any relevant information about that step. Click a link to open a dialog box. Click a button to access additional detail and options.
- Click a link in the Subject ID column of the grid to begin.
- Click to select the Prior Visits tab to display a grid listing completed visit(s) for the subject.
- A grid displays all transactions for review.
- Click the regenerate report button (square with grid), as required.
- Click the view details button (pencil icon) to display the Visit <ID> Details dialog box. The button displays when your system configuration/permissions allow access.
- Use the calendar to change a date, as required.
- Optionally, click the open button (right side of the “type” detail) to display additional details.
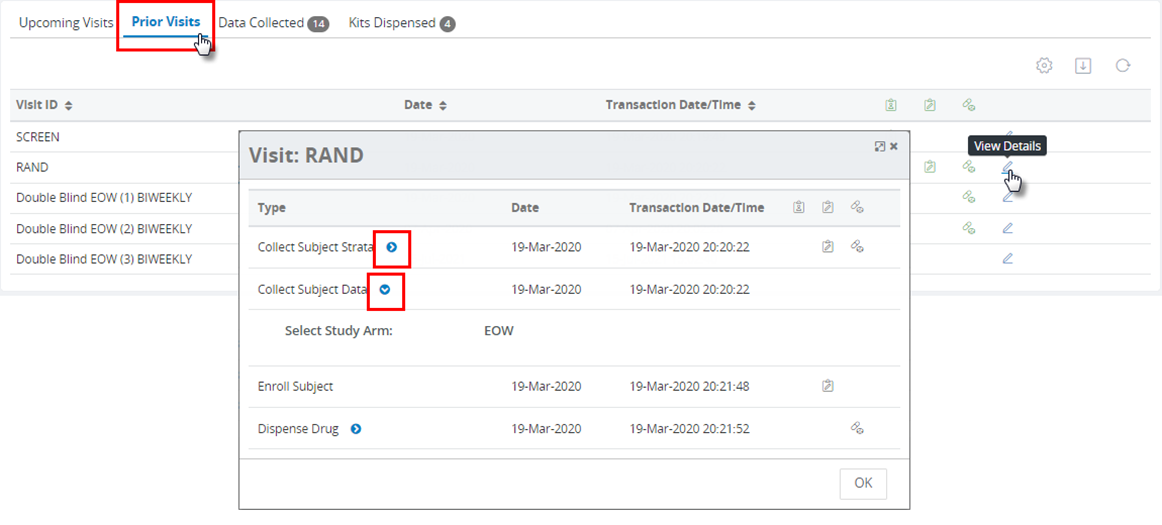
Prior Visits Screen Example
Data Collected
Click a link in the Subject ID column of the grid to begin. Information collected for the subject displays in grid format.
Click to select the Data Collected tab. This tab displays details about data collected for the subject during visit processing. The system displays the subject custom data per visit.
The edit button (pencil icon) displays when your system configuration/permissions allow edits.
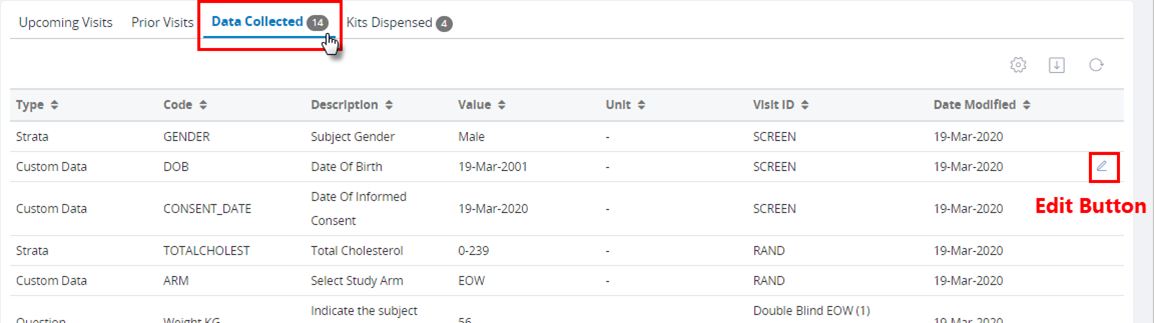
Data Collected Screen Example
Kits Dispensed
Click a link in the Subject ID column of the grid to begin.
Click to select the Kits Dispensed tab. Information related to any kits dispensed to the subject displays in grid format.

Kits Dispensed Screen Example
