Search The Knowledge Base
Add and Manage Study Sites in Mentor RTSM
A permissioned user can add a Study Site to the selected environment and can edit and delete site record plus add and manage Site Groups.
- Follow the steps in the sections below to:
- Add (or Import) a Site,
- Edit and Manage details for the Site,
- Remove a Site record
To begin:
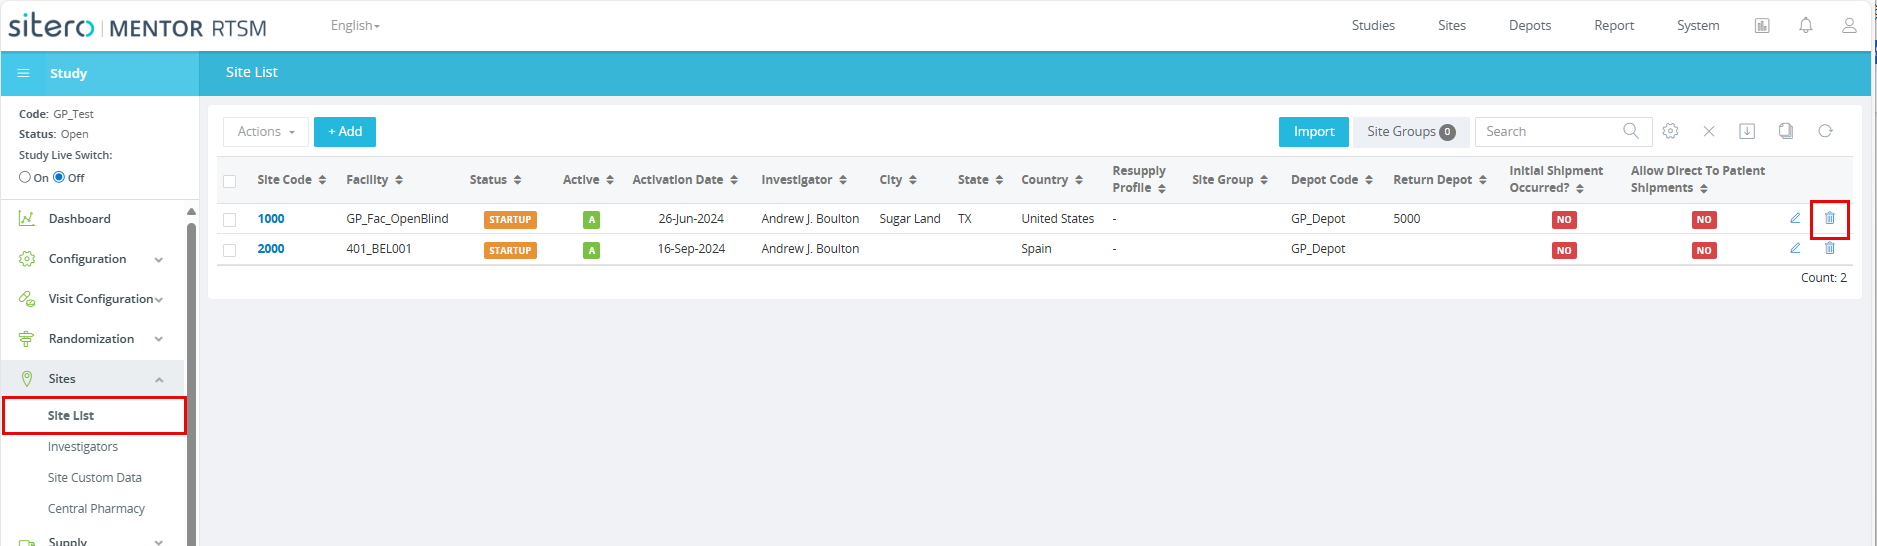
- Log in to the system and click the Studies button at the top of the screen (may be selected by default).
- Click a link in the Name column to select a Study.
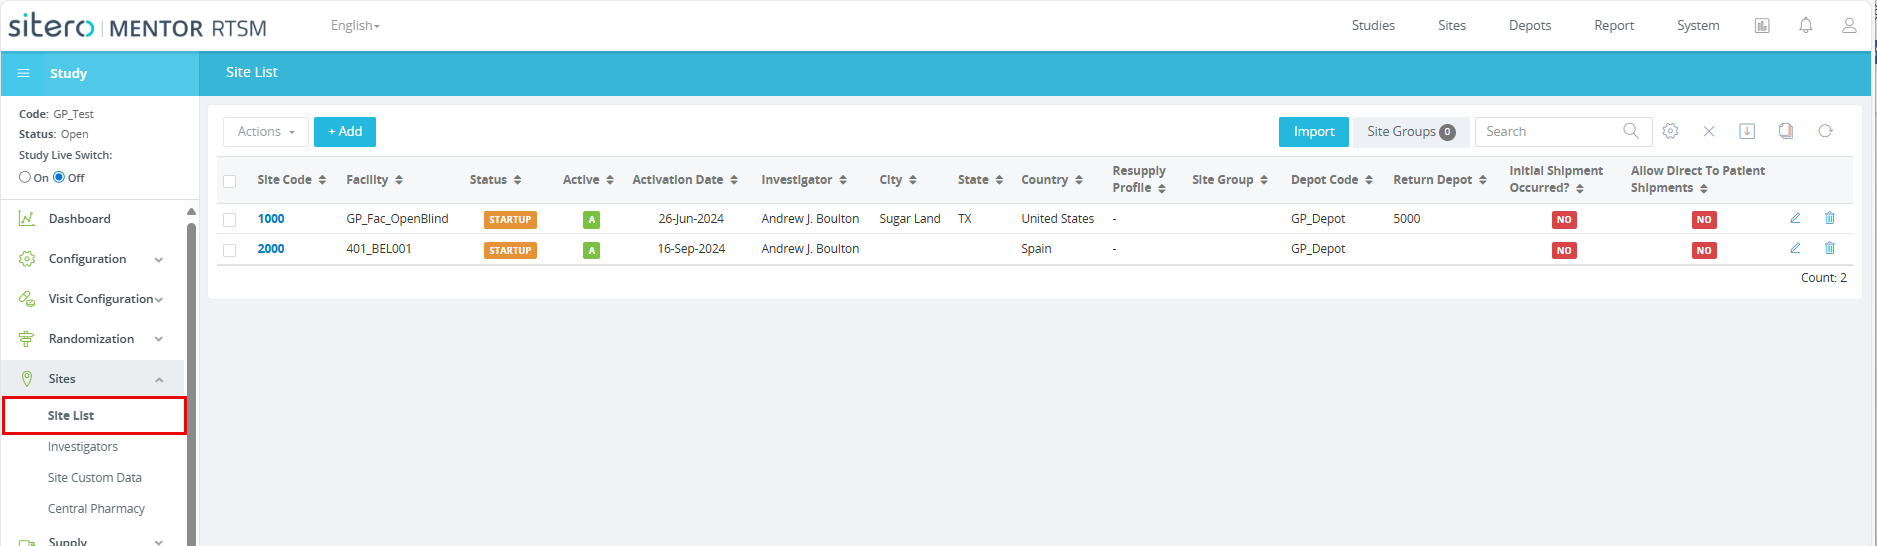
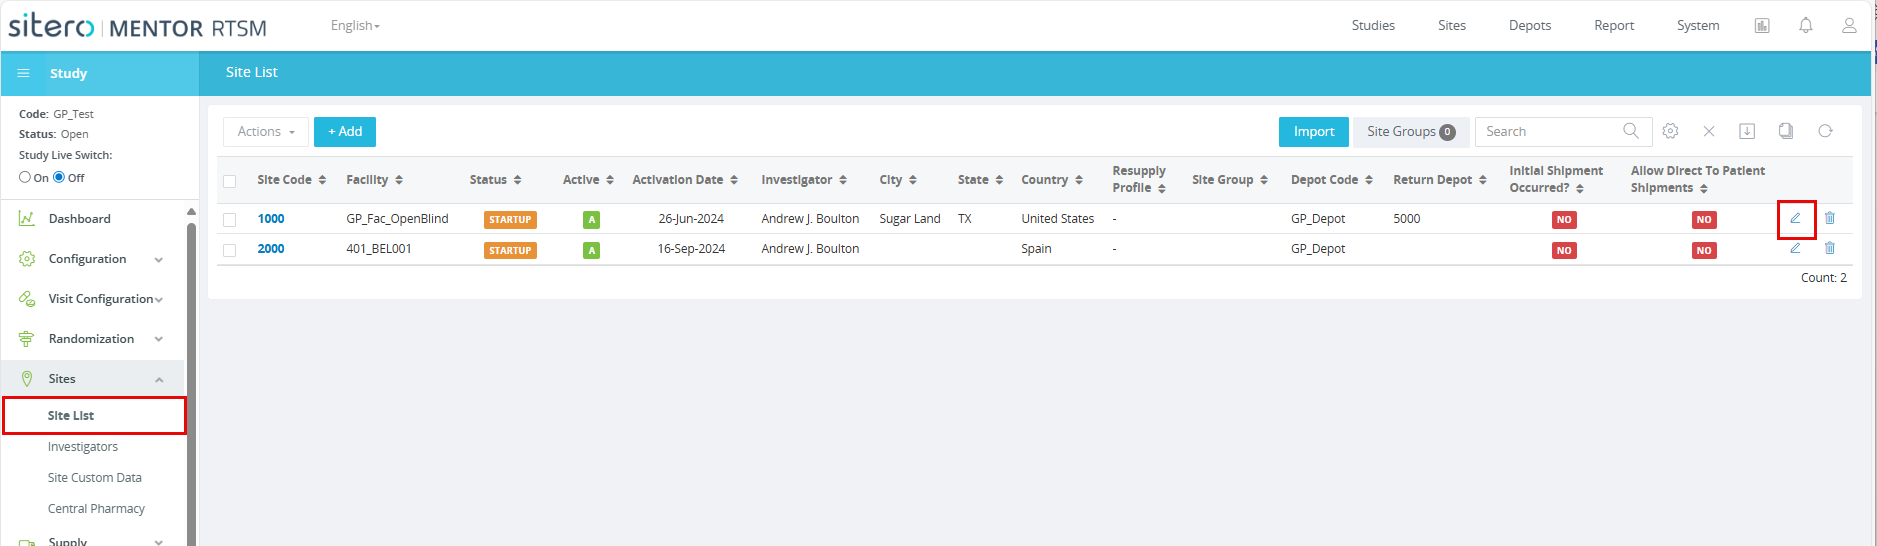
- Click on Sites (left side menu) to display options.
- Click to select Site List.
- The Site List screen displays.
- Follow the steps in the sections below to Add or Import a new Site, Edit and Manage Site details, and Delete a Site record in this system.

Add New Study Site
Follow steps 1-5 at the top of this article to begin, then follow the steps below to continue.
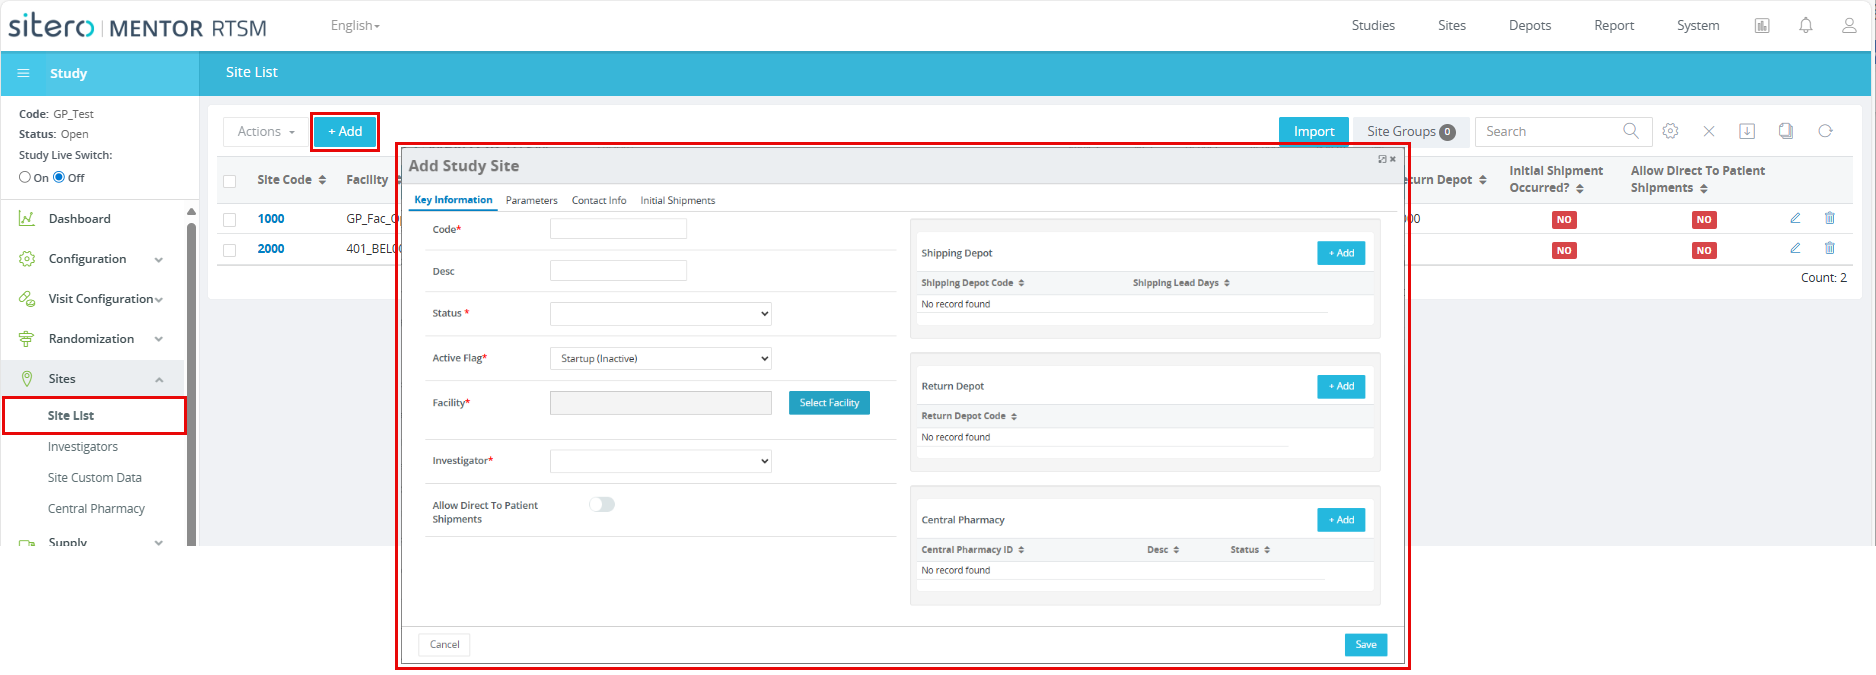
- Click the + Add button.
- The Add Study Site dialog box displays. Populate required* and optional fields.
- Notice that there are four (4) tab for adding Study Site Information; the Key Information tab is selected by default.
- Click to select the other tabs (Parameters, Contact Info, Initial Shipments) and populate information for the tabs.
- Click the Select Facility button and click in a radio button to select an option in the grid.
Optionally, click the + Add button and populate required and optional fields.
Click the Save button to complete the process.
The new Facility is selected by default, but a different facility can be selected. - Click the + Add button and populate information for the Shipping Depot, Return Depot, and Central Pharmacy in the tiles that displays to the right side of dialog box on the Key Information tab.
Click the Add button in the tile to complete this process.
Remember, you can assign only one (1) Central Pharmacy record to a Site. - Click the Save button in the dialog box to complete the process. The Save button is not active until all required information is included; an on-screen message may display missing information detail.
Import Study Site
Follow steps 1-5 at the top of this article to begin, then follow the steps below to continue.
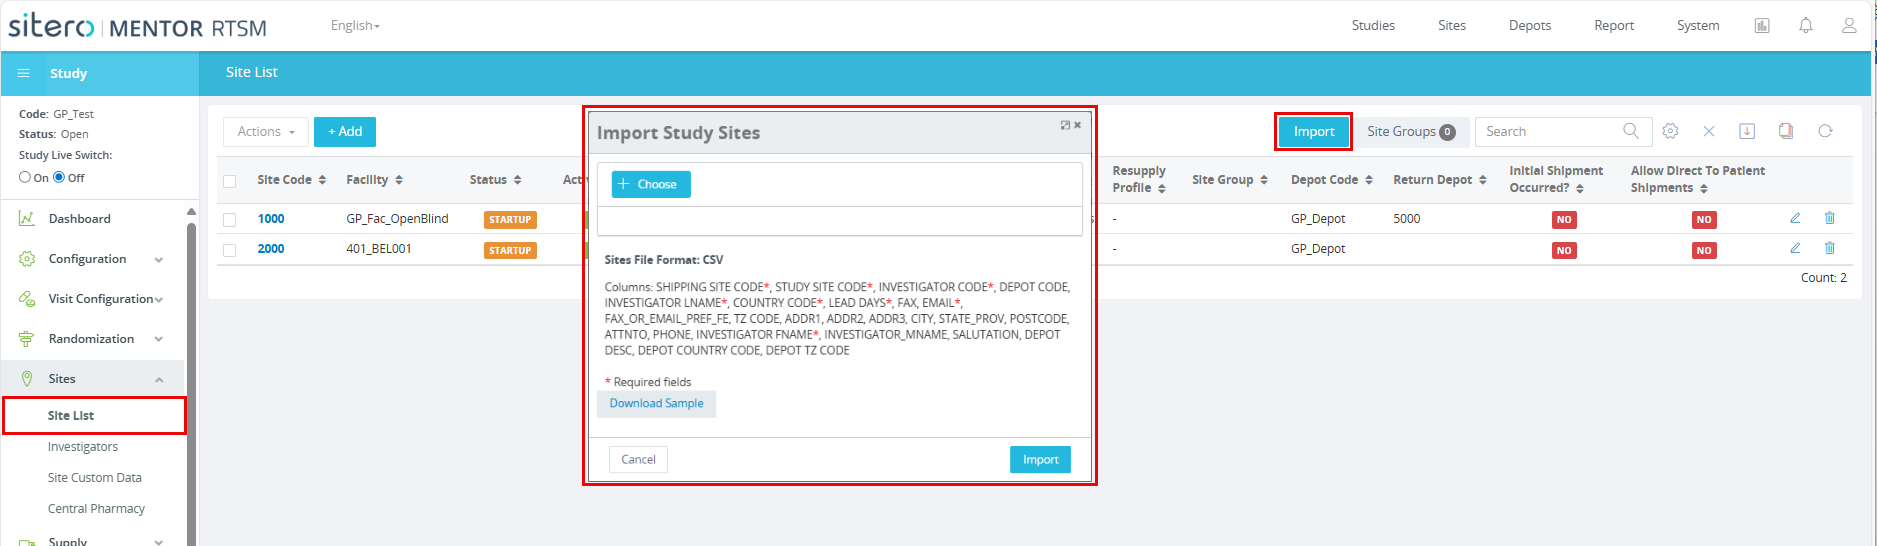
- Click the Import button.
- The Import Study Sites dialog box displays.
- Notice the Download Sample and + Choose buttons that display in the dialog box.
- Optionally, click to select the Download Sample button and populate information in the file.
- This is an optional step. If your Import file is ready, proceed to Step 4.
- The sample file that you download is a *.csv file (comma-separated value).
- Click the + Choose button to select the file to import.
- Follow the on-screen prompts to locate and select the file.
- The file name displays under the + Choose button.
- Click the Import button to complete the process.
Edit Study Site
Follow steps 1-5 at the top of this article to begin, then follow the steps below to continue.
- Click the edit button (pencil icon, located to the far-right column of the grid) OR click the link in the Site Code column to edit details for the record in that row.
- Make changes, as required.
- Click the Save button to complete the process.
- Optionally, refer to the Apply Action to Multiple Records article for details about applying a change to multiple records via the Actions menu.
Delete Study Site
Follow steps 1-5 at the top of this article to begin, then follow the steps below to continue.
- Click the delete button (trashcan icon, located to the far-right column of the grid) in the applicable row.
- A dialog box displays, allowing you to confirm your selection.
- Click the Yes button to remove the record. Optionally, click the No button to close the dialog box and keep the record.