Study Supply in Mentor RTSM
Log in to the system and select a study.
Click to open the Supply menu (tile on left side) to display Supply configuration categories.
Click on a category to make a selection.
A grid display for the selected category.
Use the menus, buttons, and options to add and manage settings for each category.
Temperature Excursions
- The features and functions on this screen allow you view and add a Temperature Excursion event at a specific location.
- Use the Location Type* drop-down menu to select the location of the event.
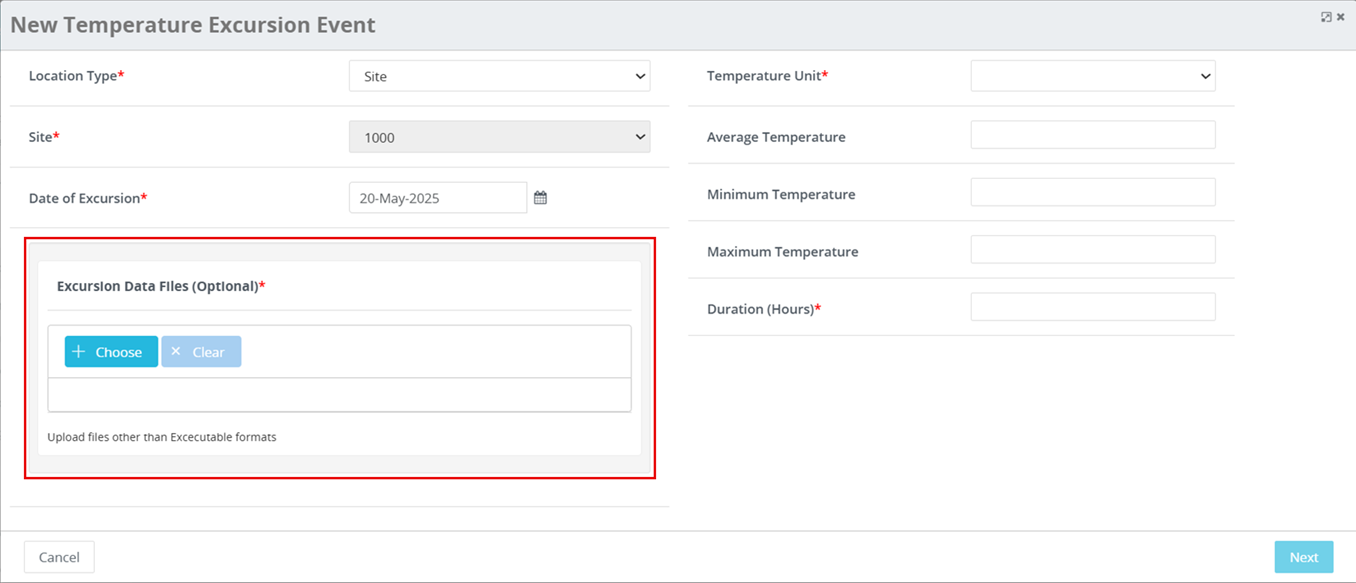
- Populate required and optional fields with event details.
- The system validates the entered information and if all are valid, and auto-calculation is not checked, the kits are marked as quarantined due to temperature excursion.
- Click the Temp. Excursions button from the main menu to begin.


- The Temperature Excursions screen displays. Notice that two (2) tab categories are available for selection.
- Temp Excursion (this option may be selected by default)
- Quarantined Kits

- When reporting a temperature excursion at a Site, a permissioned user may attach a file.
Reject or Release Quarantined Kits
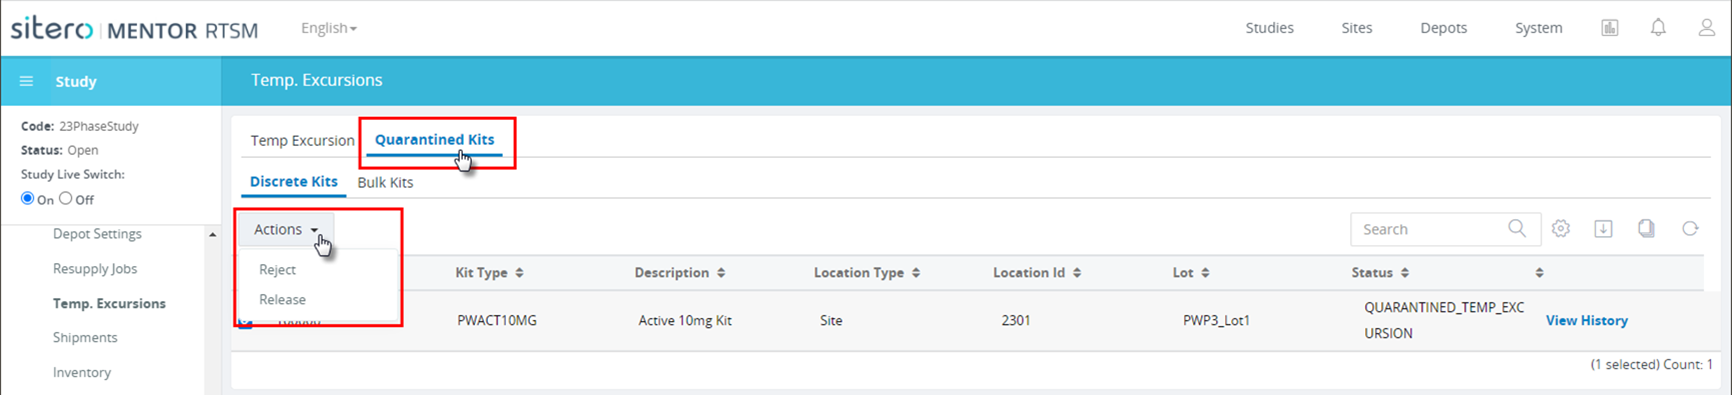
- Click on the Quarantined Kits tab.
- Click in one (1) or more check boxes to select kits to receive the same status change.
- Open the Actions menu.
- Click to select an option.
- Follow the on-screen prompts that display.
- Click the Yes or Save button to complete the action.
Shipments
Click the Shipments button under the Supply menu to display the Shipments screen.
The Shipments screen displays a grid, listing all shipments created in your system.
Use the scrollbar below the grid as needed to
display additional information.
- Use the filter options to change the results that display.
- Use the search and filter options to locate a kit in a shipment.
- Click the + Add button to create a new shipment record.
- Click a link in the Shipment ID column to display a dialog box with additional information for your selection.

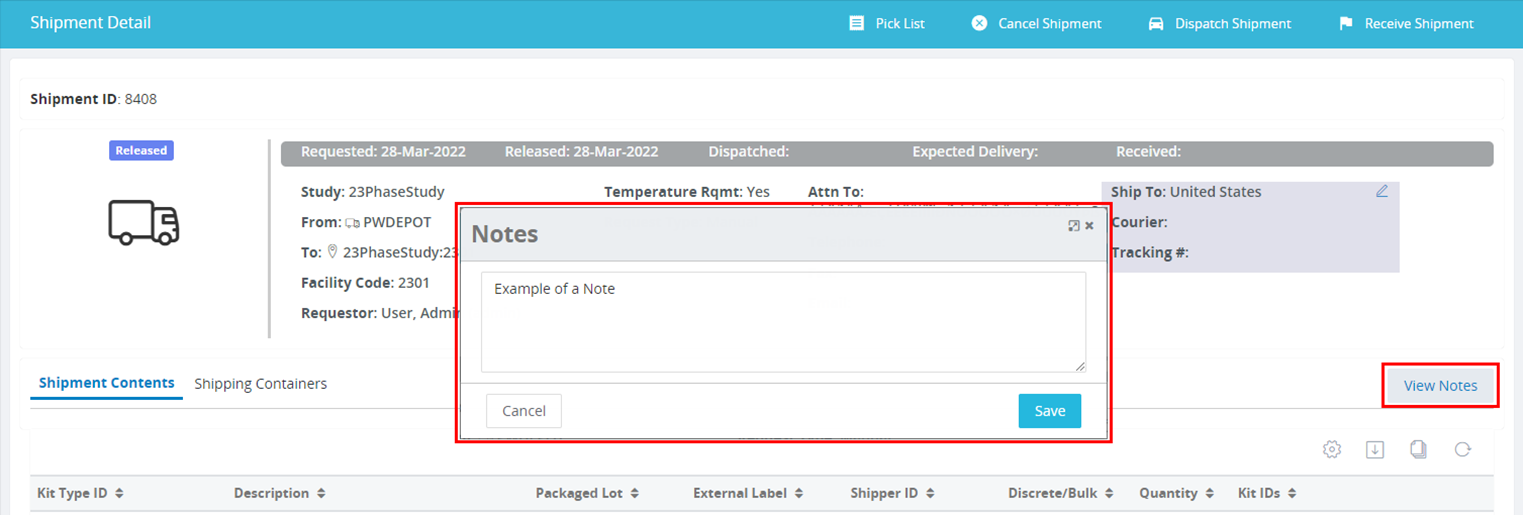
- After selecting a record, click the View Notes button in the Shipment ID tile to open the Notes dialog box.
- Review and add information as needed then click the Save button.
- Notes information is not included with the shipment; it is viewable only on this screen by permissioned users.
Inventory
- Click the Inventory button under the Supply menu to display the Inventory screen.
- The Inventory screen displays a grid, listing all inventory in your environment under the Discrete or Bulk tab.
- Navigate to the applicable tab, then follow the steps below.
- Click this link (Inventory Accountability Status Descriptions) to view a grid of status options for the Discrete grid in a new tab or browser window.
- Click in one (1) or more check boxes to select items to receive the same update.
- Open the Actions menu.
- Click to select an option.
- Follow the on-screen prompts that display.
- Click the Yes or Save button to complete the action.
Discrete (tab)
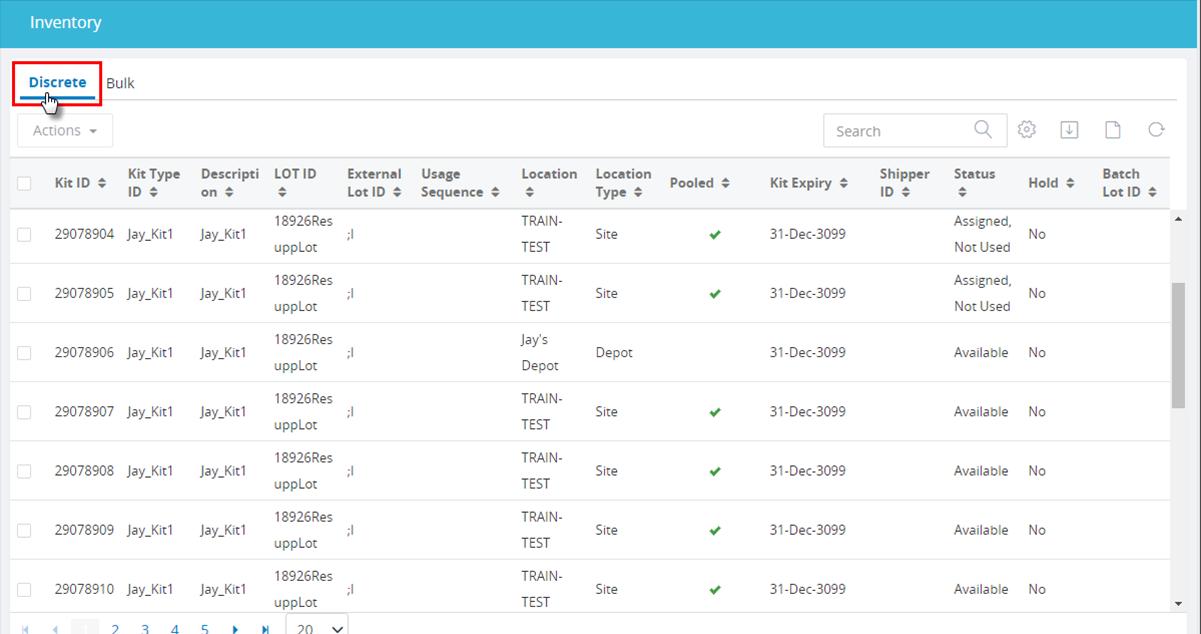
Remember: While the Discrete Inventory grid may display the Batch Lot ID column, this column is generally NOT used.
It only displays information when using the Import Lot function.
Sitero recommends that you download a clean version of the file “Bioclinica_IRT_Sample_LotList.csv” which does not contain the Batch Lot ID field.
Populating your information in the most recent *.csv file will prevent you from inadvertently populating this field in an older version.
Bulk (tab)
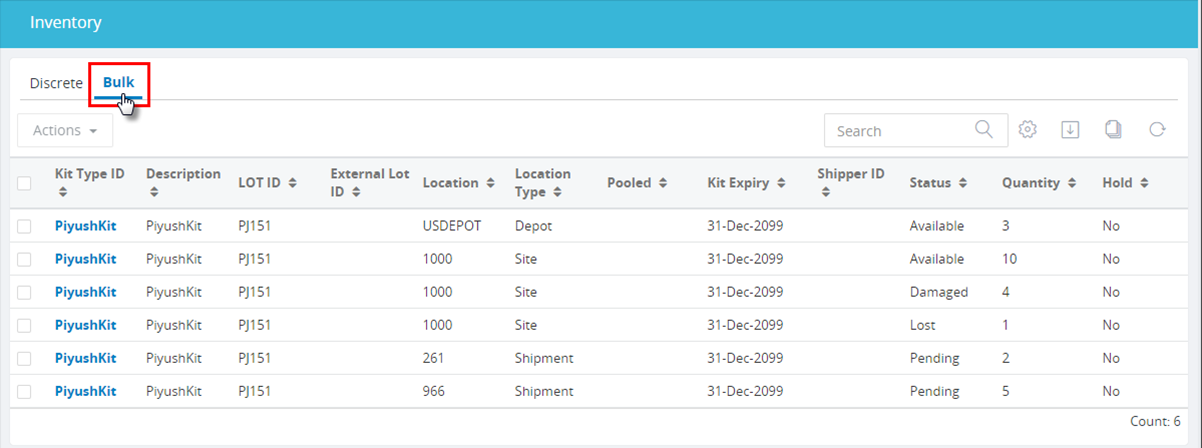
Use the system options and Actions menu as required.
Click a link in the ID column to display details for a record.
Locally Sourced Lots
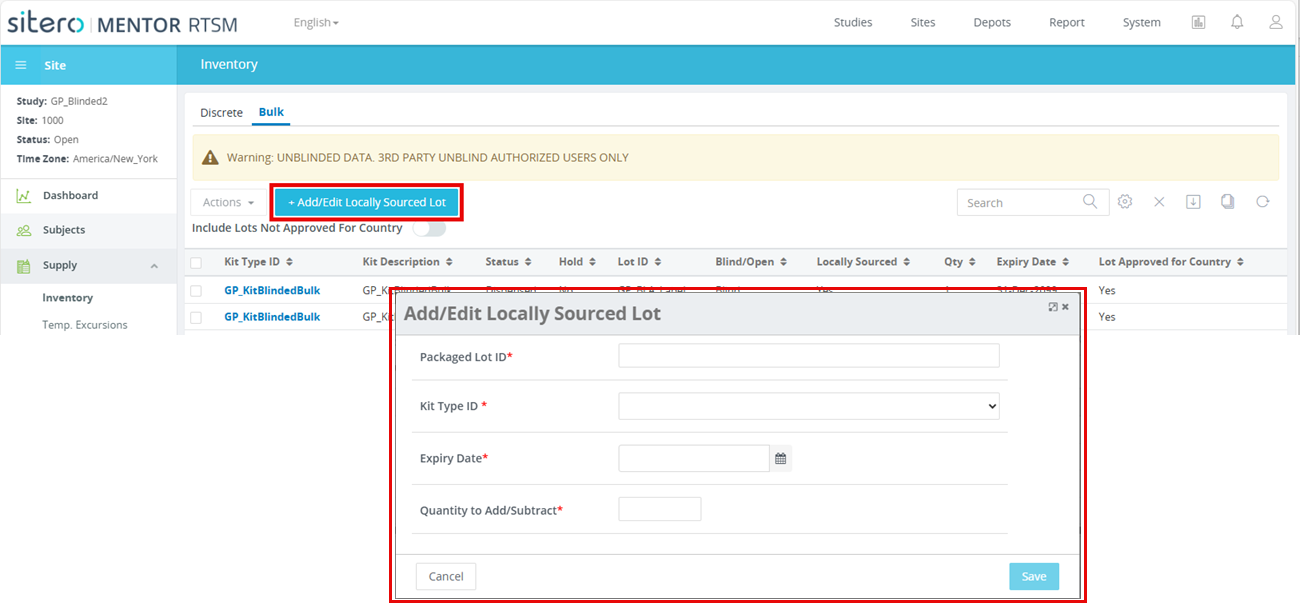
- Locally Sourced Lots can be added or updated by a permissioned User.
- When the Lot already exists in the environment, the information displays in the dialog box.
- A permissioned User can Add or Delete Kits from Lot.
- To Add Quantity, enter the value to be added (e.g., 20).
- To Subtract from the Quantity, enter a minus sign before the quantity (e.g., -20).