Manage Subject in Mentor Fusion
A View into Your Subject Data: Managing Subjects
The Manage Subjects tab is your central area for all subject data entry. The icon-driven state of data entry provides a quick visual guide on a visit-by-visit basis.

Understanding the Manage Subjects Icons
The icons provide details about the data entry status of each page of each subject record. Hover over each icon in the system for a full definition. Refer to the table below for summary information.

Manage Subject Pages — Overview
Refer to the image and table below for details about the options and icons on the Manage Subject screens.
Remember: You can quickly navigate to any visit in the study by clicking on the applicable icon.
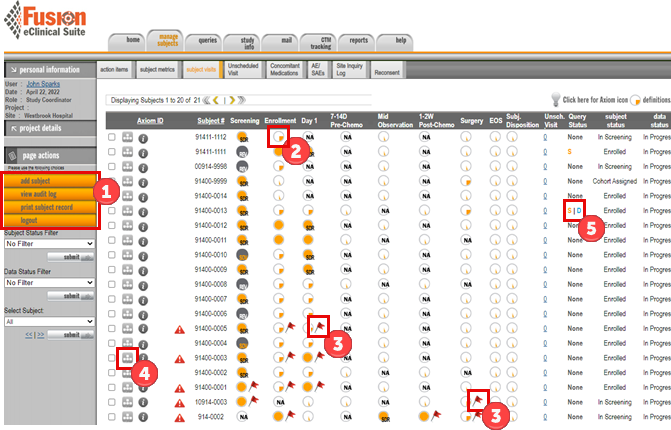
| Subject Actions — Screen Location | Function – Description |
| 1 – Page Actions | Allows you to execute tasks and dynamically adapts to the page you are in. |
| 2 – Accessing Visits / Forms | Click on the Pie icon related to the Visit that you wish to edit or view. |
| 3 – Stale Data Notification | This icon informs that you have not accessed the data entry content in an expected amount of time (days) – expected time is based on the study specifications. Please ensure to continue regular / timely data entry. |
| 4 – All Pending Tasks Per Subject | Displays a list of everything you need to complete on a per subject basis. |
| 5 – Query Status / Notification | Shows if there are any Queries for this subject |
Add a new Subject in Mentor Fusion
Data entry begins with adding a subject record in Fusion.
Follow the steps below to add a new subject to the Study.
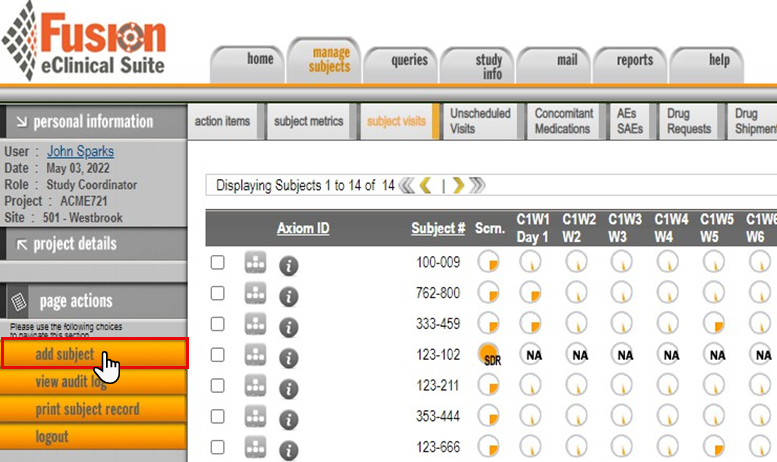
- Click add subject under page actions.


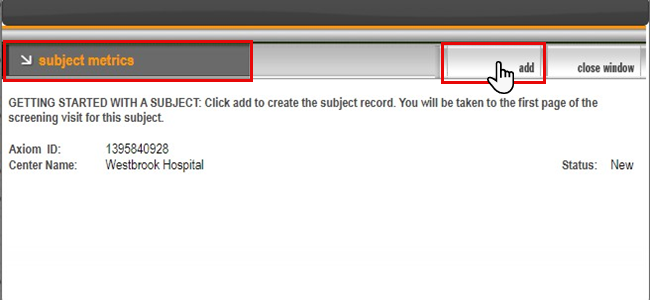
- A subject metrics screen displays.
- Click the add button.

- The system navigates to the first page of the Visit for Data Entry.


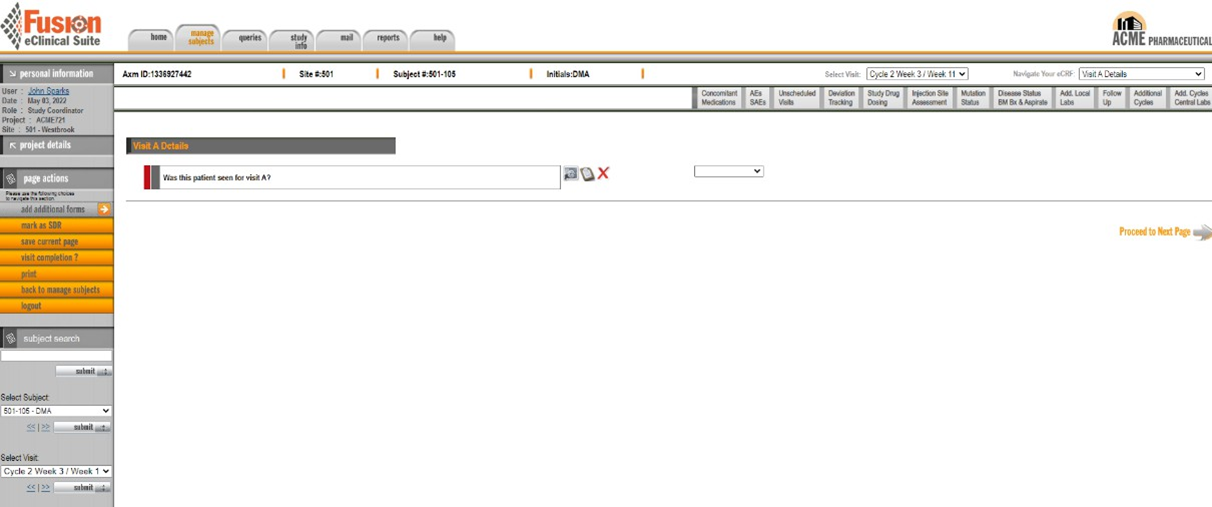
Navigating A Case Report Form (CRF) Page / Subject Record
The figure and table below provide details for using the Mentor Fusion options to navigate a CRF (case report form).
Remember: You can use the mouse or the tab key to move from field to field quickly and easily.
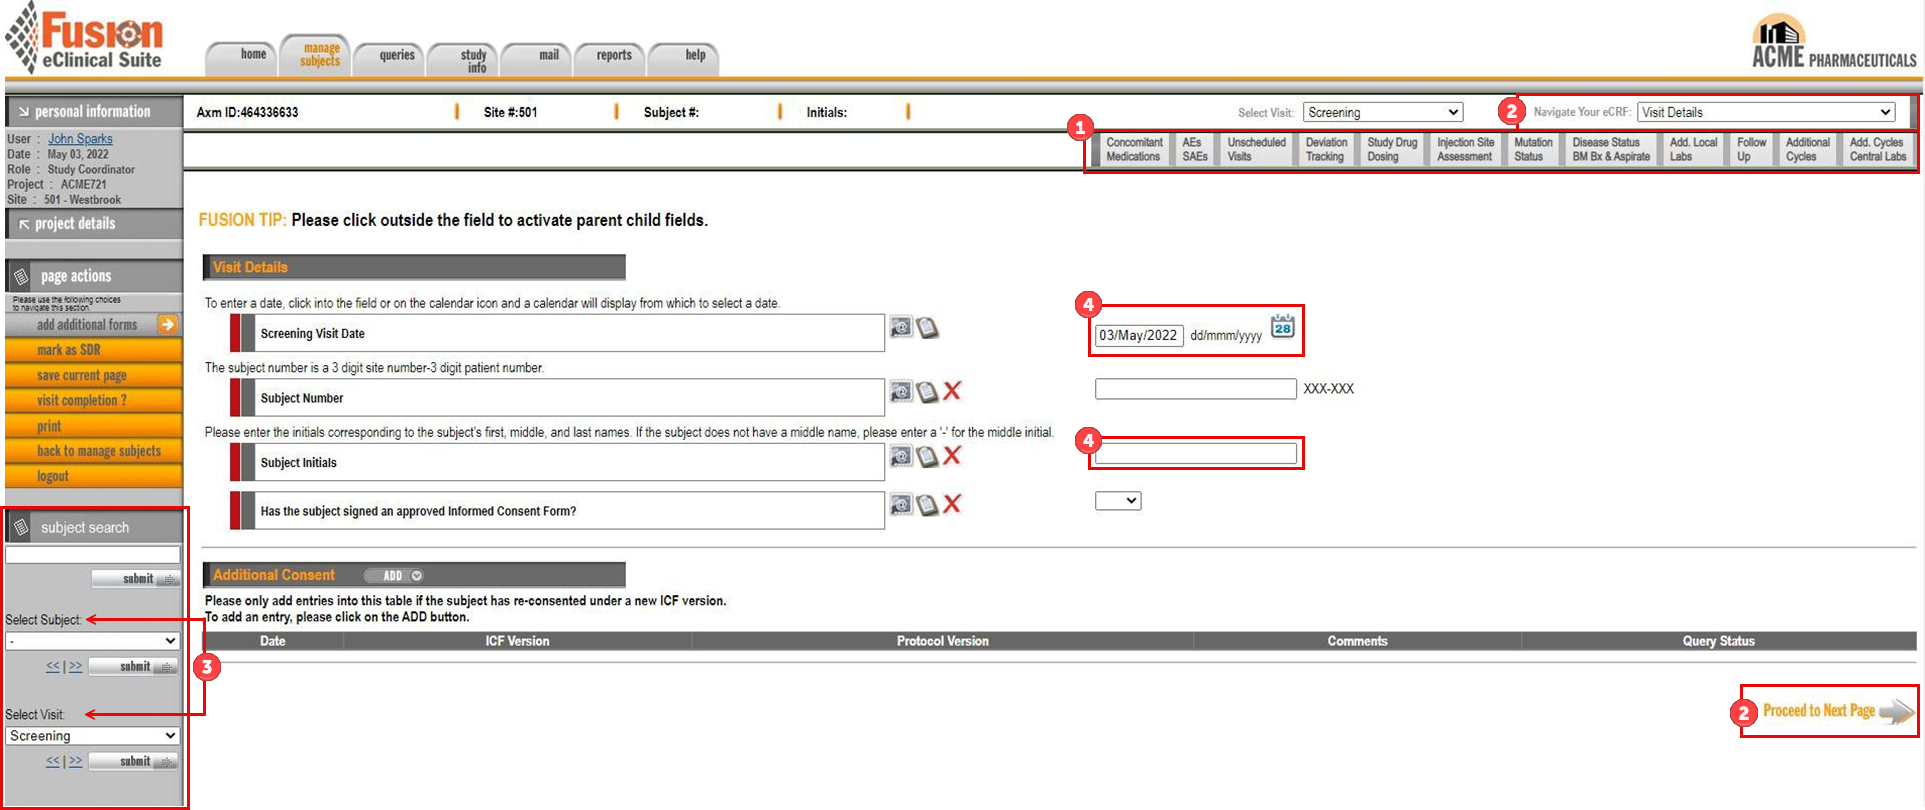
| CRF Actions — Screen Location | Description |
| 1 – Access Common Forms | Use these buttons to access regularly updated Case Report Form pages, such as concomitant medications, adverse events etc. |
| 2 – Move Between Case Report Form Screens / Pages | Expand the drop-down menu to navigate between various pages. Alternatively, you may use the Save and proceed to next page button (located at the bottom right of the screen). |
| 3 – Jump to a Specific Subject / Visit | Quickly navigate to any Subject ID/Visit via the Subject Search tile. In the subject search tile, open the Select Subject OR Select Visit drop-down menu, click an option to select and click the submit button. The results display on the main screen. |
| 4 – Enter Data | Fill in each field by using the drop-down menus, or by selecting dates, entering text or numbers as required based on the question. |
Understanding Page Actions
Refer to the figure and table below for location of Fusion features and a descripton of the available actions and their results.
Remember: Data is automatically saved when you navigate to a different page or module.
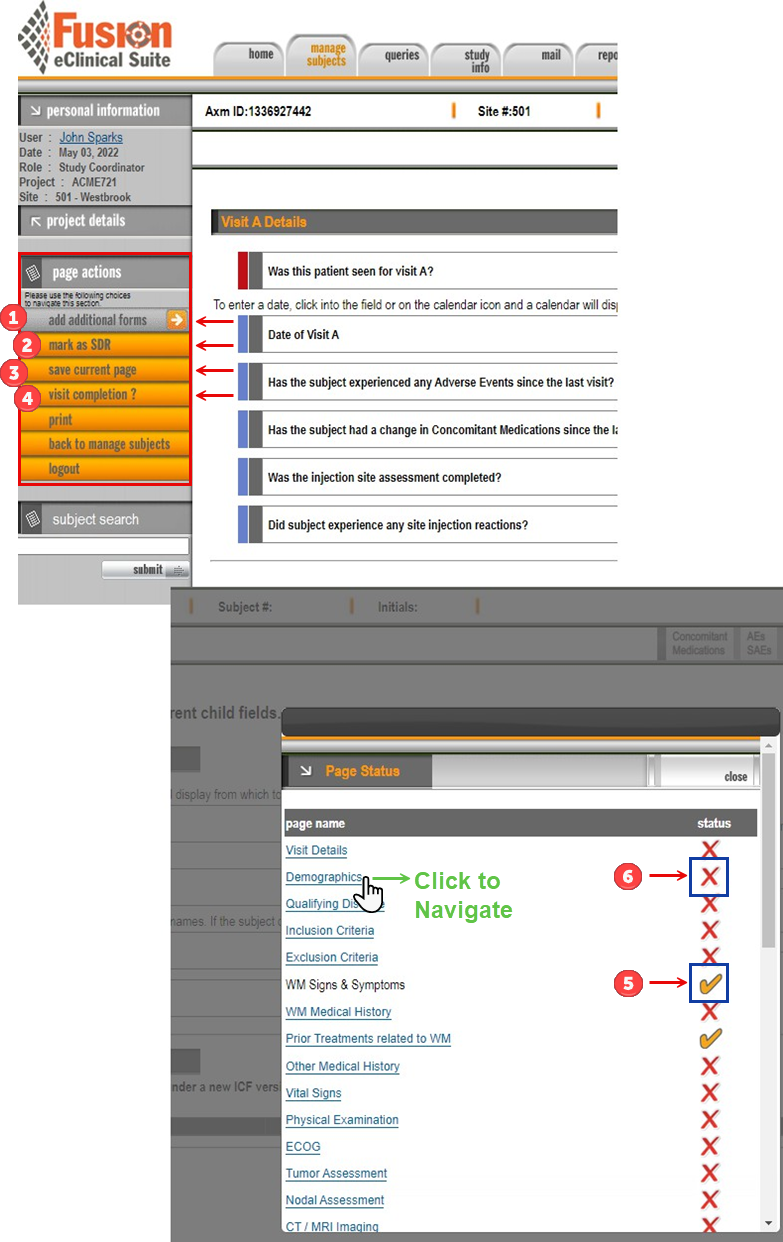
| Fusion Screen — Actions Location | Description of the Page Actions |
| 1 – Add Additional Forms | Use the GREY add additional forms page action to add common forms to the FORMS tab. Options include forms such as Con Meds, AEs, etc. |
| 2 – Mark as SDR | Click this button to mark your data entry as complete and ready for Review from the Monitor and Data Management team. |
| 3 – Save Current Page | Click the save current page option (under page actions) to save and process the data on current page. |
| 4 – Visit Completion | Review the status of each Case Report Form page for each visit by clicking visit completion under page actions. A screen displays (Visit Completion Window) that provides the completion status of each page. |
5 –  |
Indicates pages that are complete. |
6 –  |
Denotes incomplete pages. You may use the page name hyperlink to proceed to the applicable screen. |
Page Actions: Add Additional Forms Feature
Use the GREY add additional forms page action to add common forms to the FORMS tab without directly accessing it.
Options include forms such as Con Meds, AEs, etc.
Scroll down for additional information.
- In the page actions tile, hover on the add additional forms button to display a list of forms.
- Click an option to choose the applicable form from the pop-out.

- Enter form data.
- When saving the data, you have two options to choose from:
- Click the save button to save current form only.
- Click the save/add new button to retain the updates and continue adding forms.
OR
- Your common form will be saved to the appropriate section and is always accessible from the Common Forms tab.

- Optionally, you may click save entry / create new under page actions to create multiple common forms without returning to the common form summary screen.

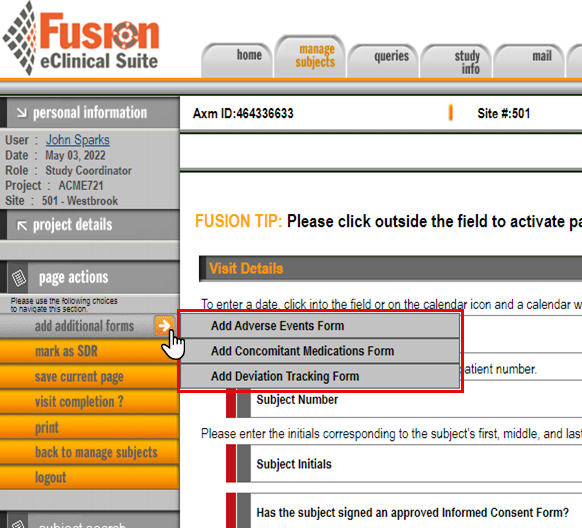
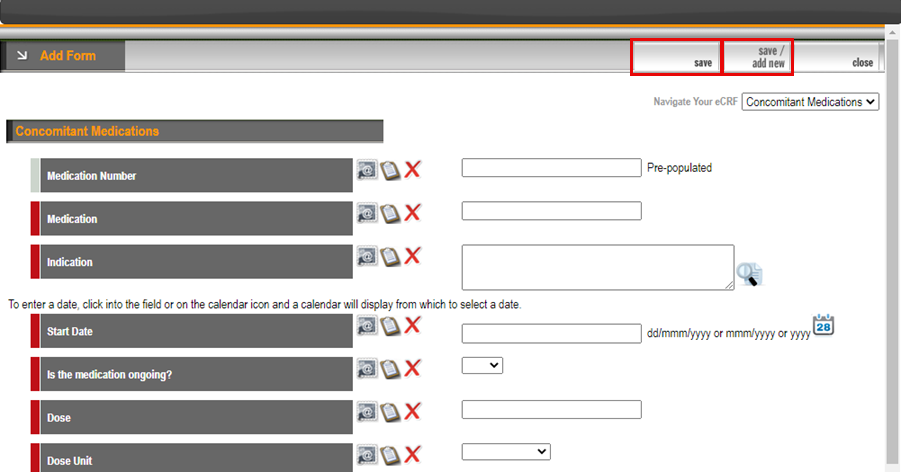

Add Common Forms
- Common forms are used for capturing data that is accessible at most/every visit, such as Con Meds, AEs, etc.
- Use the buttons to access regularly updated Case Report Form pages, such as concomitant medications, adverse events, etc.


Edit an Existing Common Form
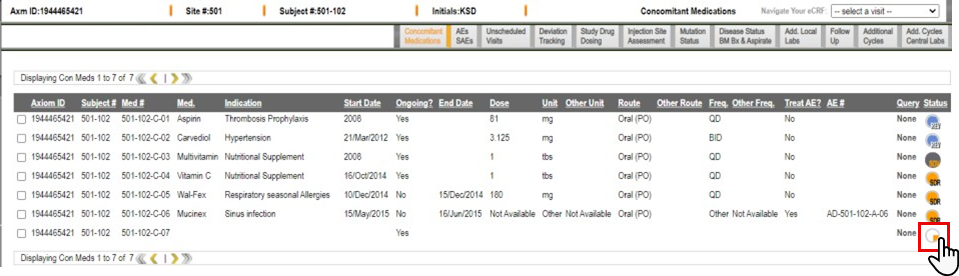
Click the Pie icon in a row to open an existing form to view and edit the information.