

Search The Knowledge Base
Actions Column in Mentor CTMS
Multiple Locations in Mentor CTMS provide an Actions Column that allows a permissioned user to Add, Edit, and Delete Configuration Options.
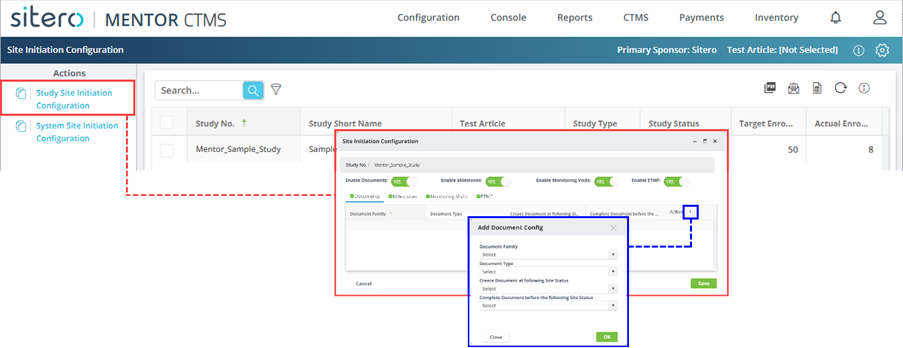

Add a Record via Actions Column Button
Follow the steps below to Add a Record.
- Log in to the system and navigate to the applicable screen.
- Click the [category] Configuration (e.g., Study Site Initiation Configuration) button in the Actions menu (left side panel).
- Some (not all) configuration screens require users to click in a check box to select a record prior to clicking the Configuration button.
- The dialog box displays options, often in tabbed categories.
- A tab may be selected by default (optionally, click to select a category).
- Use the buttons to enable and disable options for the category if applicable.
- When an option is turned off, no configuration options may be set since that category is disabled.
- Click the add button (plus sign) in the Actions column of the grid.
- The Add [category] Config dialog box displays.
- Populate required and optional fields (fields, check boxes, radio buttons, menu).
- Additional options may display based on the screen and selections made.
- Click the OK button to continue.
- Click the Save button to complete the process.
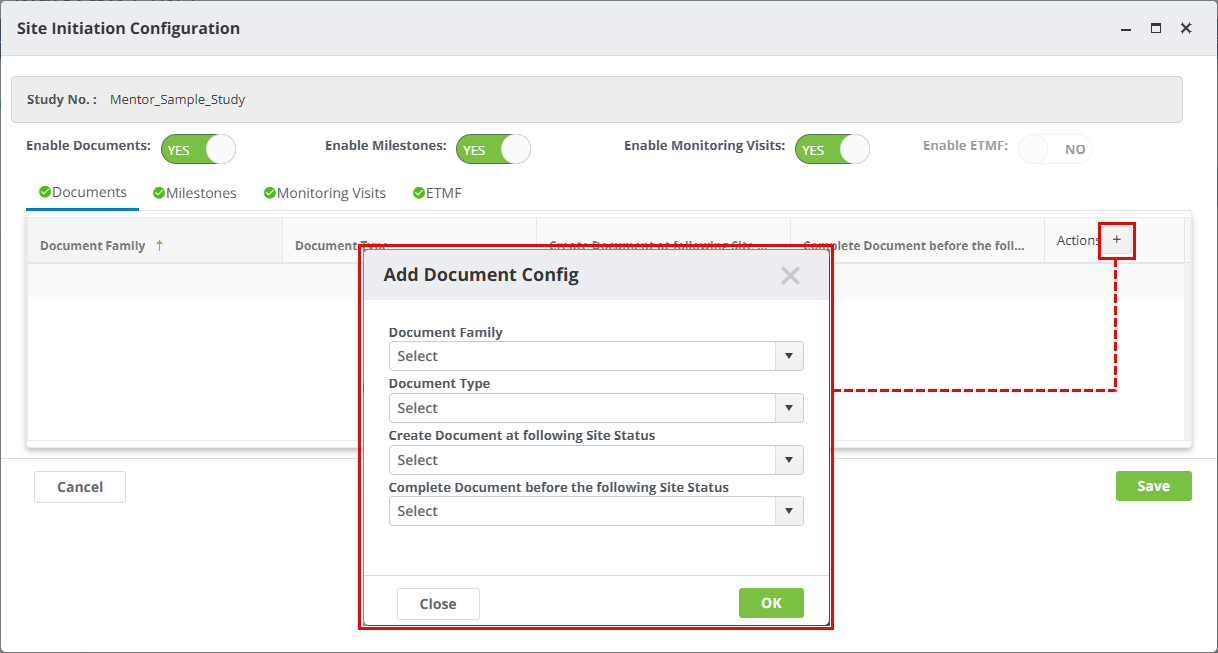
Edit a Record via Actions Column Button
Follow the steps below to Edit or Update a Record.
- Follow the first four (4) steps in the “Add” section above.
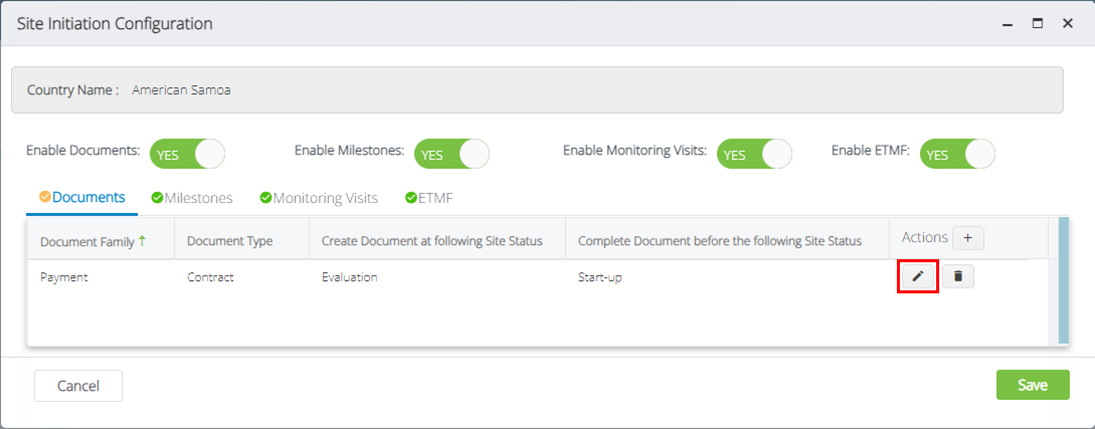
- Click the edit button (pencil) in the applicable row and the dialog box displays.
- Make changes as required.
- Click the OK button to continue.
- Click the Save button to complete the process. An onscreen message displays the result.
Delete a Record via Actions Column Button
Follow the steps below to Delete a Record.
- Follow the first four (4) steps in the “Add” section above.
- Click the delete button (trashcan) in the applicable row.
- A dialog box allows you to confirm the action.
- Click the Remove button (trash can) to continue.
- Click the Save button to complete the process. An onscreen message displays if you attempt to exit the screen without saving the changes.

