Vendor Management in Mentor Payments
To make payments in this system, information for each vendor must be entered and maintained in the system.
Each vendor record will include a name, address, and a payment method.
Most vendors will have bank account information, tax information and contact information.
Recommended Process for Vendor Entry
- The fastest and most accurate way to input vendor and site information is to upload data via ClinConnect.
- If you have limited time or only a few vendors need to be entered, vendors can be entered manually.
- After a vendor is entered, tax information and bank accounts may be added.
- As needed, vendors can be edited, linked, or replaced.
The Difference Between Vendors and Sites
- Many research sites are responsible for all of the research work and receive all of the payment.
- In this case, the same organization will be both the vendor and the site.
- In some cases, a site management organization (SMO) may negotiate on behalf of a group of sites and receive payment, even though the work is being done at a different location. In this case, the SMO will be the payee on the contract, but each individual location will be the site. In the case of an SMO, it is not uncommon to have a single vendor payee and dozens of sites.
- In other cases (especially in Europe and Asia), multiple parties may all contract directly with the sponsor and/or contract research organization (CRO). The institution, principal investigator, laboratory, and others may all have their own contract. In that case, each payable person or organization will need to be set up as a vendor, although just the institution will be set up as a site.
View Vendors
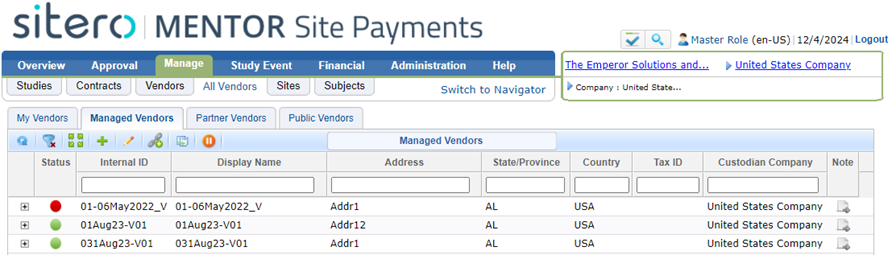
Site Payments (view) > Vendors > All Vendors
- For most organizations and users, the “My Vendors”, “Partner Vendors,” and “Public Vendors” tabs will not be used.
- Each vendor is specific to an organization and sub-company.
- If a vendor is setup under the incorrect sub-company, you will not be able to use that vendor in any other sub-company and will need to request that the vendor be moved to the correct sub-company.
- At this time, the system does not support using a single vendor in multiple organizations or sub-companies.
- Vendors are not specific to a study. The system supports using a single vendor record for multiple studies.
- Sites are study specific, and a site will have a site number for each study it participates in.
Import a Vendor
- Importing vendors is the fastest and most accurate way to get large numbers of vendors into the system.
- This system has an application programming interface (API) called ClinConnect that can be used to upload vendors.
- If your organization has an existing integration with ClinConnect, you can talk with your technical team to determine how to import vendors, sites, and principal investigators.
- If your organization does not have integration with the ClinConnect system, use the most recent version of the vendor and site template.
- Contact your project manager or the Support Center (Contact Sitero Support) to request the template.
- Upon completion, submit the template to the Support Center (support@Sitero.com) and request a manual upload of the information.
Manually Create a Vendor
- Vendors are required to be entered in the system before a site can be created and before a vendor can be designated as a payee in a contract.
- The recommended process is to import vendors, however, there may be times when you choose to enter a vendor manually.
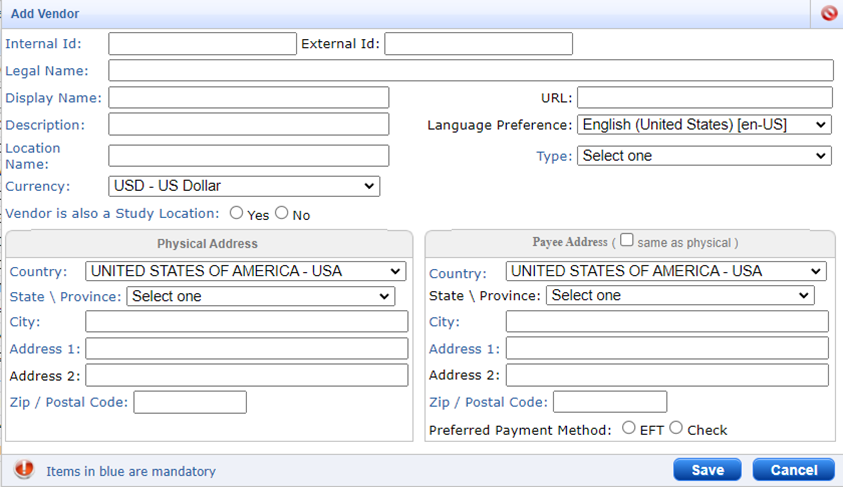
Internal ID: You will not be able to modify the Internal ID of the vendor once the Vendor has been created.
Legal Name: Name that displays on printed checks, sent to electronic payment partner.
Display Name: This is the name that the system displays for the vendor. It is not required to match the Vendor’s legal name.
Description and Location Name: Typically, the information is the same as the display name for the Vendor.
Currency: Not used at this time. Payment currency will be determined by the contract and the receiving bank account (if applicable).
- Vendors are required to be entered in the system before a site can be created and before a vendor can be designated as a payee in a contract.
- The recommended process is to import vendors, however, there may be times when you choose to enter a vendor manually.
- Follow the steps below to manually create a vendor.
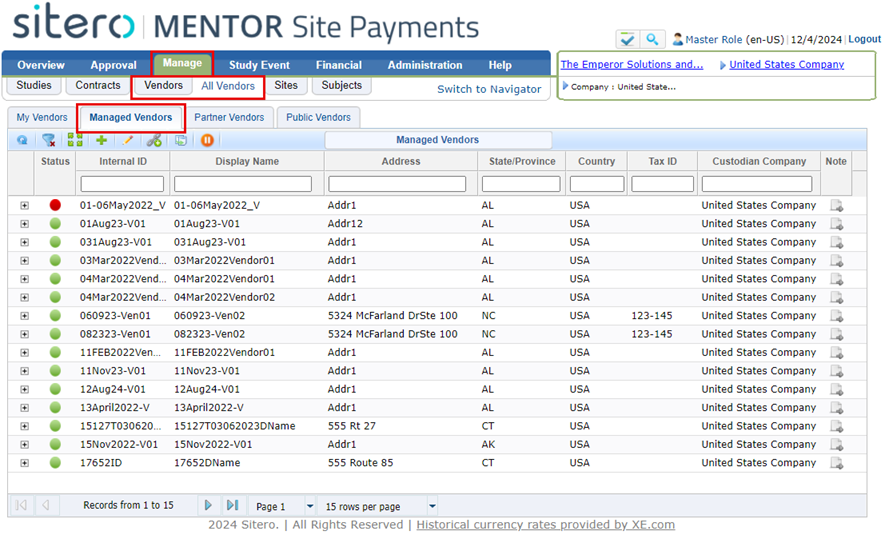
- Go to Manage > Vendors > All Vendors > Managed Vendors
- Click the Add Vendor button (green plus sign).
- The Add Vendor dialog box displays.
- Fill in required and optional fields on the form.
- Blue fields are required.
- Unless the sub-company is using an External Accounts Payable (EAP) system, the Preferred Payment Method radio button will determine how the vendor is paid.
- Click the Save button to complete the process.
- Vendor will display in the Managed Vendors screen (you may have to click the refresh button if the Vendor does not automatically display).