Search The Knowledge Base
Mark Data – Marking Buttons in Mentor EDC
Marking data is a way to designate that a form is in “a specific” status.
A permissioned user may Mark data and Unmark data using the Marking flags this system.
To review a video that shows this feature, click this link Marking Data in Mentor EDC to navigate to Absorb. In Absorb, log in (if prompted) and click the Enroll button in the applicable row to begin, then click Start to open the module.
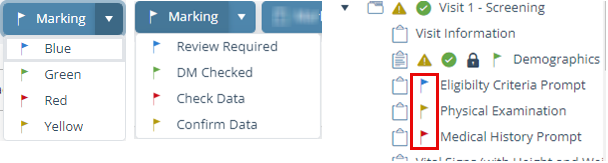
- There are four different marking options within the system, each with a default name (Mark [Blue], Mark [Green], Mark [Red], Mark [Yellow]) that may be customized with a descriptive name in the Study, scroll down for more information about customization.
- At study start, the Sponsor determines the groups to which “Marking” permission for their organization is added.
- Each group/department has an assigned color (blue, green, red, or yellow).
- The group then Marks a form with their color to show that their department acted on the form.
- Marking does not signify that the data is “verified.”
- The name of the Mark Data “flags” may be customized for the environment.
- The customized name displays on relevant screens and in menus and buttons within the system (e.g., status summary, exports, audit trail, data listings, journal, status menu, tool tips, etc.).
- The Permission name retains the default button name.
- You must have “Marking” permission in this system to Mark or Unmark a form.
- In this system, the custom Marking labels display in many locations e.g., screens, menus, and buttons.
- Remember: After a form is “marked” and then saved with a data change (added, modified, or deleted data from a field) the marking drops which indicates the form needs to be re-reviewed/marked.
Mark a Form or Folder
- To Mark a form (or all forms in a folder), select that form or folder in the navigation tree, click to open the Marking menu and click on a Mark [Color] option.
- You must have “Marking” permission in order to Mark a form.
- A Marking flag (in the selected color) displays on the navigation tree next to the form(s). You may Mark a completed form or a blank form.
- Remember: The Marking Label name may be customized in your environment.
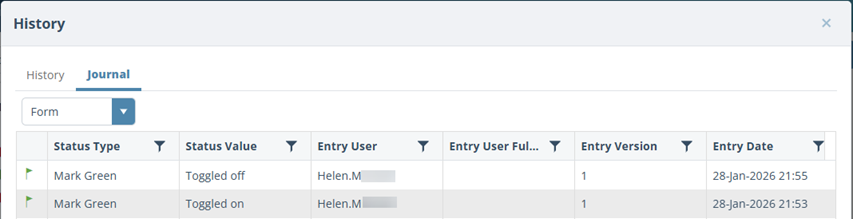
- In addition to the icon on the tree, you can see if a form is “marked” by looking at the Journal tab.
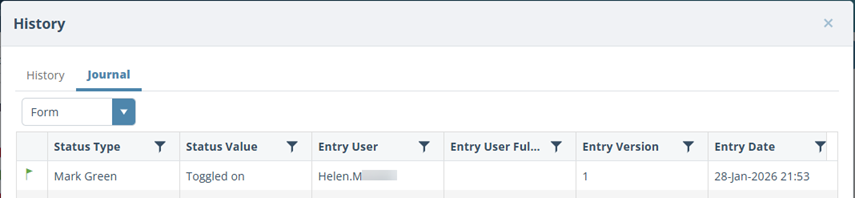
- Marking a form generates a record in the Journal tab specifying that the form is marked, who marked the form, and when they marked it.
- Remember: If the site updates any of the data on the form, then the form is no longer marked.
Unmark a Form or Folder
- To remove the Mark setting, select that form or folder in the navigation tree and click to select the same Mark [Color] option.
- This action removes the Marking flag from the navigation tree AND creates a new record in the Journal tab specifying the removal of the Mark.
- Remember: If the site updates any of the data on the form, then the form is no longer marked.